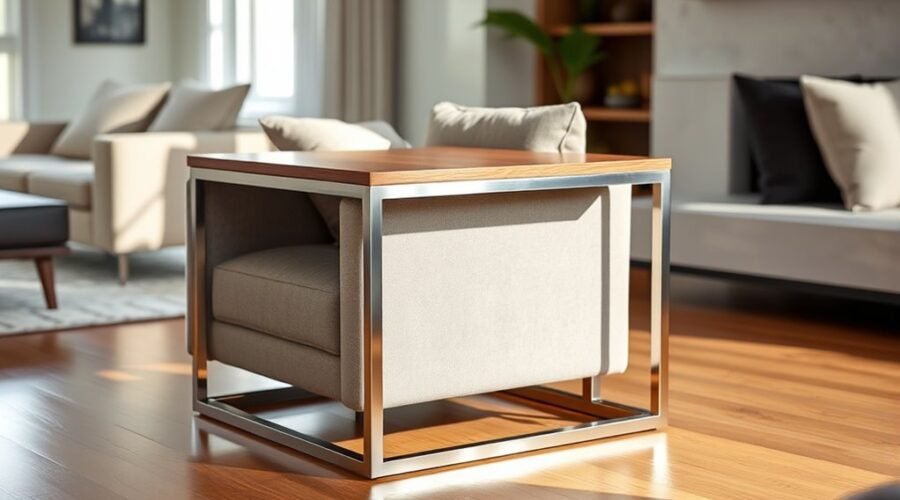
A C table is a compact side table with an open C-shaped profile that lets the base slide under a sofa or chair while the tabletop reaches over or beside the seat. That makes it useful for drinks, books, snacks, or a laptop without taking up the footprint of a conventional end table. The best C table is not defined by one standard size; it needs to fit the clearance, height, and proportions of your actual seating.
Quick Answer
A C table is an open-sided accent table designed so its base can slide beneath a sofa or chair while the top sits close to the user. Choose or build one by measuring the furniture’s floor clearance, the height the tabletop must clear, the available overhang, and the space around the seat.
Key Takeaways
Key Takeaways
- A C table uses an open base and offset top so it can tuck partly under a sofa or chair.
- There is no universal ideal C-table height, width, or depth; measure the specific furniture first.
- For a DIY version, the most important factors are clearance, squareness, joint strength, and resistance to tipping or wobbling.
- Solid wood, plywood, metal, and mixed materials can all work, but the material and joinery must match the intended load.
- Cutting, drilling, sanding, and oil finishing require appropriate tool, dust, eye, and fire-safety precautions.
What Is a C Table?
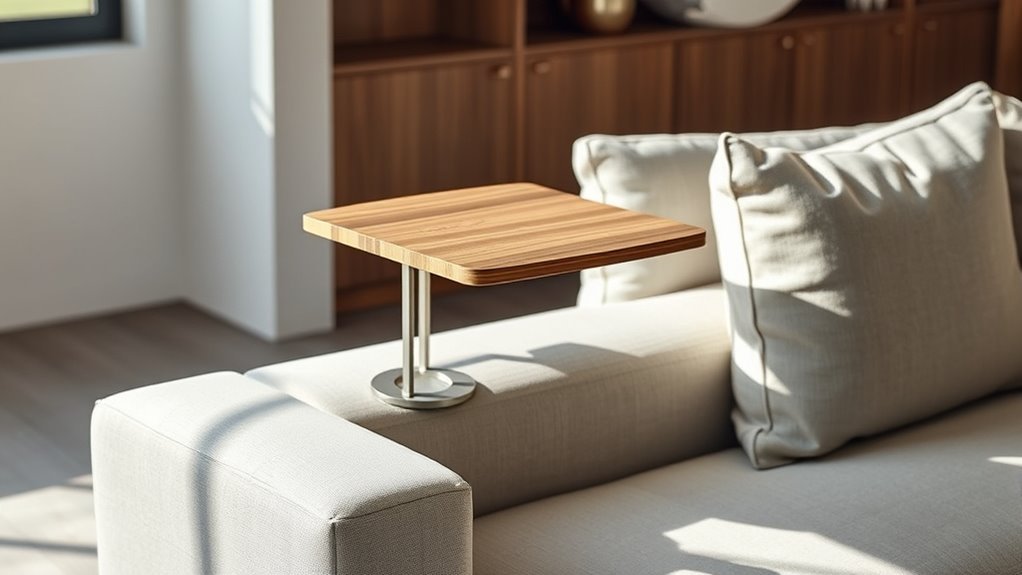
A C table is a compact side table shaped so the base, vertical support, and tabletop form an open C-like profile. The open side allows the lower section to slide beneath suitable seating while the upper surface extends closer to you.
You can use one for a drink, snack, remote, book, tablet, or laptop. Some models are easy to move, but weight varies considerably with the construction material. A slim steel table can feel very different from a heavy solid-wood, stone, or concrete version.
C tables are available in wood, steel, aluminum, glass, stone, engineered wood, and mixed-material designs. Some include drawers, shelves, adjustable-height mechanisms, casters, or other features, while minimalist models may consist of nothing more than a base, support, and top.
A wood C table can add warmth to a room and can also make a practical DIY project because the basic shape is simple. The challenge is not the silhouette itself; it is getting the dimensions, joints, and balance right so the table fits the seating without rocking or tipping.
How to Size a C Table for Your Space
Do not start with a generic “ideal” height. Current commercial C tables vary substantially in their proportions. For example, Room & Board lists Slim C-table versions at different heights, while Pottery Barn’s Allen C-table is 28 inches high. Your sofa or chair should determine the fit.
| Measurement | How to Size It | Why It Matters |
|---|---|---|
| Overall height | Measure the highest cushion, seat edge, or arm the top needs to clear, then allow a small amount of working clearance. | Prevents the tabletop from rubbing or becoming unusably high. |
| Base thickness | Keep it thinner than the clear space between the floor and the underside of the sofa or chair. | Determines whether the base can actually slide underneath. |
| Base depth | Measure how far the base can travel before it hits sofa feet, rails, mechanisms, or other obstructions. | Controls how close the tabletop can reach. |
| Top width and depth | Size the top for what you plan to place on it without creating excessive unsupported overhang. | Balances usable surface area with stability. |
Measure the sofa or chair with the cushions in their normal position. If the table will pass over a cushion rather than an armrest, measure that actual cushion height. Also measure the floor gap beneath the furniture at the exact point where you intend to insert the base.
Next, check for hidden obstacles. Sofa legs, reclining mechanisms, cross rails, storage frames, and uneven floor trim can stop a base that appears to fit from the front.
Pro Tip: Make a quick full-size cardboard profile of the side view before cutting expensive wood. Slide the mock-up into position to confirm the base depth, tabletop height, overhang, and clearance around the sofa.
Finally, make sure the table does not block a normal walking path. A C table saves floor space only when its top and base remain within a practical footprint for the room.
Best Materials for a DIY C Table
For a DIY wooden C table, your material choice affects stiffness, weight, appearance, dent resistance, joinery, and finishing. Hardwood such as oak, maple, or walnut can make an attractive long-lasting table, while plywood can provide good dimensional stability with less weight and cost in some builds.
If you want boards that are already flat, straight, and consistently dimensioned, S4S lumber can reduce preparation work. Rough lumber can also work well if you have the tools and experience to mill it accurately.
For many compact furniture projects, stock around 3/4 to 1 inch thick is a practical starting point, but thickness alone does not establish a safe load rating. The wood species, grain direction, joint design, tabletop overhang, and dimensions all influence strength.
Wood Selection Options
Choose the wood according to the look, tools, budget, and expected use of the table.
- Walnut offers a dark, distinctive grain and works well for refined indoor furniture.
- Oak and maple are commonly chosen when hardness and everyday durability are priorities.
- Pine is lighter and easier to work but dents more readily than many common hardwoods.
- Furniture-grade plywood can create a stable, efficient build when the exposed edges are finished appropriately.
- For outdoor use, the entire design—including wood, adhesive, fasteners, and finish—must be suitable for exterior exposure.
Avoid assuming that the hardwood/softwood label by itself tells you how strong the finished table will be. Species, board quality, moisture, dimensions, joinery, and grain orientation all matter.
Durable Finish Choices
A protective finish helps a wooden C table resist stains, handling, and routine spills. Suitable choices can include hardwax oil, wiping varnish, polyurethane, lacquer, or another furniture finish compatible with the wood and your application method.
If you use Rubio Monocoat Oil Plus 2C, follow the manufacturer’s current instructions rather than treating all oils the same. Rubio currently recommends a uniformly sanded raw-wood surface in roughly the 100–150-grit range, thorough dust removal, careful mixing of the two components, thin application, and complete removal of excess product. See the Rubio Monocoat furniture application instructions.
Do not assume every two-part finish automatically lasts longer than every one-part oil. Durability depends on the specific product, preparation, application, use, and maintenance.
Warning: Oil-soaked rags and applicator pads can present a combustion hazard. Follow the finish manufacturer’s disposal instructions immediately after use. Rubio Monocoat specifically warns that oil-saturated materials are combustible and recommends controlled disposal rather than leaving used rags piled on a bench or in ordinary trash.
Tools and Safety for a DIY C Table
A basic wooden C table can be made with a tape measure, pencil, square, suitable saw, drill, drill bits, doweling jig or other chosen joinery system, clamps, sanding equipment, wood glue, and the selected finish. A router is optional if you want rounded edges, cup recesses, or decorative details.
Woodworking machinery can cause severe injury if it is used incorrectly or without functioning guards. OSHA’s woodworking guidance covers common machine, cutting, and flying-particle hazards. Use each tool only as its manufacturer directs, secure the workpiece properly, keep guards in place, and wear appropriate eye protection. Hearing protection may also be appropriate for noisy operations.
Cutting and sanding also create airborne wood dust. OSHA notes that wood dust exposure can affect the eyes, skin, and respiratory system. Use effective dust collection or ventilation and appropriate respiratory protection when the task and exposure call for it. See OSHA’s Wood Dust overview.
How to Build a DIY C Table
Build the table around the measurements of the sofa or chair rather than forcing the furniture to match a predetermined plan. A simple wooden version can use three principal parts: a tabletop, one vertical support, and a base.
At a Glance
| Time Required | Several hours of active work, plus the full glue and finish cure times specified by the products you use. |
| Difficulty | Beginner to intermediate, depending on the joinery and tools. |
| Tools Needed | Tape measure, square, pencil, suitable saw, drill, joinery jig or system, clamps, sanding tools, dust control, and appropriate PPE. |
| Cost | Varies with local lumber prices, wood species, joinery supplies, and finish choice. |
Start by measuring the furniture and drawing the C-table profile to scale. Confirm the overall height, the floor clearance available for the base, the maximum usable base depth, and the tabletop area you actually need.
Cut the tabletop, vertical support, and base squarely. If you are starting with rough 5/4 walnut or another rough board, mill it to a consistent final thickness before laying out the joints. If you use pre-dimensioned stock, verify that it is flat and straight before cutting.
Any routed cup holder, cable opening, edge profile, or decorative recess should normally be cut before final finishing. Test the operation on scrap first when a router setup is unfamiliar.
- Measure the sofa or chair and sketch the full C-shaped side profile.
- Cut the top, vertical support, and base accurately and squarely.
- Mark the joinery locations on both mating parts from the same reference faces.
- Drill or cut the chosen joints with an appropriate jig, guide, or machine setup.
- Dry-fit the complete table and check clearance, squareness, and rocking.
- Glue and clamp the joints according to the adhesive manufacturer’s directions.
- Allow the glue to cure before applying significant stress to the joints.
- Sand the table evenly, ease sharp edges, remove dust, and apply the selected finish.
- Allow the finish to cure fully before putting the table into regular service.
Do not assign a numerical weight capacity to a one-off DIY table unless that exact design has been appropriately engineered or tested. A table that feels rigid under a light object is not automatically safe for a person to sit or stand on.
How to Join and Assemble the Parts
Wood dowels can create concealed joints between the tabletop, vertical support, and base. A doweling jig makes it easier to keep mating holes aligned, but the correct dowel diameter, drilling depth, spacing, and glue procedure depend on the stock thickness and the jig you use.
Mark reference faces first so you do not accidentally measure one side from the front and its mating side from the back. Set a drill-bit stop collar or another reliable depth control so you do not drill through the visible surface.
Drill the matching holes, then dry-fit the tabletop, vertical support, and base without glue. Set the table on a known flat surface and use a square to check the two main 90-degree joints. The tabletop and base should not twist away from each other.
Once the dry fit is correct, separate the parts, apply an appropriate amount of wood glue to the joint and dowels, assemble the table, and clamp it without forcing the frame out of square. Recheck the alignment before the glue begins to set.
Note: A wider tabletop or deeper overhang increases leverage on the vertical joint. If your design is unusually large, thin, or heavily loaded, use a joinery and structural design appropriate for that load rather than assuming dowels alone will make any proportion stable.
After the adhesive has cured according to its instructions, place the table on a flat floor and push gently from several directions. Correct noticeable rocking, loose joints, or excessive flex before finishing or normal use.
How to Sand and Finish a C Table
Sand after the glue has cured and remove any hardened squeeze-out before it interferes with the finish. Start with the least-aggressive grit needed to remove milling marks, glue residue, or surface defects, then move through progressively finer abrasives.
Ease sharp corners and edges so they are more comfortable to touch and less prone to chipping. Keep the rounding consistent from the tabletop to the base.
Your final sanding grit should match the finish manufacturer’s directions. If you are using Rubio Monocoat Oil Plus 2C, the company’s current furniture guidance recommends a uniformly sanded surface in roughly the 100–150-grit range rather than polishing the wood to an extremely fine grit before application.
Sanding Surface Smooth
If the wood is rough enough to require it, an 80-grit abrasive can remove significant milling marks. Follow with intermediate grits rather than jumping directly to a very fine abrasive. For a table that is already well prepared, you may be able to begin finer.
- Use only as coarse a starting grit as the surface actually needs.
- Move progressively through finer abrasives so deep scratches are removed.
- Keep the sander moving and avoid concentrating pressure on one spot.
- Sand visible hand-worked areas with the grain when appropriate.
- Vacuum the table and surrounding work area thoroughly before finishing.
Inspect the tabletop under angled light. Swirl marks, cross-grain scratches, glue smears, and dents become much more obvious after many finishes are applied, so correct them before moving on.
Applying Protective Finish
The exact application method depends on the finish. Read the current technical instructions for the product you choose instead of applying generic “oil” directions to every coating.
For Rubio Monocoat Oil Plus 2C, the manufacturer currently instructs users to prepare the raw wood uniformly, remove dust thoroughly, mix Part A and Part B at approximately a 3:1 ratio, work in manageable sections, allow the product to react with the wood, and remove all excess within the specified working period. Under favorable conditions, the manufacturer states that the surface can be lightly handled after roughly 24–36 hours and reaches full cure in about five days.
| Step | Why It Matters |
|---|---|
| Follow the finish-specific final grit | Surface preparation affects appearance, absorption, and protection. |
| Remove sanding and glue residue | Dust and dried glue can cause visible defects or uneven absorption. |
| Mix two-part products accurately | The coating is designed around the manufacturer’s specified component ratio. |
| Remove excess when required | Hardwax-oil systems such as Oil Plus 2C should not be left with heavy unabsorbed residue. |
| Allow the full cure period | Premature use can mark or contaminate a finish before it reaches normal service condition. |
Common C Table Build Mistakes
One of the easiest mistakes is designing from a generic online dimension instead of measuring the actual sofa. A base that is only slightly too thick may not slide under the frame, while an otherwise attractive tabletop may sit too low to clear a cushion.
Another common problem is making the tabletop much larger than the base. Extra overhang increases leverage on the vertical support and can make the table easier to tip. Keep the proportions conservative unless the structure has been designed to handle the additional moment.
Misaligned dowel holes can also twist the frame. Always work from consistent reference faces, use a depth stop, and dry-fit before adding glue.
Finally, do not finish the individual pieces too early if you still need to rout, drill, glue, or correct a joint. Complete machining and test assembly first unless your specific construction method requires a different sequence.
Frequently Asked Questions
What Are C Tables Typically Used For?
C tables are commonly used beside sofas and chairs for drinks, snacks, books, remotes, tablets, and laptops. Their open-sided design lets the surface sit closer to the user than many conventional end tables, which can be especially useful in compact rooms.
What Is the 4-Inch Rule for Seating?
The commonly cited 4-inch seating rule is a decorating guideline that suggests keeping the seat heights of grouped sofas and chairs within roughly four inches of one another for visual and conversational balance. It is not a rule requiring a C table to sit four inches from the seat. Measure the actual furniture clearances when sizing a C table.
What Is a C Table?
A C table is a compact side table with an open C-shaped profile. Its base can slide beneath compatible seating while the top extends over or beside the cushion, keeping frequently used items close without requiring a large end-table footprint.
What Are the Different Styles of C Tables?
Styles include slim welded-metal frames, solid-wood versions, mixed wood-and-metal designs, stone or glass tops, adjustable-height models, and C tables with shelves or drawers. The best style depends on the room, required clearance, intended load, and how often you plan to move the table.
Should a C Table Be Higher Than the Sofa Arm?
Only if the tabletop needs to pass over that arm. Some C tables slide over a seat cushion instead, while others remain beside the sofa. Measure the exact obstacle the tabletop must clear and choose the lowest comfortable height that gives reliable clearance.
How Much Weight Can a DIY C Table Hold?
There is no universal load rating for a DIY C table. Capacity depends on the material, dimensions, grain direction, joints, adhesive, base geometry, and workmanship. Unless the exact design has been engineered or load-tested, use it as a light-duty furniture surface and never assume it is safe to sit or stand on.
Conclusion
A C table gives you a useful surface close to a sofa or chair while using very little extra floor space. The key is to treat its C shape as a functional structure, not just a style. Measure the actual seating, keep the base and tabletop proportions stable, build square joints, sand and finish according to the products you use, and test the completed table before relying on it for everyday items.
Sources
- Room & Board — Slim C-Tables — examples of current C-table dimensions, materials, construction, and use.
- Pottery Barn — Allen C-Table — additional current dimensions and clearance specifications showing that C-table proportions vary by design.
- Rubio Monocoat USA — How to Apply Oil Plus 2C to Furniture — preparation, mixing, application, curing, and oily-rag safety guidance.
- Occupational Safety and Health Administration — Woodworking eTool — woodworking machinery, guarding, and general shop hazards.
- Occupational Safety and Health Administration — Wood Dust — health effects and exposure-control information for airborne wood dust.