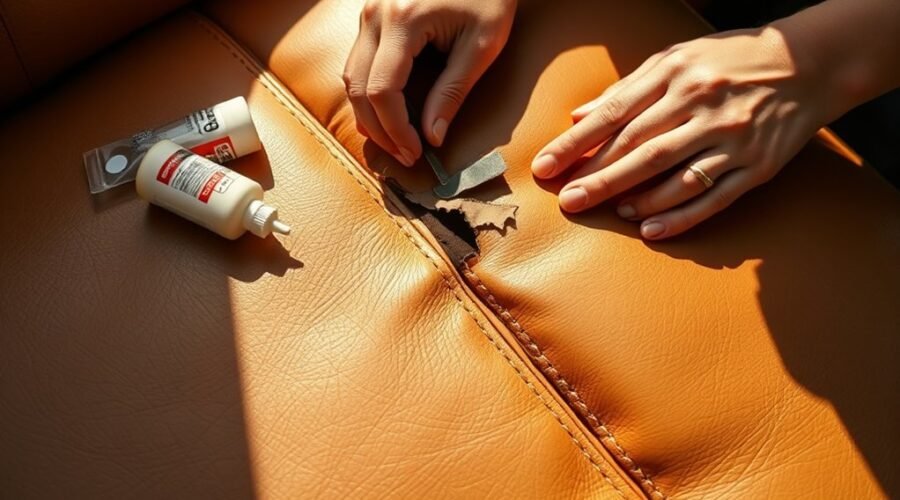
A leather upholstery tear can often be repaired at home when the surrounding material is still sound and the damage is small to moderate. The right method depends on whether the leather itself is torn or a stitched seam has opened, what type of leather or coated material you have, and whether any material is missing. Most repairs involve cleaning and drying the area, stabilizing the tear with flexible adhesive or a backing patch, filling any remaining gap, matching the color and grain, and allowing the repair to cure before the seat or sofa is used again.
Quick Answer
To repair a tear in leather upholstery, first identify the leather type and decide whether the damage is a split seam or torn material. Clean and dry the area, use a flexible leather adhesive for small tears, add a sub-patch for larger rips, then fill, color-match, finish, and allow the repair to cure fully.
Key Takeaways
- Identify the upholstery material before choosing cleaner, filler, dye, or colorant; products suitable for pigmented leather may not be suitable for suede, nubuck, or other absorbent finishes.
- A broken factory seam is normally stitched; a tear through the leather panel is usually repaired with adhesive, a sub-patch, filler, and color.
- Large or stressed tears need a backing patch beneath the leather so the repair is not relying on filler alone.
- Drying and full-curing times vary by product. Follow the manufacturer’s instructions before sitting on or flexing the repaired upholstery.
- Colorant may need a separate finish or topcoat unless the repair system specifically uses a self-sealing color product.
At a Glance
| Time Required | About 1–2 hours of hands-on work for a typical small repair, plus drying and curing time specified by the product manufacturer |
| Difficulty | Beginner to intermediate; color matching and high-stress tears are harder |
| Tools Needed | Leather cleaner or prep product, flexible leather adhesive, sub-patch, filler, tweezers, scissors, palette knife, colorant or dye, and the finish required by the chosen repair system |
| Typical DIY Cost | Roughly $20–$80 for many current DIY repair systems, with custom color matching or larger quantities costing more |
Warning: Read the cleaner, adhesive, prep solution, dye, colorant, and finish labels before starting. Some products contain solvents or flammable ingredients. Work with good ventilation, keep products away from flames and other ignition sources, and use the gloves, eye protection, or other PPE specified by the product label or safety data sheet.
Identify the Leather Tear First
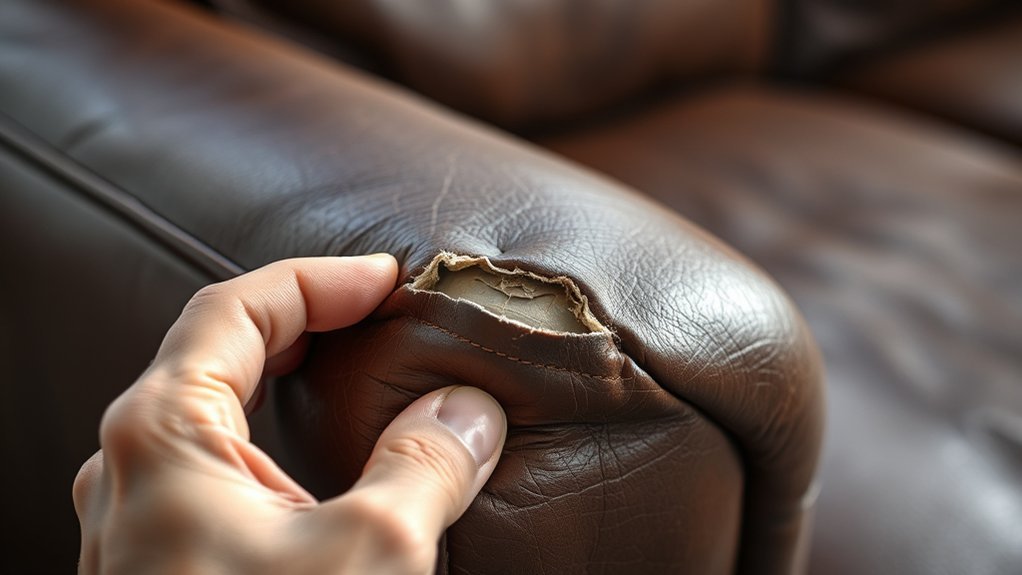
Before any repair begins, inspect the damaged area to determine its size, depth, location, and cause. These details determine whether a simple adhesive repair is enough or whether the upholstery needs a backing patch, filler, sewing, or professional attention.
Measure the length and width of the damage and inspect the leather around it. If the material surrounding the tear is brittle, stretched, flaking, delaminating, or badly cracked, repairing only the visible split may not last.
Is It a Torn Panel or a Broken Seam?
This distinction matters. If the thread along an original upholstery seam has broken while the leather on both sides is intact, the repair is primarily a sewing job. A curved upholstery needle and strong upholstery thread can often be used to restitch the original seam. Sailrite demonstrates this approach for broken leather upholstery seams.
If the leather itself has ripped away from the seam holes or has split across the middle of a panel, simply pulling the edges together with new stitches can create additional holes and stress. Those repairs normally need reinforcement beneath the damaged material.
Identify the Leather or Upholstery Type
Do not rely only on the label “genuine leather.” Upholstery may be pigmented or protected leather, semi-aniline leather, full-aniline leather, suede, nubuck, bicast leather, bonded leather, or synthetic leather/vinyl. Cleaner, filler, dye, colorant, and finish compatibility can differ substantially.
Check the furniture label and the repair-product instructions. For example, some restoration systems specifically exclude suede and nubuck because matching their brushed surface is difficult. Test cleaners and color products first on a hidden area whenever the manufacturer recommends it.
Note: Bonded leather and polyurethane-coated upholstery can peel or delaminate rather than form a clean tear. When the coating is failing over a broad area, a small filler repair may only address the visible spot and not the underlying deterioration.
Take clear photographs before beginning. They provide a useful reference for the original grain, sheen, color, seam alignment, and size of the damage.
Gather Leather Repair Kit Supplies
Assemble everything before beginning so adhesive or filler does not start drying while you search for another tool. A typical repair may require:
- A cleaner or preparation product approved for the upholstery type
- Flexible leather adhesive
- Leather repair filler or compound
- Canvas or other manufacturer-approved sub-patch material
- Sharp scissors
- Tweezers
- A palette knife, spatula, or small applicator
- Fine abrasive supplied or recommended by the repair system
- Matching leather colorant, coating, or dye
- A grain pad or texturing material when needed
- The finish or topcoat specified by the coloring system
- Clean lint-free cloths
- Appropriate gloves and other PPE required by the product label
A complete repair kit can be easier than assembling unrelated products because its adhesive, filler, color, and finish are designed to work as one system. Furniture Clinic’s published leather tear repair process, for example, uses a sub-patch, leather glue, filler, colorant, and finish as separate stages.
Pro Tip: Use products from one compatible repair system whenever possible. Mixing an unknown adhesive, filler, colorant, and topcoat from different systems can create adhesion or flexibility problems that are difficult to diagnose later.
Clean and Prep the Torn Leather
Use a cleaner or preparation product approved for the upholstery material to remove dirt, body oils, wax, silicone, and other contamination around the repair. Apply it exactly as directed rather than saturating the leather.
After cleaning, let the area dry completely. Adhesive performs best on a clean, dry surface. Furniture Clinic likewise specifies that surfaces being glued should be free from dirt, grease, and grime before bonding.
Trim only fibers or fragments that are clearly loose and cannot be laid back into place. Do not aggressively enlarge the tear merely to create straight edges. Original material is valuable for preserving the shape and appearance of the repaired panel.
- Wipe rather than scrub unless the product instructions specifically require stronger preparation.
- Remove contamination from the underside of accessible tear edges.
- Trim only loose or unusable fibers.
- Let the repair area dry fully.
- Check for adjacent cracking, weak leather, or failing seams.
If the upholstery is badly weakened around the tear, stop before adding filler. Filler cannot compensate for a large area of deteriorated material.
Fix Small Tears With Adhesive and Filler
A small, clean tear whose edges still meet without significant tension may be repairable with flexible leather adhesive followed by a small amount of filler or repair compound. If the edges separate under normal cushion movement, add reinforcement instead of relying on a surface bond alone.
Clean Tear Edges
Inspect the tear line one final time and remove any remaining dirt or loose fibers. The underside of the tear edges is especially important because that is where adhesive may need to bond.
- Remove residue along the tear.
- Trim only fibers that prevent the edges from lying naturally.
- Confirm that both sides can meet without excessive pulling.
- Keep the repair zone clean and dry.
Do not repeatedly clean a prepared surface with household detergent, furniture polish, or oily conditioner immediately before bonding. Residue can interfere with adhesion.
Apply Adhesive And Filler
Apply a thin, controlled amount of flexible leather adhesive according to the product instructions. Align the edges at their natural height and hold or press them as directed while the adhesive sets.
If a shallow gap remains after the bond is stable, apply leather filler or repair compound in thin layers rather than one thick layer. Smooth each layer close to the surrounding surface. Manufacturer repair guides commonly use several thin applications so the material can dry evenly and remain easier to level.
Drying times vary. Do not assume that a repair that feels dry on the surface has reached full strength. Follow the label for the time required before sanding, coloring, flexing, or using the furniture.
Once the filler has dried enough for the next step, level only the repair material using the abrasive and technique recommended by the repair system. Excessive sanding can damage the leather finish surrounding the tear.
Repair Larger Rips With a Backing Patch
A larger rip, open gap, or tear exposed to repeated stretching generally needs a backing patch beneath the leather. Furniture Clinic and Leather Magic both describe using a fabric or canvas sub-patch to support damage from underneath.
Cut the patch larger than the damaged opening so it overlaps sound material around the tear. Leather Magic’s current instructions specify placing the sub-patch flat beneath the leather and centering it evenly around the damage. Do not use a universal “shiny side up” rule; follow the orientation specified for the actual patch supplied with your repair system.
- Trim the sub-patch to provide overlap beyond the tear.
- Insert it through the opening with tweezers.
- Flatten and center it beneath the leather with no folded or curled edges.
- Apply the recommended adhesive between the underside of the leather and the patch.
- Press the leather onto the patch and allow the adhesive to set as directed.
- Fill any remaining surface gap in thin layers.
- Recreate the surface grain if the kit provides a grain pad or texturing material.
Furniture Clinic’s tear-repair instructions likewise place canvas beneath the damage, glue the leather to it, then build filler in thin layers before color is applied.
Note: If material is missing from a large hole, a basic filler-only repair may create a thick or weak patch. Some systems use an additional leather insert or other reinforcement. Follow the kit instructions rather than trying to bridge a large missing section with filler alone.
Let the Repair Cure Before Using the Furniture
“Dry” and “fully cured” are not the same thing. A product may be dry enough for the next repair step but still need many more hours before it can handle repeated flexing or body weight.
For example, Furniture Clinic states that its polyurethane leather glue takes about 20 minutes to dry naturally under typical conditions but advises leaving the repair unused for 24 hours while the bond continues to cure. Other adhesives and repair compounds have different schedules.
Do not sit on, stretch, fold, or aggressively clean the repaired section until the manufacturer’s return-to-use time has passed.
Blend the Repair to Match the Color
Once the structural repair is stable, color and sheen can be restored. Test the color in an inconspicuous location first when possible. Exact matching can be difficult because upholstery may have faded unevenly or use a multi-tone finish.
| Step | Action |
| 1 | Test the color and product compatibility on hidden leather |
| 2 | Apply thin, even color coats |
| 3 | Allow each coat to dry as directed |
| 4 | Blend the color slightly beyond the repaired spot when the system calls for it |
| 5 | Apply the required finish or topcoat, unless the color product is specifically self-sealing |
On pigmented or coated upholstery, the color product is often better described as a surface colorant or coating rather than a penetrating dye. Absorbent aniline, suede, and nubuck materials may use different coloring systems, which is another reason to identify the upholstery before starting.
Furniture Clinic’s standard tear-repair method uses multiple thin coats of colorant followed by leather finish. Other systems use self-sealing color products. Follow the system you purchased instead of automatically substituting conditioner for the final finish.
After the repair has fully cured, use only care products approved for that leather type.
Troubleshoot Common Leather Tear Repair Problems
The Repair Edges Lift
Lifting usually points to contamination, insufficient adhesive contact, movement before curing, or a repair area that is under too much tension. Remove loose repair material only as directed by the product manufacturer, prepare the area again, and make sure the underlying leather is structurally sound.
The Filler Cracks
Cracking can occur when filler is applied too thickly, placed over flexible damage without enough support, or flexed before curing. A tear that opens and closes during use may need a sub-patch beneath it before filler is reapplied.
The Color Looks Like a Patch
A hard color boundary can make the repair obvious. Use thin coats, check the shade after drying, and follow the coloring system’s blending instructions. Matching sheen is as important as matching color.
The Repaired Area Feels Hard
Too much filler, adhesive, colorant, or finish can create a stiff spot. Thin applications generally produce a more flexible result. Do not try to soften an uncured repair by immediately applying oil or conditioner unless the product manufacturer specifically instructs you to do so.
Know When a Professional Repair Is Safer
DIY repair is most suitable for localized cosmetic or moderate structural damage. Consider professional upholstery or leather repair when:
- The tear runs through a heavily loaded seat edge or reclining mechanism area.
- The leather is brittle or cracking several inches around the damage.
- A large section of material is missing.
- The upholstery has complicated two-tone, antique, suede, or nubuck finishing.
- The leather has torn away from a structural seam rather than the thread simply breaking.
- Previous glue or filler has contaminated a large area.
- The item is valuable enough that a visible DIY repair would significantly reduce its appearance or value.
Keep Leather From Tearing Again
After the repair has fully cured, routine care can reduce avoidable wear. The exact cleaning and conditioning schedule should follow the furniture maker or leather-care product instructions rather than one universal timetable.
Regular Conditioning
Use only a conditioner or protection product approved for your leather type. Some leather-care systems recommend treatment every few months, but absorbent aniline leather, pigmented leather, suede, nubuck, and coated materials do not all use the same products.
Apply care products sparingly and exactly as directed. More product is not necessarily better, and excessive oils or incompatible conditioners can alter appearance or interfere with future repair coatings.
- Identify the leather finish first.
- Use compatible products only.
- Apply the amount specified by the manufacturer.
- Buff or wipe off excess when instructed.
- Keep care products away from a repair until its full cure time has passed.
Avoid Sharp Objects
Keep keys, tools, scissors, buckles, sharp toys, and similar objects away from leather upholstery. Ethan Allen’s furniture-care guidance likewise warns that keys, buckles, and toys can scratch or tear leather.
Pet claws, exposed hardware, damaged zippers, and sharp furniture edges can also start small punctures that grow under repeated use. In high-contact areas, a suitable throw or furniture cover can provide an extra barrier without altering the leather itself.
Shield From Sunlight
Strong sunlight and heat accelerate fading and drying. La-Z-Boy recommends avoiding direct sunlight and keeping leather furniture at least 12 inches from radiators and other strong heat sources.
Where practical:
- Position leather furniture away from intense direct sun.
- Use curtains or blinds during the brightest part of the day.
- Keep the furniture away from radiators, heaters, and other concentrated heat sources.
- Clean spills promptly using the method recommended for the leather type.
Frequently Asked Questions
What is the best leather tear repair kit for a sofa?
There is no single best kit for every sofa. Choose one that is approved for your upholstery type and includes the components required by the damage: flexible adhesive, a sub-patch for larger tears, repair filler, colorant or dye, and any required finish. Leather Magic and Furniture Clinic both sell multi-step repair systems, but the correct choice depends on the leather finish, tear size, color, and desired appearance.
Do leather repair kits actually work?
Yes, a suitable repair kit can improve small tears, cuts, scratches, and some larger rips when the surrounding upholstery is still strong. Results depend on surface preparation, product compatibility, reinforcement, color matching, and cure time. A kit cannot permanently solve widespread peeling, severely brittle leather, or major structural damage.
How do you sew a tear in a leather couch?
First determine whether an original seam has opened or the leather itself has torn. If the thread failed while the seam holes and leather remain intact, a curved upholstery needle and heavy upholstery thread can be used to restitch the seam, often with a hidden or ladder-style stitch. If the leather panel itself is ripped or the stitch holes have torn out, reinforce the material rather than simply sewing through weakened leather.
Can leather be repaired if it is ripped?
Often, yes. A small rip may be bonded and filled, while a larger opening usually needs a fabric or canvas sub-patch beneath the leather before filler and color are applied. The repair is less likely to last if the surrounding material is brittle, badly stretched, peeling, or missing over a large area.
How long should a leather repair cure before I sit on it?
Follow the adhesive, filler, color, and finish instructions for the exact products used. Surface drying may take only minutes, but full strength can take much longer. Some polyurethane leather adhesives, for example, should remain unused for about 24 hours even though they dry much sooner.
Can the same repair kit be used on suede or nubuck?
Not automatically. Suede and nubuck have a brushed surface that is difficult to reproduce with conventional filler and pigmented color coatings. Some repair manufacturers specifically exclude them from standard restoration kits. Confirm material compatibility before applying cleaner, adhesive, filler, dye, or finish.
Conclusion
A successful leather upholstery tear repair starts with diagnosing the damage correctly. A broken seam may need stitching, a small panel tear may need flexible adhesive, and a larger rip normally benefits from a properly positioned backing patch before filler and color are applied.
Leather type matters just as much as tear size. Use cleaners, adhesives, fillers, dyes or colorants, and finishes that are approved for the actual upholstery material, and follow each product’s drying and full-curing instructions. With careful preparation and realistic color matching, a repair can restore useful strength and make the damaged area substantially less noticeable without promising an invisible result.
Sources
- Furniture Clinic — How to Repair a Tear in Leather — backs the sub-patch, adhesive, layered filler, colorant, and finish workflow.
- Leather Magic — Semi-Aniline Leather Repair Kit Instructions — backs material preparation, flat and centered sub-patch placement, compatibility testing, and flammability precautions.
- Furniture Clinic — Leather Glue PU — backs clean-surface preparation and the distinction between initial drying and longer curing before use.
- La-Z-Boy — Fabric & Leather Care — backs guidance about sunlight, heat sources, cleaning, and general leather furniture care.
- CDC/NIOSH — Organic Solvent Neurotoxicity — backs ventilation and chemical-appropriate PPE precautions when working with solvent-containing products.
- Sailrite — How to Repair a Broken Seam in Leather Upholstery — backs hand-stitching guidance for an opened upholstery seam.