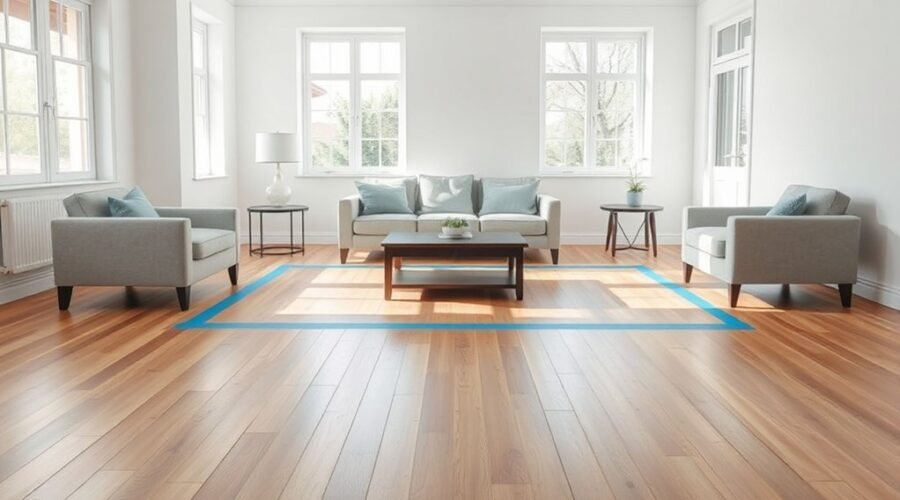
Mapping furniture placement with painter’s tape is a simple way to test a room before moving a sofa, table, bed, or cabinet. Measure the room and each piece, tape the real footprint on the floor, then walk the layout and test doors, drawers, recliners, sightlines, and traffic routes. Small changes are much easier to make while the furniture exists only as tape.
Quick Answer
Measure the room and every furniture piece, then use surface-compatible painter’s tape to mark each item’s full footprint on the floor. Include door swings, recliner extensions, drawers, chair pullback, and main walking paths. Walk through the taped layout and adjust it until everyday movement and sightlines feel comfortable.
Key Takeaways
Key Takeaways
- Measure the room first, including doors, door swings, windows, vents, built-ins, and other fixed obstacles.
- Measure each furniture piece at its largest usable size, including reclining sections, leaves, drawers, and sleeper mechanisms.
- Use painter’s tape that is approved for the actual floor surface, and test it in an inconspicuous area before taping the whole layout.
- Reserve generous space for important traffic routes; about 36 inches is a useful accessibility benchmark where the room allows it, but not every gap between furniture needs to be that wide.
- Tape sofas, tables, rugs, storage pieces, and TV-related sightlines so scale and function can be tested before buying or moving anything.
- Walk, sit, recline, open doors and drawers, and simulate normal daily routes before recording the final arrangement.
At a Glance
| Time Required | About 20–60 minutes for a typical room, depending on how many pieces are being tested |
| Difficulty | Easy |
| Tools Needed | Surface-compatible painter’s tape, tape measure, notebook or phone, and optionally graph paper |
| Cost | Low — usually only the cost of suitable painter’s tape if a tape measure is already available |
Gather Painter’s Tape and a Tape Measure
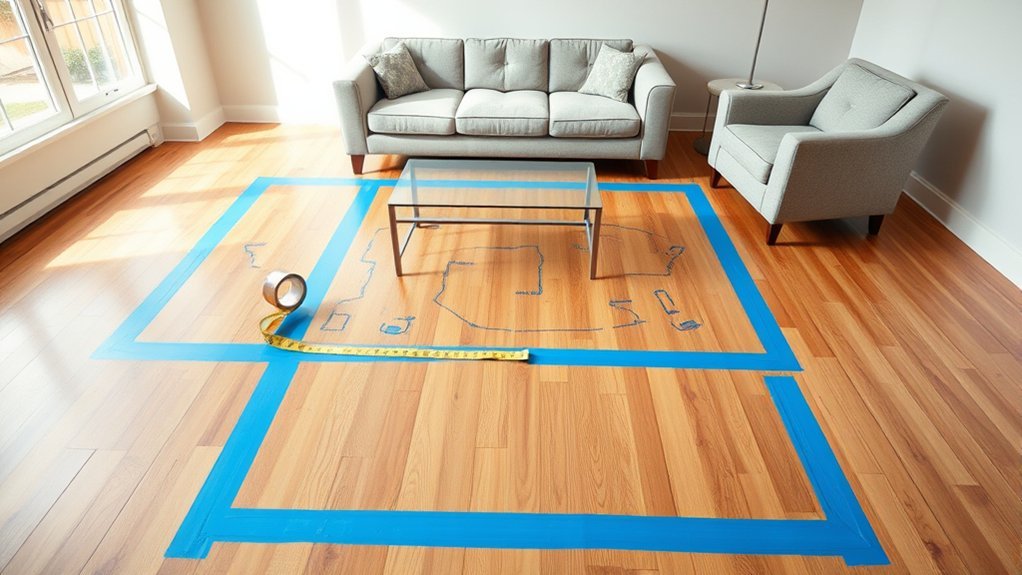
Start with a tape measure, a notebook or phone for recording dimensions, and painter’s tape that is suitable for the floor beneath it. Tape color does not determine whether an adhesive is safe. The product’s adhesive strength, surface recommendations, and the floor manufacturer’s care instructions matter more.
For finished wood or other delicate surfaces, a gentle-adhesive product may be a better choice. For example, 3M’s Scotch Delicate Surface Painter’s Tape 2080 is designed for several delicate interior surfaces, including wood floors. Other tapes can have different surface limitations.
Warning: Test the tape in an inconspicuous area before outlining the room, especially on freshly finished, waxed, oiled, aged, painted, or otherwise delicate flooring. Follow both the tape manufacturer’s instructions and the flooring manufacturer’s care guidance.
A tape measure provides the accuracy needed to translate furniture dimensions into floor markings. Measure the room first, including wall lengths, doorways, door swings, windows, radiators, vents, fireplaces, built-ins, outlets, and other fixed features that affect placement.
Before placing long strips, mark key corner measurements or write dimensions in a notebook. Press the tape flat enough to make the outline easy to read without stretching it or using unnecessary adhesive pressure.
The goal is not simply to prove that a piece fits. The taped plan should show whether the room still works when people walk, sit, open doors, use storage, and move through it normally.
Measure Each Furniture Piece First
Measure every furniture piece before the layout begins. For a sofa, record overall width, depth, and height, including arms and any part of the frame that extends beyond the cushions. Reclining sections, sleeper mechanisms, ottomans, and chaise sections should be measured in their fully operating positions as well.
For dining tables, include extension leaves when they will be used and allow room for chairs to pull out. For cabinets, dressers, or media consoles, measure the body of the piece and the extra area required for doors or drawers to open.
These measurements create two useful plans: the furniture footprint itself and the functional clearance around it.
Measure Sofa Dimensions
A well-proportioned sofa starts with accurate measurements. Record its overall length, deepest point, back height, arm width, and any moving sections so the taped outline represents the real piece rather than just the seat cushions.
- Armrests that widen the overall silhouette
- A back height that may affect windows or sightlines
- Seat and overall depth that determine how far the sofa projects into the room
- Corners, chaise sections, and angled arms that change the footprint
- Recliners, sleeper sections, or movable footrests that need extra operating space
- Scale in relation to nearby tables, chairs, doors, and walking routes
Record the measurements on paper or digitally so they can be checked again without repeatedly measuring the furniture.
Compare those dimensions with the room and adjoining pieces to prevent crowding. Before moving forward, double-check the available floor area and make sure the sofa can be delivered through the required doors, hallways, and turns.
Mark Furniture Footprints
Once the measurements are recorded, outline each major furniture piece directly on the floor. Start with the largest item, such as the sofa or bed, because it usually establishes the main seating or sleeping zone.
Use the tape to mark the actual outside edges of the piece. Then add short secondary tape marks where extra operating clearance is needed for a recliner, drawer, dining chair, or cabinet door.
For an important walking route, try to preserve a generous clear path. The U.S. Access Board specifies a 36-inch minimum clear width for accessible walking surfaces in covered settings. That does not make 36 inches a mandatory decorating rule for every private room, but it is a useful benchmark when planning a route that should accommodate easier movement.
After taping, walk through the room slowly. Check whether anyone has to turn sideways, step around table corners, squeeze between pieces, or make awkward turns.
Pro Tip: Mark moving parts with a second tape line. A recliner may fit perfectly when closed but block a walkway when extended, and a dresser may fit against a wall while its drawers collide with a bed.
Map Furniture Placement With Tape
Painter’s tape can quickly turn an empty room into a usable layout plan. A simple sequence keeps the process organized:
- Measure the room and fixed architectural features.
- Mark the largest furniture piece first.
- Add the remaining seating, tables, storage, and rugs.
- Mark operating clearances for moving furniture parts.
- Check main traffic paths and doorway access.
- Test TV or focal-point sightlines from the actual seating position.
- Walk the plan and revise any area that feels tight or inconvenient.
The taped plan provides immediate visual feedback without the effort of repeatedly moving heavy furniture. It is especially useful when comparing two or three arrangements before buying a large item.
- A sofa traced at its full outside dimensions
- A bed positioned with usable space around the sides that need access
- Chairs marked around a dining or conversation table
- A media wall checked from the seated viewing position
- Open floor space preserved between activity zones
Leave Room for Traffic Flow
Once the taped furniture outlines are down, evaluate how people will move through the room. The most important route may connect a doorway to a hallway, kitchen, patio door, staircase, or frequently used seat.
Where space allows, a clear path around 36 inches wide is a useful target for a main circulation route and aligns with the minimum continuous width used in U.S. accessibility guidance. Smaller spaces may require compromises, while households with mobility devices can require additional room, particularly at turns.
Inside a seating group, smaller gaps are normal. A coffee table, for example, is commonly placed about 14 to 18 inches from a sofa. Treat that as a practical starting range rather than a rigid rule; deeper sofas, mobility needs, reclining seats, table shape, and room size can justify a different gap.
| Zone | Useful Starting Point | What to Test |
|---|---|---|
| Main traffic path | About 36 in where practical | Walking, turns, mobility needs, door access |
| Sofa to coffee table | About 14–18 in | Legroom, reach, table shape, reclining movement |
| Moving furniture | Full operating clearance | Drawers, cabinet doors, recliners, sleeper sections |
Walk each route several times rather than judging it only by sight. A layout can look balanced from the doorway yet still create an irritating bottleneck in daily use.
Test Sofa, Table, and TV Placement
The sofa layout is often best taped first because it establishes the main seating zone. Once the sofa is marked, add the coffee table, side tables, chairs, and media area.
TV placement should be tested from the actual seated position rather than calculated from one universal multiplier. Viewing comfort depends on screen size, resolution, content, room layout, and personal preference.
This mock-up lets the whole arrangement be tested before anything is purchased or mounted.
Tape Off Sofa Layout
Outline the sofa’s full footprint, not only the seat cushions. Then check nearby tables, walking routes, and any movable sections.
- Trace the sofa at its real outside dimensions
- Keep the primary walking route as open as the room allows
- Mark side tables and the coffee table separately
- Start with roughly 14 to 18 inches between the sofa and coffee table, then test comfort
- Mark the TV wall or focal point and check it from the real seated position
Stand, sit, and walk through the taped shapes. If a person must repeatedly step around a corner or twist to pass, adjust the arrangement before moving the actual furniture.
Mark TV Viewing Distance
TV viewing distance should account for the display’s size and resolution. Current Sony guidance uses different minimum reference distances for different resolutions: approximately 1.5 times the screen’s vertical height for 4K televisions, about three times the vertical height for HD models, and farther for standard-definition displays.
That is very different from multiplying the TV’s diagonal size by three. For example, Sony lists a roughly 6.25-foot reference distance for a 50-inch HD television rather than 12.5 feet. Modern 4K sets can generally be viewed from substantially closer distances while still resolving a detailed image.
| Element | Starting Point | Final Check |
|---|---|---|
| Viewing distance | Use the TV manufacturer’s size/resolution guidance | Actual comfort, detail, room layout |
| TV center height | Near seated eye level | Viewer height, sofa height, recline angle |
| Circulation | Keep the main route comfortably open | Walk the route with the seating position marked |
Sit where the taped sofa will be and look at the planned screen location. This real-world check is more useful than relying on one formula alone.
Check Viewing Distance and Height
After the TV distance has been tested, mark the proposed screen position on the wall with removable tape that is suitable for the wall finish. The screen should normally be comfortable to view without repeatedly tilting the head upward.
SANUS uses 42 inches from the floor as an average seated-eye-level starting point for the center of a TV, but it also notes that the correct height depends on the viewing situation. The best method is to sit in the main seat and measure the actual viewer’s eye level.
- Mark the proposed TV outline or center point on the wall.
- Sit in the primary viewing position rather than checking only while standing.
- Use actual seated eye level as the main reference.
- Account for a reclined sofa or unusually high or low seating.
- Confirm that furniture and décor do not block the lower portion of the screen.
This test helps the screen feel integrated with the seating arrangement instead of forcing the furniture to adapt to a predetermined mounting height.
Refine the Layout Before You Buy
Painter’s tape turns the floor into a temporary working plan. Before purchasing furniture, use that plan to test whether each proposed piece supports movement, access, reach, and daily use.
Try more than one configuration when possible. Move a taped sofa forward, rotate a chair, reduce the depth of a proposed console, or compare two coffee-table sizes. A few minutes of tape adjustment can prevent buying a piece that physically fits but makes the room inconvenient.
Pay particular attention to furniture that operates or changes shape. Check whether a recliner extends into a walkway, whether dining chairs can pull back, whether drawers open fully, and whether a sleeper sofa has enough room to unfold.
Once a version works, photograph the taped floor and write down the final distances. Those notes make shopping easier because the room’s real limits are already known.
Use Mockups for Rugs and Storage Pieces
After the main furniture layout works, use tape to mock up rugs and storage pieces. Outline the rug’s outside dimensions so its relationship to sofa legs, chairs, tables, and open floor can be evaluated before ordering it.
For a cabinet, bench, cart, bookcase, or console, mark both the footprint and any area required for doors or drawers to open. Near a doorway, confirm that neither the furniture nor a thick rug interferes with the door swing.
- A rug boundary beneath or around the main seating group
- A cabinet footprint plus drawer or door clearance
- Clear walking routes between seating zones
- A narrow bench checked against doors and baseboards
- A layered plan that accounts for both furniture size and actual use
Note: Tape shows length and width, but it cannot show height, visual bulk, cushion softness, rug thickness, or how a tall cabinet changes sightlines. Use the taped footprint together with the furniture’s height and photos or cardboard mockups when vertical scale matters.
Frequently Asked Questions
What Is the 3-5-7 Rule in Interior Design?
There is no universal professional or building-code rule that requires furniture to follow fixed 3-foot, 5-foot, and 7-foot distances. Those numbers may appear in informal design advice, but a better approach is to measure the room and use clearances that match the activity. For important circulation routes, about 36 inches is a useful benchmark where space allows; seating, tables, and TV distances should be tested according to their specific function.
What Is the Biggest Mistake in Placement of Furniture?
One of the most common mistakes is arranging furniture by appearance alone without testing how the room is actually used. Pushing every piece against a wall can also make some rooms feel disconnected, but floating furniture is not automatically better. Measure first, preserve important routes, group seating for its intended use, and test doors, drawers, reclining sections, and sightlines before finalizing the arrangement.
How Do You Put Painter’s Tape on the Floor?
Clean and dry the test area, confirm that the tape is approved for the floor surface, and test a small hidden section first. Measure each furniture footprint, mark its corners, then connect the marks with straight strips of tape. Press the tape flat without excessive force. Remove it according to the manufacturer’s instructions once the layout has been recorded.
What Is the 2/3 Rule for Furniture?
The two-thirds rule is an optional proportion guideline, not a requirement that furniture fill two-thirds of the entire room. Designers sometimes use a roughly two-thirds relationship when comparing the width of a sofa with a wall or the length of a coffee table with a sofa. Treat it as a visual starting point, then verify the actual measurements, traffic flow, and function of the room.
Conclusion
Mapping furniture placement with tape gives you a low-risk way to test a room before moving or buying heavy pieces. Measure the room, mark furniture at its real dimensions, include operating clearances, preserve important walking routes, and test the arrangement by actually sitting and moving through it. A few tape adjustments can reveal problems that are easy to miss on paper and make the final layout more practical for everyday use.
Sources
- 3M — Scotch Delicate Surface Painter’s Tape 2080 — surface compatibility, delicate-surface use, and removal guidance.
- U.S. Access Board — Chapter 4: Accessible Routes — 36-inch accessible walking-surface benchmark and turn clearances.
- Sony Support — Recommended TV Viewing Distance — resolution-dependent reference distances for 4K, HD, and SD televisions.
- SANUS HeightFinder — seated eye-level approach to TV mounting height and the 42-inch average starting reference.