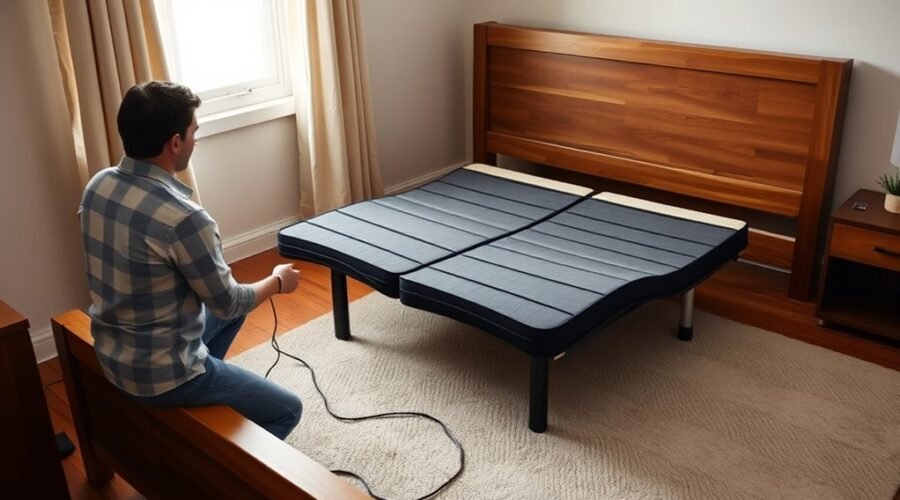
You can put many adjustable bases inside an existing bed frame, but the fit depends on the exact base and frame design. Before removing anything, compare the base dimensions with the usable space inside the frame, identify whether the base must stand on its own legs or can sit on a zero-clearance platform, and make sure nothing can touch the base while it moves.
Quick Answer
To install an adjustable base inside an existing bed frame, verify the exact interior dimensions, remove only approved slats or foundation pieces, set up the base with the correct legs or zero-clearance configuration, center it without letting it touch the frame, connect power safely, add a compatible mattress, and test the full range of motion.
Key Takeaways
- Measure the usable inside length and width of the bed frame and compare them with the dimensions listed for your exact adjustable base.
- Remove a box spring, foundation, and removable slats when required, but do not remove structural rails or braces unless the bed-frame manufacturer says it is safe.
- Use only the leg height, zero-clearance setup, brackets, cables, and accessories approved for your base model.
- Keep the adjustable base clear of side rails, drawers, upholstery, cords, and other objects throughout its entire range of motion.
- Verify mattress compatibility, weight limits, power, remote operation, and mattress retention before using the bed normally.
At a Glance
| Time Required | About 30–60 minutes for a straightforward setup; split bases, tight frames, or hardware removal can take longer. |
| Difficulty | Moderate, mainly because adjustable bases are heavy and must be positioned without damaging wiring or moving parts. |
| Tools Needed | Tape measure, the base and bed-frame manuals, and any screwdriver, wrench, or hex key required by your specific hardware. A second adult is strongly recommended. |
| Cost | Usually no added cost if the frame is already compatible. Approved leg kits, headboard brackets, a surge protector, or other model-specific accessories may add cost. |
Warning: Adjustable bases are heavy motorized assemblies. Unplug the base before moving or working around its underside, keep hands away from hinges and lift mechanisms, and do not try to lift or reposition a large base by yourself. Follow the lifting and setup instructions in the manufacturer’s manual.
Check If Your Bed Frame Fits an Adjustable Base
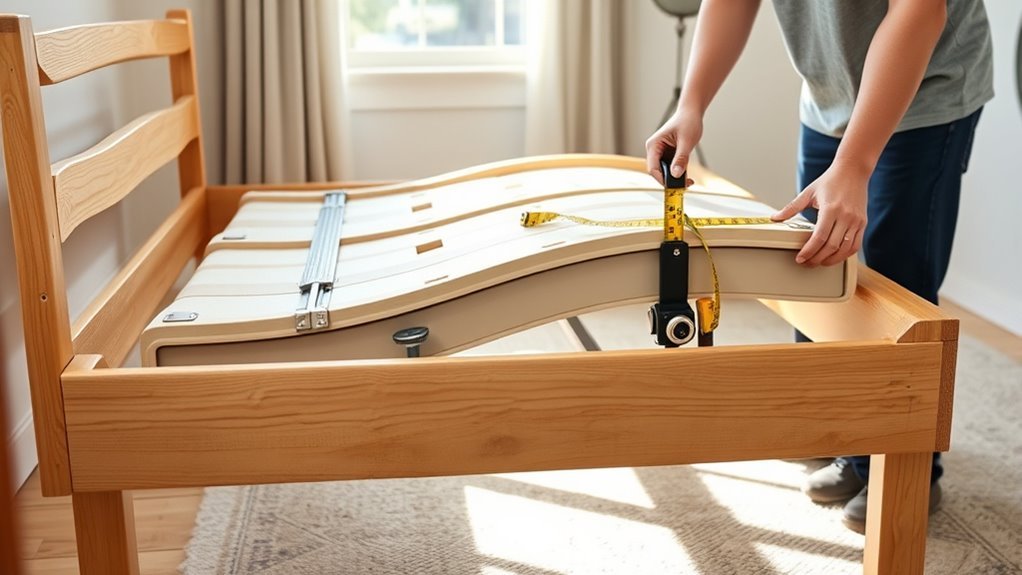
Start by measuring the usable interior length and width of the assembled bed frame. Do not rely on a universal clearance number. Compare your measurements with the specifications for your exact adjustable base because dimensions vary by manufacturer, model, and bed size.
Tempur-Pedic recommends measuring the inside of the bed frame and comparing it directly with the power-base dimensions. Antique, handmade, unusually thick, or nonstandard frames deserve extra attention because their usable interior dimensions may differ from modern standard sizes.
Identify the Type of Bed Frame
The correct installation depends on how the existing frame supports the bed:
- Open rail or removable-slat frame: The mattress support slats and foundation may need to come out so the adjustable base can stand on its own legs inside the decorative frame.
- Solid platform frame: Use it only if your adjustable base is specifically approved for zero-clearance or platform installation.
- Storage or drawer frame: Built-in drawers, platforms, and crossmembers frequently interfere with adjustable bases. Confirm compatibility before removing anything.
- Antique or custom frame: Measure carefully and check whether rails, brackets, upholstery, or unusual dimensions could interfere with movement.
Saatva, for example, distinguishes between zero-clearance platform installation and an open-frame setup in which the platform or slats are removed and the adjustable base rests on its own legs.
Check Headboard, Footboard, and Side Clearance
Look beyond the base footprint. The mattress and moving deck travel upward and backward as the head section rises, so thick upholstery, protruding bolts, a low headboard rail, footboard hardware, or decorative trim can interfere even when the base fits while flat.
The goal is not a wedged or perfectly tight fit. Leave enough room for the base and mattress to articulate without rubbing the surrounding frame.
Note: Do not attach an adjustable base directly to decorative side rails unless the base manufacturer provides an approved mounting method. Some manufacturers specifically warn that doing so can affect performance or warranty coverage.
Confirm the Weight Limit and Mattress Compatibility
Check the adjustable base’s rated capacity before installation. The base must support the mattress and sleepers within the manufacturer’s specified limit, and that limit can differ by size and model.
Also verify that the exact mattress model is approved for adjustable use. Memory foam, latex, hybrid, and even some innerspring mattresses can work on adjustable bases, but construction type alone is not enough to confirm compatibility.
An adjustable base normally replaces the traditional box spring or flat foundation. Do not place a box spring between the adjustable base and the mattress unless the manufacturer specifically instructs you to do so.
Remove Slats and Other Obstructions
Once compatibility is confirmed, remove the mattress, box spring or foundation, and any removable pieces that occupy the space needed by the adjustable base.
Remove Center Slats
If your adjustable-base manufacturer requires an open frame, remove the mattress-support slats according to the bed-frame instructions. Label screws, clips, and brackets as you remove them so the original frame can be restored later.
Do not assume every center rail or brace should be removed. A center beam, corner brace, or crossmember may be part of the bed frame’s own structural system even when it will not support the adjustable base.
If a structural component prevents installation, check with the bed-frame manufacturer rather than cutting, bending, or forcing it out.
Clear Frame Obstructions
Inspect the full interior for drawers, shelf panels, decorative brackets, bolts, electrical cords, storage hardware, and other features that could touch the base.
Check both the flat position and the space the deck will occupy when the head and foot sections rise. A part that clears the base while flat can still become an obstruction during articulation.
Pro Tip: Before moving the adjustable base into the frame, photograph the empty frame and any hardware you remove. It makes reassembly much easier if you later return to a conventional foundation.
Install the Legs and Set the Height
Follow the adjustable-base manual when installing legs. Many bases are designed for leg-supported use inside an open frame, while zero-clearance models may be approved for use directly on a solid platform without legs.
Do not choose an arbitrary leg height or combine extra segments just to make the mattress taller. Leg systems and allowable heights are model-specific. Current Tempur-Pedic models, for example, have model-specific minimum and maximum heights.
Thread or attach each approved leg exactly as the manual describes and make sure every leg is fully seated. If adjustable segments are supplied, use only the number and combination approved by the manufacturer.
Before final placement, confirm that all legs will land on a solid, level floor rather than on a slat, loose rug edge, electrical cord, or unstable surface.
Place the Adjustable Base in the Frame
Unplug the base before moving it. Remove bedding and other loose items, secure the power cord so it cannot drag or snag, and use enough people to handle the base safely.
Lower the base carefully into the prepared frame. If it is a leg-supported installation, all approved base legs should contact the floor evenly. If it is an approved zero-clearance installation, place the base on the supporting platform exactly as its manual directs.
Center the base so the spacing is reasonably even from side to side, but do not wedge it against the rails. Press gently at each corner to check for rocking.
Look underneath and around the head, foot, and sides to confirm that no rail, brace, fabric panel, drawer, bolt, or cord touches a moving component.
A correct fit gives the adjustable base enough room to move through its full range without rubbing or transferring its load to decorative bed-frame parts.
Reconnect Power, Cables, and Links
Once the base is stable, inspect the power cord and power supply for damage before reconnecting them. Route cords where they cannot be pinched by the lift mechanism, trapped beneath a leg, or stretched when the head and foot sections move.
Use a working grounded outlet and follow the electrical instructions supplied with the base. Tempur-Pedic also recommends a grounded electrical surge protector for its current adjustable-base troubleshooting guidance.
Do not unplug and reconnect factory actuator, lighting, or control-box wiring unless the owner’s manual tells you to do so. If something was disconnected during shipping or setup, use the wiring diagram for the exact model.
For Split or Multi-Piece Bases
A split setup contains separate powered sections. Connect each section according to its own wiring instructions and decide whether you want the sides to operate independently or together.
Some systems use a sync cable, while others sync wirelessly. Do not assume every King or California King uses the same number of cords, outlets, remotes, or synchronization method.
After power is connected, pair or synchronize the remote controls according to the manufacturer’s procedure.
Add the Mattress and Test the Base
Before placing the mattress on the base, install the supplied mattress retainer bar or other retention hardware if your model requires one. The retainer helps stop the mattress from sliding as the head and foot sections move.
Place the compatible mattress directly on the adjustable base and center it. Do not add a conventional box spring between the base and mattress unless the manufacturer specifically approves that setup.
Use the remote to raise the head and foot sections gradually. Watch all four sides while the base moves.
Check for:
- smooth movement without grinding, popping, or repeated strain;
- no contact with side rails, headboard, footboard, drawers, or brackets;
- power cords that stay loose and clear of hinges and moving arms;
- legs that remain firmly planted without rocking;
- a mattress that stays centered and does not catch on the surrounding frame;
- normal remote, preset, massage, lighting, and synchronization functions, if equipped.
Run the base back to flat and inspect the installation again. If anything rubs, binds, shifts, or pulls on a cable, stop using the base until the interference is corrected.
Common Problems After Installation
The Base Rubs the Side Rails or Headboard
Stop movement and reposition the base. Recheck the interior dimensions and make sure upholstery, brackets, and decorative trim are not entering the base’s travel path. Do not solve rubbing by forcing the base more tightly into the frame.
The Base Rocks or Feels Uneven
Confirm that the floor is level, every approved leg is fully attached, and no leg is sitting on a cord, loose rug edge, slat, or obstruction. Do not use unapproved blocks or improvised leg extensions.
The Base Has No Power
Confirm the power supply and cord are firmly connected, test the outlet with another working device, and check the remote batteries. Some bases can also be reset by unplugging them briefly, but use the reset procedure specified for your model.
The Mattress Slides
Check that the mattress retainer is installed correctly and that the mattress is approved for the base. Also confirm that bedding is not pulling against the headboard or surrounding frame when the bed articulates.
The Two Sides of a Split Base Do Not Move Together
Check whether the system is supposed to operate independently or in synchronized mode. Re-sync the bases using the instructions for your specific model rather than using a generic remote-pairing procedure.
Frequently Asked Questions
Can I Use an Adjustable Base With My Existing Bed Frame?
Yes, many existing frames can surround an adjustable base. Measure the usable interior dimensions, confirm whether your base needs its own legs or supports zero-clearance installation, remove only approved slats or foundation parts, and make sure the base can move without touching the frame.
How Do You Put an Adjustable Bed Inside a Bed Frame?
Empty the frame, measure it, remove the box spring and any removable slats required by the base manufacturer, install the approved legs or zero-clearance setup, lower the base into position with help, route the power cord safely, add the compatible mattress, and test the full range of motion.
Can You Put a Frame Around an Adjustable Bed Frame?
Yes. A compatible decorative frame can surround many adjustable bases as long as its rails, headboard, footboard, upholstery, storage parts, and hardware stay outside the base’s moving path. The adjustable base should be supported exactly as its manufacturer requires.
Why Are Some Bed Frames Not Compatible With Adjustable Beds?
A frame may be incompatible because it is too small, has fixed crossbars or storage drawers, lacks an approved zero-clearance surface, interferes with the moving mattress, or cannot safely remain assembled after its mattress-support parts are removed.
Do I Need to Remove the Slats for an Adjustable Base?
Often, yes, when the adjustable base will stand on its own legs inside an open bed frame. However, a zero-clearance base may be designed to rest on an approved solid platform. Follow the instructions for both the bed frame and adjustable base rather than removing structural components automatically.
How Much Clearance Does an Adjustable Base Need Inside a Frame?
There is no single clearance measurement that applies to every adjustable base. Compare the exact dimensions of your base with the usable interior of the frame and leave enough room for the base and mattress to move through the full articulation range without touching surrounding parts.
Do I Keep the Box Spring With an Adjustable Base?
Usually no. An adjustable base is designed to support the mattress directly and normally replaces the conventional box spring or flat foundation. Use a separate foundation only if the adjustable-base and mattress manufacturers specifically approve it.
Conclusion
An adjustable base can work well inside an existing bed frame when the frame is truly compatible and does not interfere with the base. Measure the actual interior space, follow the base manufacturer’s leg or zero-clearance instructions, remove only approved mattress-support parts, keep structural frame components intact unless the manufacturer allows their removal, and route every cable away from moving parts.
After the mattress is installed, test the head and foot sections through their full travel and watch for rubbing, rocking, cord tension, mattress movement, or unusual noise. If the base moves smoothly and remains stable without touching the surrounding frame, the installation is ready for normal use.
Sources
- Tempur-Pedic — Will the power base fit inside my bed frame? — supports measuring the exact interior dimensions and checking base size.
- Saatva — Adjustable Base bed-frame compatibility — supports open-frame, platform, leg-supported, and zero-clearance installation guidance.
- Tempur-Pedic — Adjustable Base Moving Preparation — supports heavy-base handling, unplugging, and safe moving precautions.
- Tempur-Pedic — Adjustable-base height guidance — supports model-specific leg and zero-clearance height requirements.
- Tempur-Pedic — Adjustable-base troubleshooting — supports cord-clearance, power-supply, outlet, and remote checks.