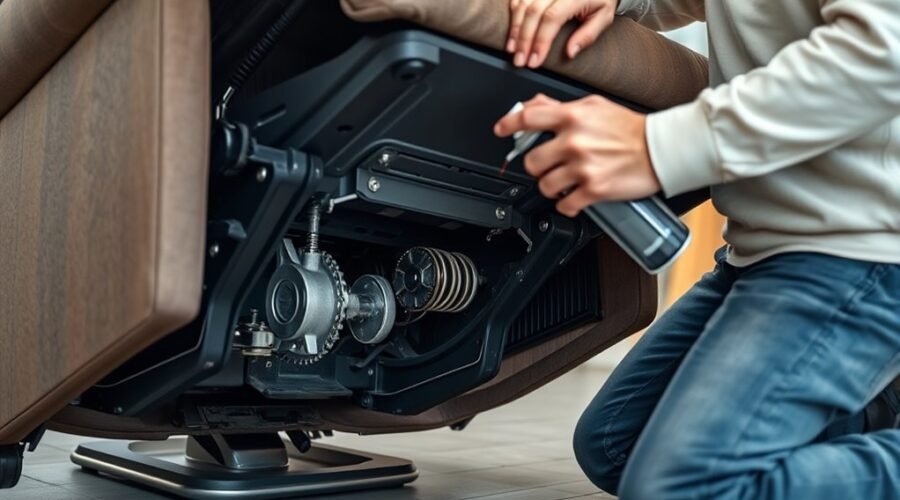
A stiff or squeaky recliner does not always need the same lubricant. The safest approach is to check the chair manufacturer’s instructions first, clean the mechanism, identify the approved lubrication points, and apply only a small amount of the specified product. A careful inspection also helps separate ordinary friction from loose, bent, worn, or electrically faulty parts that lubrication cannot fix.
Quick Answer
To lubricate a recliner mechanism, first check the chair’s manual for the approved lubricant and lubrication points. Unplug powered models, protect the floor and upholstery, clean the mechanism, apply a very small amount only where specified, cycle the chair slowly, then wipe away excess. Stop if you find bent, broken, or loose parts.
Key Takeaways
- Check the recliner manufacturer’s manual before choosing silicone spray, mineral oil, lithium grease, or another lubricant.
- Unplug a power recliner or lift chair before maintenance and keep hands away from moving linkages and pinch points.
- Clean dust and old residue before applying lubricant, and protect nearby fabric and flooring from drips or overspray.
- Lubricate only the points the manufacturer identifies; do not automatically spray every rivet, motor, wire, switch, or plastic part.
- If lubrication does not correct stiffness, inspect for loose hardware, bent links, damaged cables, springs, corrosion, or power-system problems.
At a Glance
| Time Required | About 20–30 minutes for inspection, cleaning, lubrication, cycling, and cleanup |
| Difficulty | Easy to moderate, provided the mechanism is accessible and not damaged |
| Tools Needed | Flashlight, vacuum or soft brush, lint-free cloths, drop cloth or cardboard, and the manufacturer-approved lubricant; use protective gear required by the product label |
| Cost | Low for routine lubrication; usually limited to the specified lubricant and basic cleaning supplies |
Warning: Unplug a power recliner or lift chair before cleaning, inspection, or lubrication. Keep fingers, loose clothing, pets, and children away from the mechanism and pinch points. If using an aerosol lubricant, follow its label and safety data sheet and keep the spray away from flames, sparks, hot surfaces, and other ignition sources.
Why Recliner Mechanisms Get Stiff?
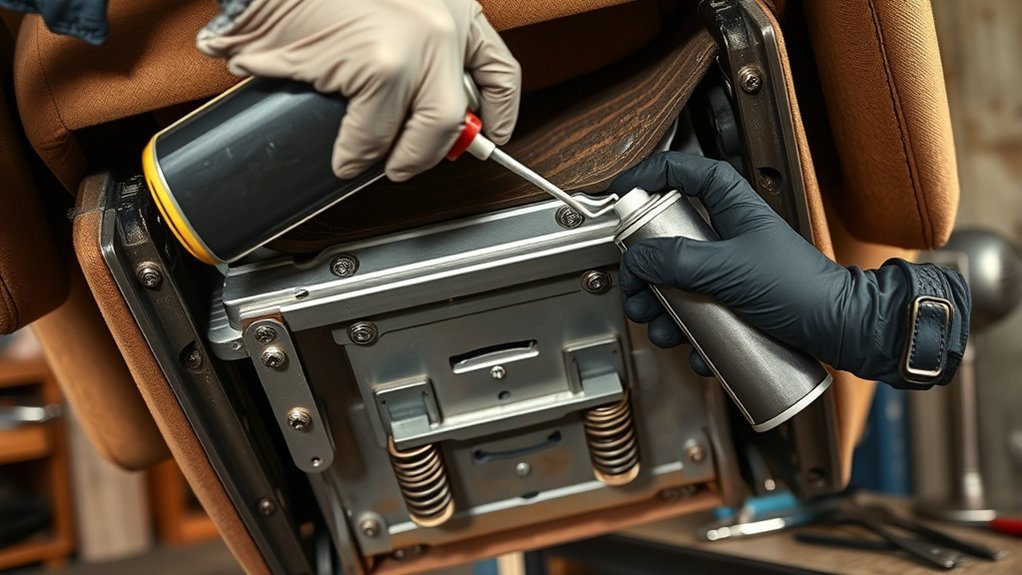
Recliner mechanisms can become stiff when dust, lint, hair, dried residue, or corrosion builds up around moving parts. Contamination can increase friction at pivots, sliding contacts, and latching surfaces, making the chair harder to open or close.
Lubricant can also migrate, dry, or wear away from a contact point over time. Moisture may promote rust on exposed steel, especially when a chair is stored or used in a damp environment.
Not every stiff recliner simply needs more lubricant. Loose fasteners, bent linkage arms, worn bushings, damaged springs, a binding release cable, or a failing power actuator can also create resistance. Forcing the chair when something is bent or jammed may turn a small problem into a larger repair.
Temperature can affect how some lubricants flow, but the important point is to use a product that the chair manufacturer approves and to follow the lubricant maker’s temperature and application instructions.
Check the Owner’s Manual Before You Lubricate
There is no single lubricant that is correct for every recliner. Manufacturer instructions can differ substantially by brand, model, and mechanism design.
| Manufacturer example | Published guidance | What it shows |
|---|---|---|
| Champion Care Cliner | Champion’s manual specifies a silicone-based lubricant on recline-mechanism pivot points. | Silicone is appropriate when the manufacturer specifies it. |
| La-Z-Boy Reclina-Rocker | La-Z-Boy’s customer-care guidance says clear mineral oil may be used if lubrication is needed for the cited squeak and says not to lubricate rivet locations. | A blanket rule to lubricate every pivot or avoid all petroleum-derived lubricants is not reliable. |
| UltraComfort lift recliners | UltraComfort’s service guide specifies white lithium grease at illustrated lift-frame points and states that routine lubrication is not necessary for the covered chairs. | Lubricant type, location, and maintenance interval are model-specific. |
The best lubricant for a recliner is the one specified for that chair and that lubrication point—not whichever spray happens to be closest.
Note: If the manual says routine lubrication is unnecessary, do not create a maintenance schedule of your own. Lubricate only when and where the manufacturer instructs.
Gather the Correct Lubricant and Safety Gear
Gather the manufacturer-approved lubricant, a flashlight, lint-free cloths, a vacuum or soft brush, and a drop cloth or piece of cardboard. If the specified lubricant is an aerosol, a precision straw or nozzle can help keep the product on the intended contact point rather than on the upholstery.
Read the lubricant label before use. Safety glasses, gloves, ventilation, or other precautions should be used when the product instructions call for them.
Silicone Spray Selection
If your recliner manufacturer specifically calls for silicone lubricant, choose a product whose label confirms compatibility with the materials around the mechanism. A precision nozzle is useful for linkages, guides, cables, and other narrow locations.
For example, WD-40 Specialist Silicone is labeled for many metal, plastic, rubber, and vinyl applications and dries to a clear lubricating film. That does not mean it is automatically correct for every recliner; the chair manufacturer’s instructions still come first.
Do not select an aerosol simply because it is described informally as “non-toxic.” The current safety data sheet for WD-40 Specialist Silicone, for example, identifies an extremely flammable aerosol and aspiration hazard. Product-specific label and SDS instructions are the appropriate safety reference.
- Confirm the lubricant type in the recliner manual or service instructions.
- Confirm that the exact lubricant is suitable for the materials at the intended application point.
- Use a narrow applicator when possible so only the specified contact point is treated.
Protective Safety Gear
Wear the protective equipment required by the lubricant label. Eye protection and gloves are sensible when there is a risk of spray, drips, or contact with old grease and dirt.
When using an aerosol, work with adequate ventilation and keep the can away from flames, sparks, cigarettes, heaters, and other ignition sources. Never spray an aerosol onto energized electrical parts.
Keep the recliner empty while you work. Hands and tools should stay clear of scissor mechanisms, springs, and linkage pinch points whenever the chair is being moved.
Prep Cleaning Cloths
Keep several lint-free cleaning cloths nearby: one for removing dirt before lubrication and another for wiping away excess lubricant afterward.
- Place a drop cloth, cardboard, or absorbent material under and behind the mechanism.
- Vacuum or brush away loose dust, lint, hair, and debris before adding lubricant.
- Use a clean cloth to wipe accessible metal surfaces without pushing dirt farther into joints.
Pro Tip: Put cardboard behind the exact joint you are treating. It acts as an overspray shield and makes it much easier to keep lubricant away from upholstery, carpet, wiring, and nearby finished surfaces.
Unplug and Clear the Recliner Area
If you have a power recliner or lift chair, switch it off if the controls provide an off position and unplug it from the wall before cleaning, inspecting, or lubricating the mechanism. Champion, for example, instructs users to unplug powered equipment before maintenance or servicing.
A manual recliner has no electrical supply to disconnect, but it still contains moving links, springs, sharp metal edges, and pinch points.
Clear furniture, toys, pets, and other obstacles away from the chair. Vacuum the surrounding floor so debris is less likely to enter the mechanism while you work.
Use good lighting. A flashlight or work light helps you distinguish a true pivot or sliding surface from a fastener, cable, electrical connector, or nearby upholstery that should not be sprayed.
Locate the Pivot Points and Linkages
Inspect the mechanism from a safe position and identify the parts that actually move when the footrest or backrest changes position. Depending on the recliner, these can include linkage arms, hinge points, sliding contacts, latch surfaces, drive bars, and manufacturer-designated grease points.
Look for dirt, old lubricant, rust, looseness, bent metal, missing hardware, cracked parts, or uneven movement before adding anything.
- Trace the mechanism from the seat frame toward the footrest and backrest.
- Use a flashlight to identify rubbing or sliding surfaces and any lubrication points shown in the manual.
- Check bolts and mounting points for obvious looseness without changing factory adjustments unless the service instructions tell you to do so.
What Not to Lubricate
Do not assume every moving-looking point needs oil. Some manufacturers specifically exclude certain rivets or use self-lubricating components.
Unless your chair’s instructions say otherwise, keep lubricant away from motors, actuator housings, electrical connectors, switches, wiring, upholstery, finished wood, and unspecified plastic or rubber parts. Do not soak springs, joints, or tracks simply because they are accessible.
Apply the Approved Lubricant to the Moving Parts
If silicone spray is the product your manufacturer specifies, direct a small, controlled burst at the approved pivot or contact point. If the chair calls for mineral oil, grease, or another lubricant, follow the corresponding application method instead.
The objective is to put lubricant between the surfaces that require it, not to coat the whole underside of the chair.
Use the smallest amount that reaches the specified contact surface. More lubricant is not automatically better.
For sprays, use the straw or narrow nozzle when available. For grease or oil, apply only the quantity needed to leave the prescribed film on the contact point. Keep a cloth under the application area to catch drips.
Avoid saturating the mechanism. Excess product can migrate onto upholstery or flooring and may collect dirt in areas where a wet or tacky residue remains.
Move the Recliner to Distribute Lubricant
After the lubricant is applied, move the recliner slowly through several normal operating cycles so the product can spread across the intended contact surfaces.
- Move the mechanism gently through its normal range without forcing a stiff point.
- Repeat several times while listening and feeling for a change in resistance or noise.
- Stop immediately if the linkage binds, twists, snaps, grinds heavily, or moves unevenly.
There is no need to use an arbitrary 10- or 15-second timing rule. The goal is simply to work the approved lubricant across the intended surfaces while watching for abnormal movement.
For a powered model, complete the hands-on lubrication and cleanup while the chair is unplugged. Restore power only after tools, cloths, hands, and other objects are clear of the mechanism and the product instructions allow operation.
Wipe Away Excess Lubricant
Once the lubricant has reached the intended contact surfaces, remove visible excess with a clean cloth. This reduces the chance of drips, staining, and dirt buildup.
| Area | Action | Result |
|---|---|---|
| Approved joints | Wipe visible excess | Less dripping and buildup |
| Brackets | Inspect for residue and looseness | Cleaner inspection surface |
| Nearby upholstery | Remove accidental residue promptly using the upholstery maker’s care instructions | Lower staining risk |
| Floor or drop cloth | Clean drips before operating the chair | Lower slip and stain risk |
Manufacturer guidance should determine how much lubricant remains on the mechanism. UltraComfort, for example, warns that excessive lubricant can leak onto the chair or floor.
Fix Squeaks and Stiff Spots After Lubing
If the correct lubricant has been applied to the correct locations but the recliner is still noisy or stiff, do not keep spraying more product. Cycle the mechanism carefully and identify where the problem occurs.
- Recheck the specified lubrication points for a missed contact surface.
- Look for debris trapped in a track or linkage.
- Inspect accessible mounting hardware for looseness.
- Watch for bent arms, abnormal gaps, corrosion, a sticking latch, or a damaged release cable.
- On powered chairs, consider the actuator, motor, control box, wiring, and connectors if the movement problem appears electrical rather than friction-related.
Some mechanism noise is normal. La-Z-Boy notes that moving metal components can make noise during footrest operation, so the goal should not be to make every recliner completely silent.
When Lubrication Will Not Fix the Problem
Lubrication cannot straighten a bent linkage, repair a cracked bracket, replace a broken spring, reconnect a failed release cable, fix stripped hardware, or restore a failed motor or actuator.
Stop using the chair and seek manufacturer, dealer, or qualified service help if you find broken structural parts, severe corrosion, damaged wiring, exposed conductors, repeated binding, abnormal motor behavior, or a mechanism that will not lock or support the chair correctly.
Keep Your Recliner Mechanism Smooth
Good recliner maintenance starts with cleanliness and inspection, not automatic periodic spraying. Keep lint and debris away from the underside, inspect the mechanism when symptoms appear, and follow the maintenance interval published for the exact chair.
Some recliners are designed for regular lubrication at specified points. Others require lubrication only when noise develops. The manufacturer’s manual should decide the schedule.
Choosing The Right Lubricant
The best lubricant for a recliner mechanism is the one specified by its manufacturer. Depending on the design, that might be silicone lubricant, clear mineral oil, white lithium grease, or another purpose-specific product.
Do not apply a blanket rule that all petroleum-derived lubricants are harmful. La-Z-Boy, for example, specifies clear mineral oil for the particular Reclina-Rocker issue described in its customer-care guidance.
Likewise, do not treat “WD-40” as a single type of lubricant. WD-40 is a brand with different formulations, including a dedicated silicone lubricant. The correct question is whether the specific product matches the lubricant type and application instructions for your recliner.
- Find the manufacturer’s lubrication specification.
- Match the lubricant type and application point exactly.
- Follow the lubricant label for material compatibility and safety.
- Do not invent a 3–6 month schedule unless the manufacturer actually calls for one.
Applying Lubricant To Joints
Clean contact surfaces respond better than dirty ones because the lubricant can reach the intended interface rather than mixing with loose dust and grit.
Use a straw applicator, dropper, grease applicator, or other method appropriate for the specified lubricant. Apply it precisely and avoid flooding neighboring parts.
After application, move the recliner gently through several normal cycles to distribute the lubricant. Wipe off visible excess and test the chair again.
For future maintenance, use the interval stated in your manual. If no routine interval is given, do not assume the chair needs lubrication simply because several months have passed.
Frequently Asked Questions
What Is the Most Common Problem With Recliners?
Stiffness and unwanted noise are common complaints, but they can have several causes, including contamination, dried or missing lubricant, loose fasteners, worn components, bent linkages, release-cable problems, and—in powered chairs—electrical or actuator faults. Inspect the mechanism before assuming lubrication alone will solve the problem.
How Can I Make My Recliner Close Easier?
Remove debris, inspect the linkage and track, check accessible mounting hardware, and look for an obstruction under the footrest. If the manufacturer specifies lubrication, apply the approved lubricant only at the listed points. Do not force a footrest that binds or needs unusually high pressure to close.
How to Fix the Reclining Mechanism in a Recliner?
Start by safely exposing and inspecting the mechanism. Remove debris and look for loose hardware, bent or broken linkage parts, damaged springs, a failed release cable, or electrical problems on powered models. Lubrication helps only when friction at an approved contact point is the cause. Structural or electrical failures need proper repair rather than additional lubricant.
What Is the Best Lubricant for a Recliner?
There is no universal best lubricant. Some manufacturers specify silicone-based lubricant, others specify clear mineral oil, white lithium grease, or another product at particular locations. Check the owner or service manual for your exact recliner before applying anything.
How Often Should You Lubricate a Recliner Mechanism?
Follow the manufacturer’s maintenance schedule. There is no reliable universal 3–6 month rule. Some manuals call for periodic or annual lubrication, while other manufacturers state that routine lubrication is unnecessary unless a specific noise or service condition occurs.
Can You Use WD-40 on a Recliner Mechanism?
Do not decide based on the WD-40 brand name alone. WD-40 sells several different lubricant formulations, and the original Multi-Use Product provides light lubrication. Use a product only when its lubricant type and material compatibility match what your recliner manufacturer specifies. A dedicated silicone product may be suitable for a chair that specifically calls for silicone, but not every recliner does.
Conclusion
Proper recliner lubrication is a model-specific maintenance task. Start with the chair’s manual, disconnect power where applicable, clean and inspect the mechanism, protect nearby fabric and flooring, and apply only the approved lubricant to the approved locations. Cycle the recliner gently and wipe away excess afterward.
If stiffness, grinding, or binding remains, do not keep adding lubricant. Loose hardware, bent linkage, damaged springs or cables, corrosion, or a power-system fault may require repair. A small, precise application can reduce friction when lubrication is actually the problem, but inspection is what keeps routine maintenance from hiding a mechanical failure.
Sources
- Champion Care Cliner Owner’s Operating and Maintenance Manual — backs up powered-chair unplugging, pinch-point precautions, inspection, and silicone lubrication guidance for the covered Champion mechanisms.
- La-Z-Boy Customer Care — Quality FAQs — backs up manufacturer-specific mineral-oil guidance, the instruction not to lubricate certain rivet locations, and the note that some mechanism noise is normal.
- UltraComfort Lift Recliner Service Guide — backs up white lithium grease at specified points, limits on excessive lubricant, and the statement that routine lubrication is not necessary for the covered chairs.
- WD-40 Specialist Silicone Lubricant Product Information — backs up labeled material compatibility and precision-application information for that specific silicone product.
- WD-40 Specialist Silicone Lubricant Safety Data Sheet — backs up aerosol flammability, aspiration-hazard, ignition-source, and handling precautions.