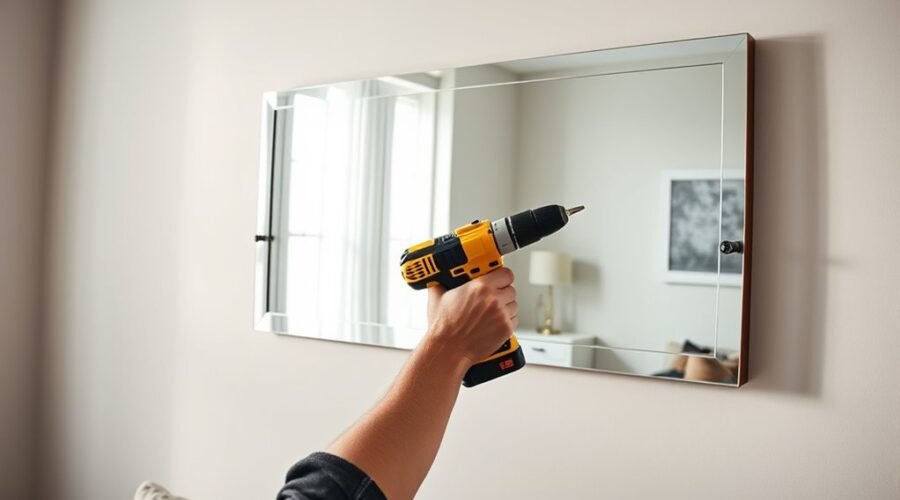
A heavy mirror can be mounted securely when the mirror, frame, wall, and hanging hardware are treated as one system. Start with the mirror’s actual weight and factory mounting points, identify the wall material, then choose hardware specifically rated for that application. Measure carefully, scan before drilling, and use a helper for a mirror you cannot safely control alone.
Quick Answer
To hang a heavy mirror safely, weigh the mirror, inspect its frame and mounting points, identify the wall material, and use a hanger or anchor specifically rated for that combination. Fasten into studs when the mounting system allows it, or use approved hollow-wall or masonry hardware. Follow the hardware manufacturer’s exact drilling, spacing, and load instructions.
Key Takeaways
- Use the mirror’s actual weight and wall type to choose the mounting system.
- Follow the manufacturer’s working-load, substrate, fastener-count, hole-size, and spacing instructions instead of relying on a universal safety-factor formula.
- Inspect the mirror’s D-rings, wire, cleat, keyholes, and frame before trusting them with the load.
- Scan the drilling area for studs, metal, and possible live wiring before making holes.
- Use a helper whenever the mirror is too large, awkward, or heavy for you to lift and position under full control.
At a Glance
| Time Required | About 30–90 minutes for a straightforward installation; masonry, tile, difficult access, or hardware changes can take longer. |
| Difficulty | Moderate; higher when the mirror is oversized, the wall material is difficult, or the mounting points do not align with structural framing. |
| Tools Needed | Tape measure, level, pencil, appropriate wall scanner or stud finder, drill/driver, manufacturer-specified drill bit, suitable fasteners, and safety glasses. A helper is recommended for bulky mirrors. |
| Cost | Varies by the hanging system, wall material, and tools you already own. French cleats and specialty hollow-wall or masonry fasteners generally cost more than basic picture-hanging hardware. |
Check Mirror Weight and Wall Type
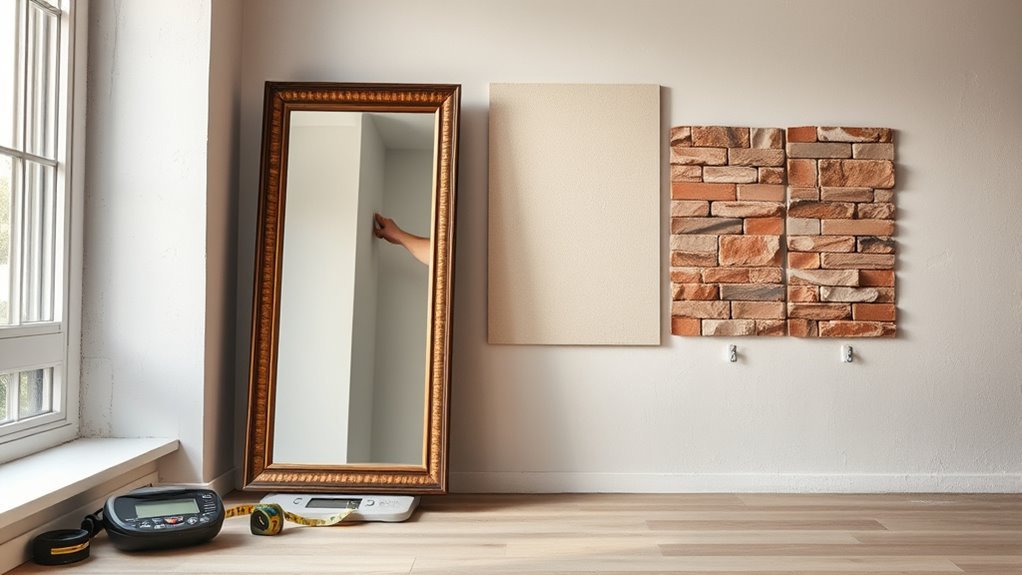
Before you hang a heavy mirror, determine its actual weight and identify the wall material. If the manufacturer lists the weight, use that figure. Otherwise, weigh the mirror carefully with a suitable scale. Do not estimate weight from dimensions alone because glass thickness, frame material, backing, and decorative details can change the total substantially.
Next, identify whether you have drywall, plaster and lath, solid masonry, hollow masonry, tile over another substrate, or another wall system. Each surface can require different fasteners and drilling methods.
Warning: Before drilling, scan the planned locations for studs, metal, and possible live electrical wiring. A wall scanner can reduce risk, but no detector is perfect. If the location of electrical cables, plumbing, or other hidden services is uncertain, investigate further before drilling.
Inspect the Mirror Frame and Mounting Hardware
Check the back of the mirror before selecting wall hardware. Look for factory-installed D-rings, keyhole plates, hanging wire, brackets, or a cleat. Confirm that each piece is tight, undamaged, and attached to a structural part of the frame rather than thin cardboard or decorative backing.
If the mirror manufacturer specifies a particular mounting system, use that method unless a qualified installer or the manufacturer approves an alternative. Adding a powerful wall anchor does not help if the mirror-side hardware or frame cannot carry the load.
Match Fasteners to the Wall Material
- Wood studs: Use screws or hanger hardware approved for fastening into wood, with the diameter and embedment required by the hanging-system manufacturer.
- Drywall without a stud: Use a hollow-wall anchor or drywall hanger specifically rated for the wall thickness and intended load. Do not rely on an unrated plastic plug for a heavy installation.
- Plaster and lath: Treat the surface carefully because brittle plaster can crack. Structural framing is often preferred; otherwise use hardware specifically approved for that wall construction.
- Brick, concrete, or block: Use masonry-rated fasteners and the specified masonry bit. Solid and hollow masonry can require different anchors.
- Tile: The tile itself is not usually the structural support. The fastener must be appropriate for the material behind it, and drilling tile requires the correct bit and technique to avoid cracking.
Whatever the wall type, the fastener manufacturer’s substrate and installation instructions control the decision.
Choose Heavy Mirror Hanging Hardware
Choose hanging hardware with a published rating for the wall material and the way you plan to install it. Avoid creating a universal rule such as “add 25%” or “double the mirror’s weight.” Different manufacturers determine ratings in different ways, and tested capacity changes with the wall, anchor size, hole quality, fastener geometry, and condition of the substrate.
Also avoid assuming that the capacities of several anchors can simply be added together. Real-world load sharing may be uneven. Use the number, spacing, and installation pattern specified for the hanger, cleat, or anchor system.
The safest rating to trust is the one published for the exact hanger, fastener, wall material, and installation method you are actually using.
- Check the mirror’s weight and dimensions.
- Inspect the mirror-side mounting points and frame.
- Confirm that the wall hardware is approved for your wall material.
- Follow the specified number of fasteners, hole size, spacing, and installation sequence.
- Do not substitute screws or anchors unless the hardware manufacturer permits it.
Adhesive products and picture hooks should not be dismissed automatically, but they must be specifically approved for the mirror’s weight, size, wall surface, and application. For example, some modern picture-hanging products are tested for mirrors within clearly stated limits. Never exceed those limits or assume that adding extra strips or hooks automatically raises the allowable load.
Compare D-Rings, Wire, and French Cleats
D-rings, hanging wire, and French cleats can all be legitimate mirror-hanging methods when the complete system is designed for the load.
D-rings: Directly hanging two properly installed D-rings on two matching wall hooks or screws can give a mirror stable support with little side-to-side movement. Confirm that the rings and their screws are firmly attached to a structural part of the mirror frame.
Hanging wire: Picture wire is available in different ratings, including products intended for substantial loads. The wire rating alone is not enough: the D-rings or screw eyes, frame attachment, knots or wraps, wall hooks, and wall fasteners must also be appropriate. Use wire only when the mirror or hanging-hardware manufacturer permits it.
French cleats or interlocking Z-hangers: These systems support the mirror along a wider mounting area and can help it sit level and close to the wall. They are often useful for large or wide mirrors, but the cleat must be securely attached both to the wall and to the mirror’s structural frame.
Pro Tip: Do not add D-rings, wire, extra hooks, or another “backup” system to a French cleat unless the mirror or hardware manufacturer approves that combination. A properly installed rated system should be used as designed.
Find Studs or Use Heavy-Duty Anchors
Where the mirror and its hanging system allow it, fastening into wall studs provides a strong structural attachment. If the required mounting points fall between studs, use a wall fastener specifically approved for that substrate and load.
Do not rely on bare drywall, damaged wallboard, crumbling plaster, or an unknown cavity wall without a suitable fastening system.
Locating Wall Studs
Use a suitable stud finder or wall scanner and follow its operating instructions. Rather than assuming a stud must be a certain distance from the last one, identify the actual framing at the intended mounting area.
- Scan the area at the planned height.
- Mark both edges of a detected stud when your detector allows it.
- Identify the approximate center of the framing member.
- Scan the same area for metal or possible live wiring before drilling.
- Compare the stud locations with the mirror’s mounting points or cleat holes.
Knocking on a wall can provide a rough clue, but it is not a dependable substitute for locating the actual framing.
Choosing Heavy-Duty Anchors
If a stud is not available at a required mounting point, choose a heavy-duty anchor whose manufacturer approves it for your exact wall material and thickness.
For hollow drywall, toggle-style systems are one option because part of the anchor opens or locks behind the wallboard. However, these systems require adequate cavity clearance and a specific hole diameter. Their capacity also depends on wall condition, board thickness, fastener size, and how far the load sits from the wall.
Never assume that using more anchors automatically multiplies the capacity. Install exactly the quantity and pattern specified for the hanging system.
Measure the Hanging Height and Mark the Wall
Decide where you want the mirror to sit, taking nearby furniture, sight lines, switches, outlets, trim, and the mirror’s proportions into account. Eye-level guidelines can be useful as a starting point, but there is no safety requirement that a mirror’s center must sit at one specific height.
Once the visual position is set, measure from the mirror’s top edge to its actual load-bearing mounting points. For D-rings, measure the vertical and horizontal location of both rings. For wire, reproduce the wire position under the same type of tension it will have when hanging. For a cleat, measure to the engagement point specified by its manufacturer.
- Mark the desired mirror center or top-edge reference.
- Transfer the mounting-point measurements to the wall.
- Use a level to confirm the marks are horizontally aligned.
- Verify that the planned holes still match safe, suitable fastening locations.
- Recheck all measurements before drilling.
Drill Pilot Holes and Install the Hardware
Use the drill-bit diameter specified for the exact screw, anchor, masonry fastener, or hanging system. Do not automatically choose a bit “slightly smaller” than the anchor.
A screw going directly into wood may require a pilot hole sized for that screw and wood species. A hollow-wall anchor may require a much larger hole through the wallboard so the anchor can deploy behind it. A masonry fastener requires its specified masonry-bit diameter and drilling depth.
Keep the drill perpendicular to the wall unless the hardware instructions call for another angle. Wear eye protection, especially when drilling masonry, plaster, or tile.
Install each anchor or fastener exactly as directed. Some sit flush; others use a collar, channel, hook, or bracket that must remain in a particular position. Do not overtighten fasteners in drywall or plaster, because crushing or breaking the substrate can reduce holding strength.
Note: Frameless mirrors that are bonded directly to a wall with mirror mastic, clips, J-channel, or another glazing system require a different installation procedure. Do not substitute the framed-mirror instructions in this guide for a manufacturer-specified frameless installation.
Hang the Mirror Straight and Securely
Before lifting, clear the work area and make sure you can reach the mounting points without stretching, twisting, or standing in an unstable position. Use a helper if the mirror is bulky or difficult to control.
Mark Level Placement
Use the reference measurements you already established rather than guessing from the mirror’s visible top edge.
- Confirm the desired final position.
- Check both mounting marks with a level.
- Confirm the wall fasteners correspond to the mirror-side hardware.
- Verify the drilling area one final time.
If the mounting system uses a long cleat, check the cleat itself with a level before tightening all fasteners.
Align Mounting Points
Measure the spacing of the mirror’s D-rings, cleat, or other mounting points and reproduce that spacing accurately on the wall.
Check that the wall is reasonably flat and that trim, uneven plaster, tile edges, or other projections will not prevent the hanging system from engaging fully.
Use only hardware whose published application covers the mirror and substrate. If the mounting points do not land where the selected hardware can be installed safely, change the hanging system rather than forcing an unsuitable anchor into place.
Secure Final Position
With a helper when needed, lift the mirror from its frame rather than pulling on wire or small mounting fittings. Engage both mounting points or the full cleat before gradually releasing the mirror’s weight.
- Confirm the mirror is fully seated on the hanger, hooks, screws, or cleat.
- Use a level to check the final position.
- Look behind the frame where possible to confirm that D-rings or cleats are actually engaged.
- Check that the mirror sits evenly instead of hanging from one side.
- Add manufacturer-approved bumpers or lower restraints if the hanging system calls for them.
Check Stability Before You Finish
Once the mirror is mounted, inspect it without aggressively pushing or pulling on the glass. Check that the frame is seated correctly, the mounting hardware is not visibly deforming, and the wall around each fastener is not cracking, crushing, or pulling outward.
Step back and confirm that the mirror remains level. If it shifts easily, one mounting point appears more heavily loaded, or a fastener moves in the wall, take the mirror down and correct the installation instead of tightening an unsuitable fastener harder.
Reinspect the installation periodically, particularly if the mirror is bumped, moved, or exposed to repeated vibration. Tighten mirror-frame hardware only when the manufacturer permits it and replace damaged components rather than reusing them.
Avoid Common Heavy Mirror Mistakes
- Guessing the weight: Measure or verify the actual mirror weight.
- Using a universal safety percentage: Follow the selected hardware’s published installation and working-load information.
- Trusting the wall fastener but ignoring the frame: The mirror-side attachment must also carry the load.
- Assuming several anchors simply add their ratings together: Load may not be shared evenly.
- Using the wrong drill size: Follow the anchor or fastener instructions exactly.
- Drilling without scanning: Check for studs, metal, and possible electrical wiring first.
- Mixing hanging systems: Do not combine a cleat, wire, and extra hooks unless the manufacturer approves the setup.
- Mounting to damaged material: Repair or avoid soft drywall, loose plaster, cracked masonry, or another questionable substrate.
- Lifting alone when you cannot control the mirror: Use another person or professional handling equipment.
- Leaving a floor mirror unsecured: Use the manufacturer’s anti-tip or anchoring hardware.
Locations above beds, cribs, sofas, or other areas where people remain for long periods deserve extra caution because the consequences of a failed installation are greater.
Call a Pro for Oversized Mirrors
There is no single mirror weight or dimension that automatically separates a safe DIY job from a professional installation. The decision depends on the mirror, wall, access, hardware, and your ability to control the load.
Consider hiring an experienced installer or glazier when:
- the mirror is too heavy or awkward for the available people to lift safely;
- the frame does not appear strong enough for added hanging hardware;
- the wall material is unknown, damaged, or unusually thin;
- you need to drill through valuable tile, stone, difficult masonry, or another fragile finish;
- the required mounting points cannot be aligned with an approved fastening system;
- the mirror is being installed high on a wall or over a high-consequence area;
- hidden electrical, plumbing, or structural conditions are uncertain; or
- the mirror manufacturer requires professional installation.
A professional can evaluate the wall, select an appropriate hanging system, handle the mirror safely, and determine whether reinforcement or specialty hardware is needed.
What to Do With a Mirror That Is Too Heavy to Wall-Mount
A floor-mounted arrangement can be an alternative when the mirror was designed for that use, but do not simply lean a large mirror against the wall and leave it unsecured.
Use the mirror manufacturer’s anti-tip or anti-slide fittings and anchor them to the wall exactly as directed. Some floor mirrors are specifically designed to be tilted against a wall while mechanically restrained.
A sturdy stand or console can also support certain mirrors if the mirror manufacturer approves that configuration, but it should still be protected from tipping or sliding when required.
Frequently Asked Questions
What Is the Safest Way to Hang a Heavy Mirror?
Use a mounting system approved for the mirror’s actual weight, frame construction, wall material, and mounting configuration. Attach to structural framing when the system allows it, or use a properly rated wall anchor or hanger. Follow the manufacturer’s exact hole size, fastener count, spacing, and installation instructions instead of applying a generic percentage safety margin.
What Is the Best Anchor for a Heavy Mirror?
There is no single best anchor for every heavy mirror. The correct choice depends on whether the wall is drywall, plaster, solid masonry, hollow block, tile over another substrate, or wood framing. For hollow drywall, a rated toggle-type or specialty drywall hanger may be suitable. For masonry, use an anchor designed for that specific masonry. Always follow the anchor manufacturer’s wall-thickness, hole-size, clearance, and load instructions.
What Should I Do With a Mirror That Is Too Heavy to Hang Safely?
Use professional installation or, if the mirror was designed for floor use, follow the manufacturer’s instructions for anchoring it as a leaning or standing mirror. Do not leave a large mirror unsecured against a wall. If you cannot identify a safe load path from the mirror frame into suitable wall structure, stop and get professional advice.
Can Command Strips Hold a Heavy Mirror?
Some Command Picture Hanging Strip products are specifically approved for mirrors within published weight, dimension, surface, and installation limits. Other mirrors exceed those limits. Check the exact product packaging and instructions rather than assuming all adhesive strips have the same capacity, and never add extra strips in an attempt to exceed the manufacturer’s stated limit.
Can You Hang a Heavy Mirror on Drywall Without a Stud?
Yes, some anchors and drywall-specific picture hangers are designed for substantial loads without fastening into a wood stud. The hardware must be approved for the drywall thickness, mirror weight, and intended application, and the wallboard must be in sound condition. Do not treat bare drywall itself as the fastener.
Conclusion
You can hang a heavy mirror securely when you verify the actual weight, inspect the mirror’s frame and mounting points, identify the wall material, and install hardware specifically approved for that combination. Stud attachment is useful when the system permits it, while properly selected hollow-wall or masonry fasteners can work when structural framing is not available.
The most important rule is to follow the hanging-system manufacturer’s real installation data instead of relying on a universal 20%, 25%, 1.5×, 2×, or fixed-weight shortcut. Scan before drilling, use the specified hole size and fasteners, get lifting help when necessary, and use professional installation whenever the wall, frame, or load cannot be assessed confidently.
Sources
- 3M Command — current picture-hanging and heavy-mirror product limits, approved surfaces, and installation guidance.
- TOGGLER SNAPTOGGLE Technical Data — anchor drill sizes, wall-thickness requirements, substrate-dependent performance, and load-testing guidance.
- Bosch Professional — wall-scanner guidance for locating wood structure, metal, and possible live electrical cables before drilling.
- OOK Hardware — rated French-cleat systems and picture-hanging wire options.
- Hangman Products — heavy-duty interlocking mirror and picture-hanging systems.
- IKEA mirror safety guidance — wall-fixing requirements for compatible leaning and floor-standing mirrors.