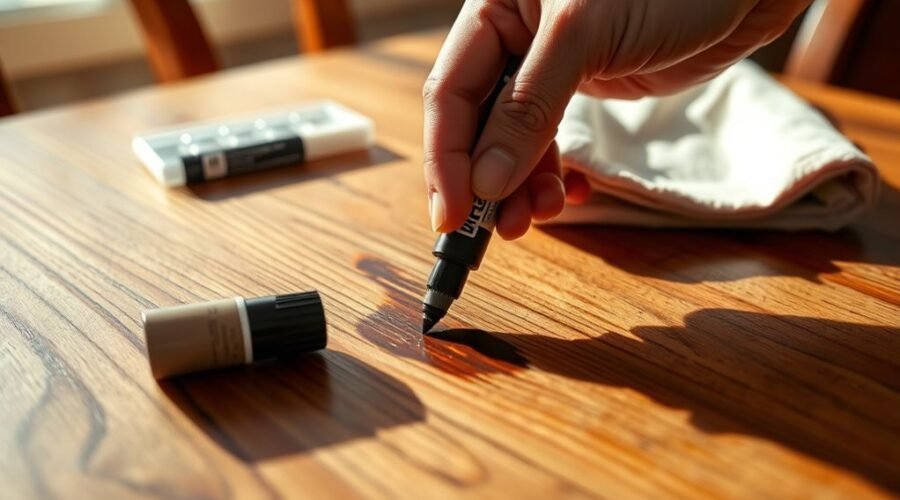
A scratched wood table can often be made much less noticeable without sanding the whole surface. The safest approach is to clean the area, determine whether the mark is only in the finish or has cut into the wood, and then use the least aggressive compatible repair. Light marks may respond to a finish restorer or touch-up marker, while narrow deeper scratches can often be concealed with matching wax filler.
Quick Answer
To fix scratches on a wood table without sanding, first clean and inspect the damage. Use a finish-compatible restorer or touch-up marker for light marks and a matching wax fill stick for narrow grooves. Test every product in a hidden spot first, and avoid solvents or abrasives when the existing finish is unknown.
Key Takeaways
- Start by deciding whether the scratch is in the clear finish, reaches the wood, or is actually a cloudy water or heat mark.
- Use the least aggressive repair that works; an unknown finish should never be treated blindly with alcohol, strong solvent, or steel wool.
- Restor-A-Finish should be used according to the manufacturer’s directions: test first, treat a small area, and wipe excess dry.
- Wax filler can hide a narrow groove, but a true gouge with missing wood may need professional filling and finish work.
- Antiques, loose veneer, cracked finishes, and valuable furniture deserve extra caution because an incorrect repair can reduce both appearance and value.
At a Glance
| Time Required | About 10–60 minutes for most cosmetic repairs, plus any product drying or curing time |
| Difficulty | Beginner for light scratches; intermediate for color and wax-fill repairs |
| Tools Needed | Soft cloths, cotton swabs, compatible touch-up marker or wax stick, plastic scraper; optional 0000 steel wool only when the product directions specifically allow it |
| Cost | Usually low; it depends on which repair products you already own and the type of finish |
What Scratch Type Are You Fixing?
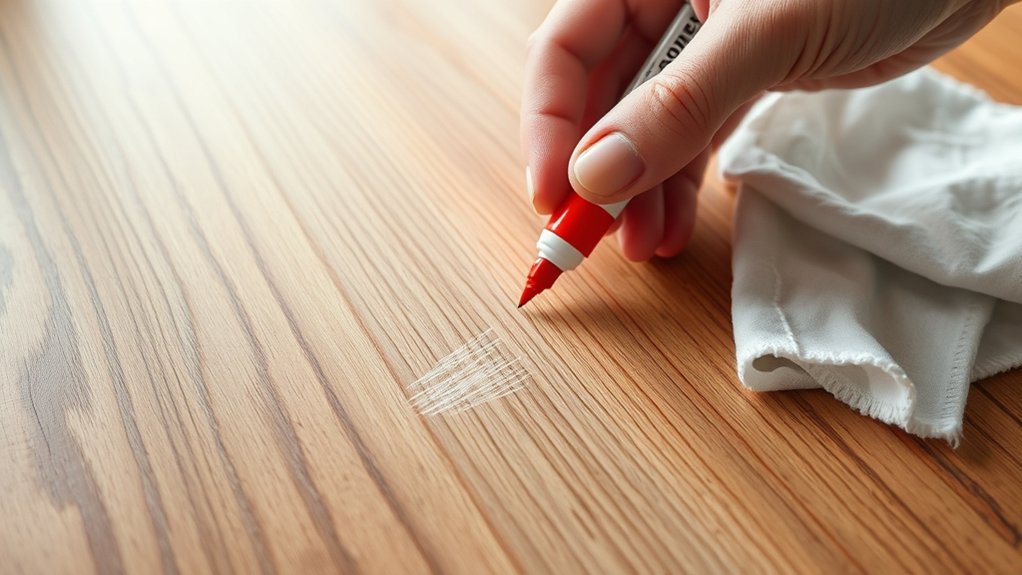
Before attempting any repair, identify what the mark has actually damaged. A line that looks like a scratch may be surface residue, a scuff in the finish, a color break that exposes lighter wood, a narrow groove, or a cloudy moisture mark. These problems need different treatments.
A practical first check is to clean the area, let it dry, and then run a fingernail very lightly across the mark. If the nail does not catch, the damage is probably limited to the finish. If it catches slightly, the finish may be broken and the upper wood fibers may be exposed. If the nail drops into an obvious groove, material has probably been removed.
Surface scratches usually affect the finish rather than the wood itself, so begin with cleaning and the least aggressive finish-compatible treatment instead of a strong solvent or abrasive.
Shallow color breaks may respond to a matching touch-up marker, wax repair crayon, or a compatible finish-restoration product. Narrow deeper scratches can often be filled cosmetically with wax. A true gouge, chipped edge, or missing wood requires a different repair and may not be fully correctable without leveling, finish work, or professional help.
Do not use rubbing alcohol as a general scratch remover. Shellac and some other coatings are alcohol-sensitive. The National Park Service guidance for wooden objects specifically distinguishes shellacked surfaces when discussing alcohol-based cleaning.
| What you see | Likely damage | Best no-sand starting point |
| Faint line; fingernail does not catch | Finish scuff or fine scratch | Clean, test, then use compatible wax, polish, or finish restorer |
| Light-colored line; slight catch | Finish broken; wood may be exposed | Matching touch-up marker or wax crayon applied only to the damaged line |
| Narrow groove | Deeper scratch | Matching wax fill stick, leveled carefully with a plastic scraper |
| Wide gouge, chip, or lifted veneer | Missing wood or structural surface damage | Stop before making it larger; professional repair is often the safest option |
Before You Start: Identify the Finish, Construction, and Value
The same scratch treatment is not safe for every wood table. Modern polyurethane, lacquer, shellac, oil, wax, painted surfaces, bare wood, and veneer can react differently to moisture, solvents, abrasives, and restorative products.
The Canadian Conservation Institute recommends determining what coating is present, whether it is stable, and how a cleaning method may affect it before treatment. That principle is especially important when the finish is old or unknown.
- Solid finished wood: often tolerates careful cosmetic touch-up when the coating is sound.
- Veneer: needs extra restraint because excessive moisture, abrasion, or scraping can loosen or cut through the thin decorative layer.
- Bare or unfinished wood: absorbs liquids readily, so ordinary wet-cleaning and oily scratch remedies can create staining.
- Antiques or heirlooms: may have original finishes whose historical and financial value exceeds the value of a perfectly invisible repair.
Warning: Stop DIY repair if the finish is flaking, crazed, sticky, lifting with the veneer, historically important, or unusually valuable. Also stop if a hidden compatibility test softens, discolors, or transfers finish onto the cloth.
Why Skip Sanding and Refinishing
Skipping sanding makes sense when the damage is small and the surrounding finish is still sound. A localized cosmetic repair can preserve the table’s original finish, color, patina, and surface character while avoiding unnecessary material removal.
Sanding is not inherently wrong, but it is irreversible. On veneer, antiques, molded edges, thin factory coatings, or an unknown finish, removing even a small amount can create a larger color or sheen mismatch than the original scratch.
Preserve Original Finish
Preserving the original finish is especially important on older or valuable furniture. The Canadian Conservation Institute notes that original finishes can have historical, aesthetic, and financial value and generally recommends maintaining them rather than stripping them unnecessarily.
For a minor scratch, start with cleaning, hidden testing, and a localized repair. Compatible products such as a color-matched touch-up marker, wax stick, or properly used finish-restoration product can reduce the contrast without removing the surrounding coating.
That approach keeps the intervention small. If it does not work, you can still move to a more involved repair later; removing finish first eliminates that option.
Avoid Dust And Damage
Sanding creates abrasive dust and removes part of the existing coating. On a small scratch, that can turn a narrow defect into a larger dull patch that then needs color and sheen matching.
A no-sand furniture scratch repair is also easier to control. Instead of altering the entire tabletop, you work only on the damaged line and judge the result after each small step.
This does not mean solvents, steel wool, or restorative products are automatically safer. They can also damage an incompatible finish, which is why a hidden test remains essential.
Skip Uneven Results
A localized repair often blends better than a partially sanded area because the surrounding finish remains untouched. The goal is not to make an old table look factory-new; it is to make the scratch less noticeable without creating a larger transition.
Color and sheen matter as much as filling the mark. A repair that is too dark, too glossy, or too dull may be more visible than the original damage.
For that reason, build color and filler gradually, inspect the area from normal viewing distance, and stop as soon as the scratch no longer draws attention.
Clean the Wood Table First
Begin by removing loose dust with a soft microfiber or cotton cloth. Dirt and grit can act like an abrasive if they are rubbed across the surface during repair.
On a sound modern finish, a slightly damp cloth or a very mild soap solution may be appropriate. Wring the cloth thoroughly, work in a small area, and dry the surface promptly. The Canadian Conservation Institute’s basic furniture-care guidance recommends regular dusting and cautions against unnecessary moisture, especially on older or unfinished wood.
Use moisture sparingly, work in small sections, and let the table dry completely before applying any scratch-repair material.
Do not make paint thinner and steel wool your default treatment for stubborn grime. A compatible mineral-spirit cleaning method can be useful on some stable finishes, but it should be tested first, used with proper ventilation, and kept away from flames or ignition sources.
If the finish is cracked, loose, veneered, sticky, or unknown, stay with gentle dust removal and seek qualified advice rather than experimenting with solvents.
Pro Tip: Clean first and inspect the mark again in daylight. Dirt, rubber transfer, wax buildup, and dried residue can imitate a scratch, and a mark that disappears during cleaning needs no further repair.
Use Restor-A-Finish on Flat Spots
Restor-A-Finish can be useful for some scratches, blemishes, oxidation, and worn-looking areas on an existing finish, but it should be treated as a finish-restoration product rather than a universal scratch filler.
According to the current Howard Restor-A-Finish directions, choose the closest color, test it in an inconspicuous spot, work on a small area at a time, and wipe the surface dry after treatment.
Prepare the Flat Surface
Make sure the tabletop is clean, dry, and free of loose dirt. Check whether the scratch is actually in the finish rather than a deep groove in the wood.
Choose a Restor-A-Finish shade that closely matches the existing wood tone. If you are unsure, the manufacturer recommends testing first so you can judge color, penetration, and compatibility before moving to the visible area.
- Use a clean, lint-free cloth.
- Protect nearby fabric, carpet, and flooring from drips.
- Work with the wood grain rather than across it.
Restor-A-Finish is meant to restore an existing finish. It is not a substitute for filling missing wood, repairing loose veneer, or rebuilding a chipped edge.
Apply Restor-A-Finish Evenly
Apply a small amount to a clean cloth and work on a limited area, following the grain. Do not pour it directly onto the tabletop.
Wipe off the excess rather than leaving a wet layer sitting on the finish. Howard describes the normal process as a controlled wipe-on, restore, and wipe-off treatment and warns against oversaturating the surface.
If a stubborn light scratch or white mark does not respond to a soft cloth, the manufacturer allows super-fine 0000 steel wool in some situations. Test first, use very light pressure, rub only with the grain, and stop immediately if the sheen changes.
High-gloss finishes deserve extra caution because 0000 steel wool can leave a dull patch. Do not automatically add polyurethane or another clear coat after Restor-A-Finish; if you plan to add a different coating, follow the manufacturer’s compatibility and waiting-time instructions.
Warning: Finish restorers contain solvents. Use them only as directed on the label, provide ventilation, keep them away from sparks and open flames, and wear the protective equipment recommended by the manufacturer.
Fix Light Scratches With Vinegar and Olive Oil
A mixture of white vinegar and olive oil is a common household trick for making a very light scratch look darker and less obvious, but it should not be confused with a durable finish repair.
The oil can temporarily change the way light reflects from a pale scratch. It does not rebuild a damaged coating, fill missing wood, or restore the protective film. The Canadian Conservation Institute also cautions that oils, polishes, and other furniture-care mixtures can leave residue or create future finish-compatibility problems.
If you still choose to try the method on an ordinary, low-value piece with a sound finish, test a tiny hidden area first. Apply only a very small amount with a cloth, wipe away all residue, and judge the result after the surface has returned to its normal appearance.
- Do not soak the scratch.
- Do not use the mixture on bare or unfinished wood.
- Do not use it on a valuable antique or unstable finish.
- Do not assume an improved appearance means the scratch has been repaired.
For a repeatable cosmetic repair, a compatible touch-up marker, paste wax, wax crayon, or manufacturer-approved finish restorer is usually easier to control.
Fill Deep Scratches With Wax Sticks
A matching wax fill stick can be a useful no-sand solution for a narrow scratch or groove because it adds material where the surface has been cut.
First clean the area and let it dry. Choose a wax color that matches the surrounding wood as closely as possible; if necessary, a slightly lighter base can be darkened gradually with a second compatible shade.
Press the wax across and into the groove until it is slightly overfilled. Then use a plastic scraper, plastic card edge, or another non-marring tool to remove excess from the surrounding finish.
Buff lightly with a soft cloth and inspect the color and sheen. A wax-filled scratch is primarily a cosmetic repair. It works well when the groove is narrow and the surrounding surface is stable.
Note: A wide gouge, crushed corner, missing wood, or damaged veneer is different from a narrow scratch. Wood filler or epoxy repairs usually require shaping, leveling, and refinishing, so a strictly no-sand DIY repair may not produce an invisible result.
Scuff the Finish With Fine Steel Wool
Fine 0000-grade steel wool should not be treated as a routine preparation step for every scratched table. It is an abrasive, and even very fine steel wool can change the sheen of a finish.
Use it only when the instructions for the chosen product specifically call for it and a hidden test shows that the finish tolerates the treatment.
- Rub only in the direction of the wood grain.
- Use the lightest pressure that produces a result.
- Check the surface after a few strokes rather than working continuously.
- Keep steel wool away from live electrical current and wear appropriate hand and eye protection.
Howard specifically warns that 0000 steel wool can dull high-gloss finishes. If a soft cloth is sufficient, there is no benefit in adding an abrasive step.
After any compatible steel-wool treatment, remove loose fibers and residue completely before applying another product.
Match the Finish on the Repaired Spot
A repair can have the correct color and still remain obvious if its sheen does not match the surrounding table. Look at both color and gloss level before deciding that the job is finished.
Wood species, stain, age, oxidation, lighting, and the existing clear coat can all change how a touch-up color appears. That is why hidden testing and gradual application matter.
Match Existing Sheen
Identify whether the surrounding surface appears matte, satin, semi-gloss, or glossy. Then choose a compatible repair material that does not create an obvious bright or dull spot.
A very light, compatible wax treatment may help unify minor differences on a stable clear finish. The National Park Service guidance on waxing wooden objects notes that paste wax can create a protective layer on stable clear finishes, but it can also change sheen, so it should be applied sparingly.
- Judge sheen from several angles.
- Let the repair dry or set before deciding whether another application is needed.
- Do not use steel wool merely to force a glossy area to look satin unless the finish and repair system specifically allow it.
A subtle repair that is slightly imperfect is usually preferable to repeatedly abrading the surrounding original finish.
Blend Color Carefully
Choose a wood touch-up marker, stain marker, or wax color that closely matches the table. Test it underneath an edge, behind an apron, or in another inconspicuous place.
Apply color only where the scratch exposes lighter material. Use short strokes and wipe excess from the undamaged finish before it dries.
Check the color under the same lighting normally used in the room. If the first pass is too light, build the color gradually rather than applying a very dark shade in one heavy stroke.
Let the color dry fully before adding any compatible protective material. A successful touch-up should reduce contrast without creating a dark outline around the scratch.
Test Inconspicuous Areas
A hidden test is one of the most important parts of furniture scratch repair. It tells you whether a cleaner, marker, wax, finish restorer, or other treatment changes the color, gloss, softness, or stability of the existing coating.
- Apply a very small amount in a hidden location.
- Watch for darkening, whitening, tackiness, color transfer, or loss of gloss.
- Let the test area return to its fully dry state before judging it.
If the test area becomes sticky, cloudy, lighter, darker, or visibly damaged, stop and choose another method.
For an antique, an uncertain coating, or a table with significant monetary or sentimental value, a failed hidden test is a good reason to consult a furniture conservator instead of trying progressively stronger products.
A Safe No-Sand Repair Workflow
- Dust and clean first. Remove anything that could simply be dirt or surface transfer.
- Inspect the scratch. Decide whether it is a finish scuff, exposed wood, a narrow groove, or a larger gouge.
- Check the table. Look for veneer, loose finish, bare wood, antique construction, or signs that the piece should not receive a DIY chemical treatment.
- Test the repair product. Use a hidden area and wait long enough to judge the result accurately.
- Use the least aggressive repair. Start with a cloth-based treatment or localized color touch-up before considering wax filler or an abrasive.
- Blend color and sheen. Work slowly and avoid spreading product over intact finish unnecessarily.
- Stop when the scratch stops attracting attention. Chasing absolute invisibility can turn a small repair into a larger damaged patch.
Troubleshoot a Repair That Still Looks Obvious
If the scratch is less visible but the repair still stands out, identify what is mismatched before applying more material.
The repair is too dark: Stop adding color. Wipe away removable excess according to the product instructions. Do not reach for a strong solvent unless the finish and product manufacturer specifically permit it.
The repair is too light: Add color gradually with a compatible marker or wax shade. Small layered adjustments are easier to control than one dark application.
The spot is too shiny: First let the product dry or cure completely. Do not immediately dull it with steel wool because the abrasion may enlarge the repair area.
The spot is too dull: Check whether the surrounding finish is waxed or polished and whether a compatible light buffing step is appropriate.
The surface turns cloudy or sticky: Stop. A chemical incompatibility may be affecting the existing finish. Do not continue adding products.
The wax will not stay in the groove: The scratch may contain oil, polish residue, or loose material. Clean it using a method that is safe for the finish, let it dry, and refill only after the groove is stable.
Clean Hardware Safely
Hardware should be cleaned separately from the surrounding wood whenever possible. Metal cleaners and polishes may contain abrasives or chemicals that can mark the furniture finish.
The Canadian Conservation Institute recommends removing metal hardware before polishing when practical because metal-cleaning compounds can damage nearby wood and coatings.
For routine care, start by buffing hardware gently with a clean, dry cotton cloth. If mild cleaning is needed, use a method appropriate to the actual hardware material and avoid letting moisture or cleaner run onto the wood.
Vintage plastics such as Bakelite and old plated hardware can be sensitive to strong cleaners. Do not assume that a metal polish, abrasive pad, or solvent is safe simply because the hardware looks dull.
After cleaning, reinstall removable hardware only when it and the surrounding wood are fully dry.
When Should You Call a Furniture Conservator?
A small finish scratch on an ordinary table is usually a reasonable DIY project. Professional help becomes more sensible when the damage or the object itself raises the stakes.
- The table is an antique, collectible, designer piece, or family heirloom.
- The original finish is cracked, flaking, crazed, sticky, or unusually thin.
- Veneer is lifting, blistered, chipped, or sanded through.
- The scratch is actually a deep gouge with missing wood.
- A solvent or repair-product test softens or transfers the finish.
- The color and sheen cannot be matched without expanding the repaired area.
- Previous repairs have left silicone, wax, oil, or unknown coatings on the surface.
Professional conservation is not necessary for every scratch, but restraint is valuable when an incorrect DIY repair could permanently remove original material.
Prevent New Scratches on Wood Tables
Preventing scratches is easier than blending them later. Protect the finish from friction, grit, heat, moisture, and repeated dragging of hard objects.
Use coasters and placemats under glasses, mugs, dishes, planters, and serving pieces. Add felt or other soft protective pads under lamps, decorative objects, electronics, and anything that is moved across the tabletop.
Dust with a soft cloth before wiping the surface more firmly because dry grit can contribute to fine abrasion. Deal with spills promptly so moisture does not sit on the finish.
A compatible paste wax can provide an additional sacrificial barrier on some stable clear finishes, but more is not better. Avoid repeated heavy polish buildup, and do not wax bare wood or an unstable finish simply because the surface looks dry.
The Canadian Conservation Institute also recommends keeping furniture away from unnecessary direct sunlight, heat sources, and large environmental fluctuations where possible.
- A glass should rest on a coaster instead of directly on the finish.
- Decorative objects should have clean, soft pads underneath them.
- Lift objects instead of dragging them across the grain.
Frequently Asked Questions
Can You Get Scratches Out of a Wood Table?
Many scratches can be made much less visible. Fine scratches limited to the finish may respond to compatible wax, polish, a finish restorer, or a touch-up marker. Narrow grooves can often be filled with matching wax. A deep gouge with missing wood may require a more involved repair and may not disappear completely without refinishing.
Does WD-40 Take Scratches Out of Wood?
WD-40 Multi-Use Product may change the appearance of some scuffs or dull wood surfaces, but it does not rebuild a scratched furniture finish or replace missing wood. The manufacturer lists wood among compatible materials and recommends spot testing, but a dedicated, finish-compatible repair product gives better control for furniture scratches.
Does White Vinegar and Olive Oil Fix Wood Scratches?
It may temporarily make a very light scratch look darker or less obvious, but it is not a true finish repair and will not fill a groove. Oils can also leave residue. Test first, avoid bare wood and valuable furniture, and use a compatible touch-up product when you want a more controlled repair.
How to Repair Deep Scratches in Wood Furniture Without Sanding?
For a narrow deep scratch, press a color-matched wax fill stick into the groove, level the excess with a plastic scraper, and blend the sheen carefully. A true gouge or chip with missing wood may need stainable filler, shaping, color matching, and finish work, so a completely no-sand repair may be cosmetic rather than structural.
Can I Use Rubbing Alcohol on a Scratched Wood Table?
Do not use rubbing alcohol as a universal scratch treatment. Alcohol can soften or dissolve alcohol-sensitive finishes such as shellac. Unless you know the finish and the manufacturer specifically permits alcohol, choose a gentler repair method and test it in an inconspicuous spot first.
When Is a Scratch Too Deep for a DIY Repair?
Consider professional repair when the scratch becomes a wide gouge, exposes or loosens veneer, removes a corner, crosses a valuable antique finish, or cannot be color-matched without treating a large surrounding area. Professional help is also appropriate when a hidden product test softens or discolors the original finish.
Conclusion
Most everyday scratches on a wood table do not require sanding the entire surface. Start by cleaning and identifying the damage, test every treatment in a hidden area, and use the least aggressive compatible repair. A finish restorer or touch-up marker may reduce a light mark, while a matching wax stick can disguise a narrow groove. Avoid treating rubbing alcohol, steel wool, solvents, or household oil mixtures as universal solutions because the existing finish determines what is safe.
When veneer is lifting, a gouge has removed wood, the finish reacts badly during testing, or the table is valuable or historically important, stop before making the repair larger. Careful handling, coasters, protective pads, gentle dusting, and prompt spill cleanup will also reduce the need for future repairs.
Sources
- Canadian Conservation Institute — Basic Care: Furniture and Objects Made of Wood — supports cleaning, handling, moisture, finish preservation, and preventive-care guidance.
- Canadian Conservation Institute — Care of Furniture Finishes — supports finish identification, cautious cleaning, original-finish preservation, and concerns about polish/oil residue.
- U.S. National Park Service — Waxing Furniture and Wooden Objects — supports cautious paste-wax use on stable clear finishes and sheen considerations.
- Howard Products — Restor-A-Finish Directions — supports color matching, hidden testing, wipe-on/wipe-off application, and limited 0000 steel-wool use.
- WD-40 — Multi-Use Product Surface Guidance — supports the distinction between wood compatibility or scuff cleaning and actual scratch repair.