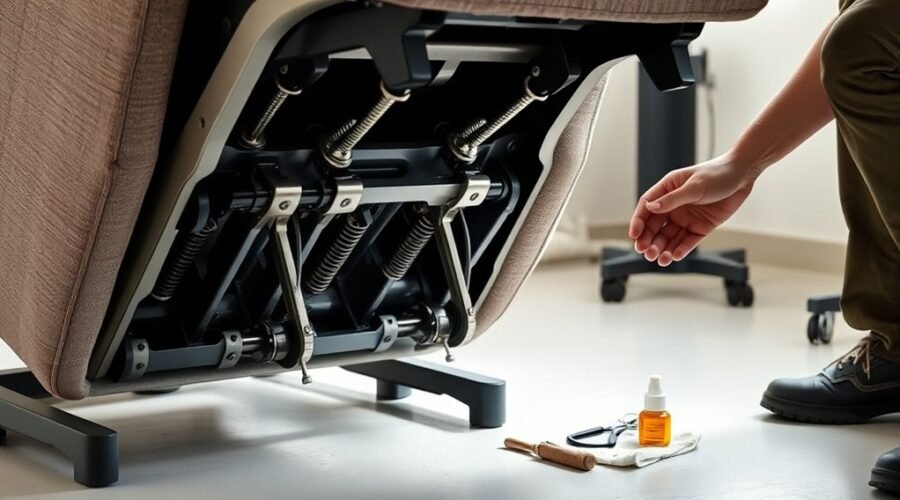
A recliner mechanism stays smoother and easier to operate when dust is kept away from the linkage, loose hardware is addressed early, and any lubrication follows the chair manufacturer’s instructions. Manual and power recliners use different mechanisms, so identify your model before working underneath it. Squeaking, stiffness, uneven movement, damaged wiring, or a chair that leans to one side are signs that inspection is due.
Quick Answer
Maintain a recliner mechanism by keeping the underside and moving linkage clean, checking accessible fasteners and cables, and using only the lubricant and lubrication points approved for that specific model. Unplug power recliners before cleaning or inspection, keep hands away from moving parts, and stop using the chair if wiring, structural parts, or the mechanism is damaged.
Key Takeaways
- Vacuum dust, pet hair, crumbs, and loose debris from around the mechanism before assuming the chair needs lubricant.
- Do not treat silicone spray as a universal recliner lubricant. Some manufacturers specify silicone, while others specify products such as clear mineral oil.
- For a power recliner, disconnect power before cleaning, inspecting, moving, or servicing the chair.
- Keep fingers, children, pets, cords, rugs, and other objects away from the mechanism and footrest travel path.
- Persistent grinding, bent linkage, broken springs, damaged wiring, or structural leaning usually calls for repair rather than more lubricant.
At a Glance
| Time Required | About 20–30 minutes for a basic visual inspection and cleaning; troubleshooting or repairs can take longer. |
| Difficulty | Easy for cleaning and visual inspection; moderate to professional-level for mechanism, spring, frame, motor, or electrical repairs. |
| Tools Needed | Vacuum with brush or crevice attachment, soft cloth, flashlight, and the correct screwdriver or wrench. Use lubricant only if the manufacturer specifies one. |
| Cost | Usually minimal for cleaning and inspection if you already own basic tools; replacement parts and professional service are extra. |
Why Recliner Mechanisms Get Stiff
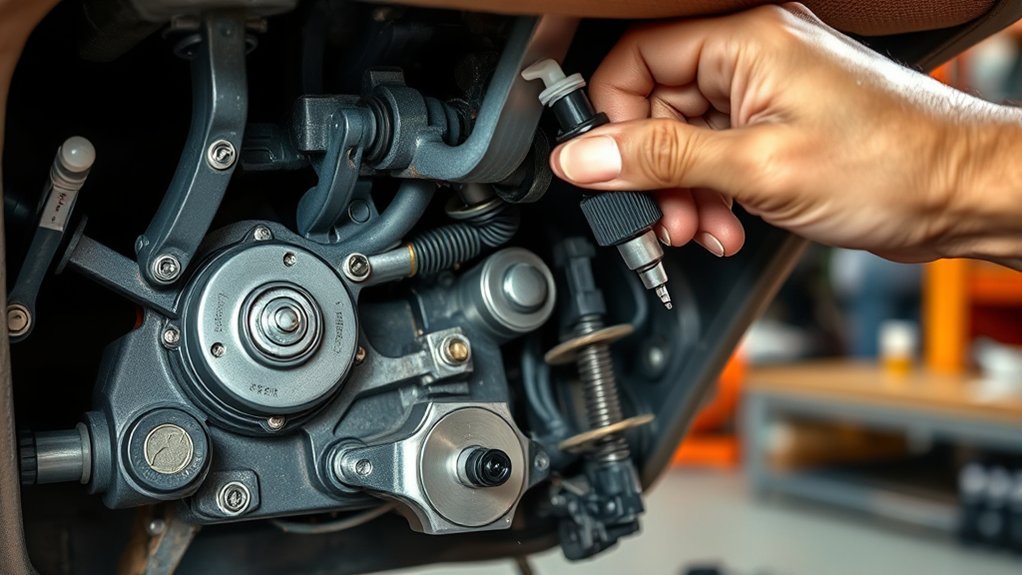
Recliner mechanisms can become stiff when dust, pet hair, crumbs, or other debris interferes with hinges, tracks, linkages, cables, or the footrest assembly. Friction can also increase when a manufacturer-approved lubrication point becomes dry.
Wear is another cause. Springs, cables, pivot pins, brackets, bushings, and mounting hardware can loosen or deteriorate after repeated cycles. A loose mounting point may let the mechanism shift slightly instead of moving in a straight, controlled path.
Stiffness does not always mean the mechanism needs lubricant. Some recliners include a factory-designed tension adjustment that changes how much effort is needed to recline. For example, certain La-Z-Boy manual recliners use adjustable wing nuts or thumb wheels for reclining tension. Those adjustments must be made according to the product instructions rather than by randomly tightening mechanism hardware.
Moisture, corrosion, contamination, damaged linkage, a binding cable, or a chair sitting unevenly can also change how the mechanism feels. The safest approach is to inspect first, identify the source of resistance, and then perform only the maintenance approved for that chair.
Pro Tip: If a recliner suddenly becomes harder to operate, look for an obstruction, loose fastener, cable problem, or alignment issue before applying lubricant. More lubricant will not repair a bent bracket, damaged spring, or failing actuator.
Before You Start: Recliner Maintenance Safety
Recliner mechanisms contain moving steel linkages, springs, footrest assemblies, and pinch points. Keep your hands and fingers away from the mechanism whenever the chair is moving, and keep children and pets away from the underside of the recliner.
For a power recliner or lift chair, disconnect the electrical plug before cleaning, moving, inspecting, or servicing the mechanism. Do not work underneath a powered chair while another person operates the controls.
Warning: Stop using a power recliner if its power supply, cord, plug, connector, control, or wiring is damaged, pinched, wet, unusually hot, or producing an unusual odor. Do not open a sealed motor or power supply unless the manufacturer specifically identifies it as user-serviceable.
Provide enough clearance for the back and footrest to travel without hitting a wall, table, rug, power cord, toy, or other object. If the manufacturer requires the chair to be tilted or repositioned to access the underside, follow that model’s instructions and use help when the chair is too heavy to control safely.
How to Clean the Recliner Mechanism
Cleaning begins with removing loose material from the underside, hinges, linkage, brackets, and surrounding floor. Dust and debris can hide a loose fastener or become trapped where metal parts move past each other.
Use a vacuum with a brush or crevice attachment instead of blowing debris deeper into the mechanism. Wipe accessible non-electrical surfaces with a lightly damp cloth when needed, then allow them to dry. Avoid saturating pivots, motors, switches, connectors, upholstery, or unfinished wood.
Clear tangled cords and loose objects only while the chair is stationary and, on powered models, unplugged.
Remove Dust And Debris
Vacuum under and around the chair regularly enough to prevent visible buildup. Homes with pets, children, carpeting, or frequent recliner use may need cleaning more often than lightly used rooms.
Pay particular attention to the floor beneath the mechanism, linkage arms, brackets, and areas where pet hair or fibers can collect. Remove coins, toys, pens, cables, and other loose objects that could enter the footrest or linkage path.
A monthly housekeeping check is a practical routine for many homes, but it is not a universal manufacturer requirement. Adjust the interval to the chair’s environment and follow any schedule in the owner’s manual.
Wipe Moving Parts
After loose debris has been removed, wipe accessible metal surfaces with a soft cloth. A lightly damp cloth can remove surface grime, but do not leave water pooled around pivots, wiring, connectors, switches, or motors.
While cleaning, inspect for rust, metal shavings, bent linkage, cracked brackets, loose fasteners, damaged cables, or unusual wear. Those signs are more useful than automatically adding lubricant.
If a manufacturer-approved lubrication point appears dry or noisy, use only the product and application method specified for that chair. Wipe away excess lubricant so it does not drip onto flooring or upholstery or collect unnecessary dust.
Clear Obstructions Carefully
Inspect the underside while the chair is stationary. For a power recliner, disconnect it from power first. Clear debris, loose objects, or misplaced cords that could interfere with the mechanism, and make sure the chair has enough clearance to operate.
| Task | Tool | Result |
|---|---|---|
| Inspect underside | Flashlight and visual check | Spot debris, damage, or hazards |
| Vacuum debris | Brush or crevice attachment | Remove loose particles |
| Wipe components | Soft, lightly damp cloth | Reduce surface buildup |
| Check wires | Visual inspection only | Find pinching, cuts, or poor routing |
| Test motion | Normal chair controls | Check for smooth, even travel |
After cleaning, restore the chair to its normal operating position before testing it. Keep hands, tools, clothing, and other objects away from the moving mechanism during the test.
How to Lubricate Recliner Joints and Tracks
Lubrication should begin with the owner’s manual, not with a universal spray recommendation. Different manufacturers and mechanism designs specify different products and lubrication points.
For example, La-Z-Boy states that when lubrication is needed on certain recliner mechanisms, it recommends clear mineral oil and says not to lubricate rivet locations. Champion’s Care Cliner manual, by contrast, specifies silicone-based lubricant on its mechanism pivot points. These instructions apply to their respective products and illustrate why the chair manufacturer’s guidance comes first.
There is no single “best” lubricant for every recliner mechanism. Use the lubricant, quantity, and application points specified for your exact chair.
Before applying an approved lubricant, vacuum away grit and protect nearby upholstery and flooring with a cloth. Apply only the amount needed at the specified pivot, hinge, slide, or other approved contact point.
After application, return the chair to its normal position and operate it through its normal range so the approved lubricant can distribute across the intended contact surfaces. Wipe away excess.
What Not to Lubricate
Do not spray lubricant indiscriminately across the entire mechanism. Rivets, sealed bearings, plastic components, electrical connectors, switches, motors, actuator housings, and factory-greased assemblies may have different requirements.
Avoid assuming that a penetrating oil, silicone spray, white lithium grease, or general-purpose household oil is suitable simply because it reduces friction elsewhere. Product compatibility, dust attraction, plastics, coatings, and factory lubrication all vary.
Note: If the manual does not identify owner lubrication as a maintenance step, contact the manufacturer or dealer before adding a lubricant. A squeak can come from loose hardware, upholstery contact, alignment, a spring, or a worn component rather than a dry joint.
Tighten Screws, Bolts, and Loose Parts
Inspect accessible screws, bolts, mounting points, and other fasteners for obvious looseness. Repeated movement can allow some hardware to lose tension, which may create rattles, shifting, or uneven motion.
Use the correct screwdriver, socket, or wrench and follow manufacturer torque or adjustment instructions when they are provided. A fastener should not simply be tightened as hard as possible. Over-tightening can damage wood, strip threads, distort brackets, compress an adjustment spring, or restrict movement.
Pay particular attention to accessible mechanism mounts, seat-frame connections, base hardware, and rocking or swivel components. If a bolt repeatedly loosens, a mounting hole is damaged, or the frame is cracked, tightening alone is not a reliable repair.
After adjustments, return the chair to its normal position and test it without placing hands near the operating mechanism. Stop if the chair shifts abnormally, binds, or makes a new grinding or popping noise.
Check Recliner Wires and Motor
Power recliners add a power supply, wiring, controls, connectors, and one or more actuators or motors to the mechanical linkage. These components require a different level of caution than a manual recliner.
Unplug the chair before inspecting the underside. Look for crushed, frayed, cut, overheated, wet, or pinched wiring. Check that cords are routed away from the mechanism and are not trapped under the chair or where the footrest can catch them.
Connections that are designed for normal owner access should be fully seated according to the manual. Do not open sealed connectors, motors, power supplies, switches, or actuator housings simply to inspect them.
After the visual check, restore the chair to its normal position, reconnect power, and operate each normal function while staying clear of the mechanism. Hesitation, uneven travel, repeated stopping, clicking, grinding, or loss of power may indicate an obstruction, poor connection, overloaded mechanism, actuator problem, or other fault.
Consult the product manual for that model’s troubleshooting sequence. If the power supply, electrical cord, plug, connector, switch, motor, or wiring is visibly damaged, stop using the chair and contact the manufacturer, dealer, or a qualified furniture-repair technician.
Early Signs Your Recliner Needs Repair
Early warning signs include a reclining motion that suddenly needs more force, a footrest that does not travel evenly, new squeaks or grinding sounds, looseness in the seat or base, intermittent power operation, or leaning that was not present before.
These symptoms do not identify one specific failed part. They are signals to clean, inspect, check the manual, and isolate the source before the problem becomes worse.
| Symptom | Possible Causes | Safe First Check |
|---|---|---|
| Stiff movement | Debris, tension setting, dry approved lubrication point, binding cable, worn linkage | Clean, inspect, and check the manual before lubricating |
| Squeak | Friction, upholstery contact, spring contact, loose hardware | Locate the noise before applying anything |
| Pop or clunk | Loose mount, worn joint, bent part, spring or linkage movement | Inspect accessible hardware and stop if a structural part is damaged |
| Uneven leaning | Frame damage, loose mechanism mount, spring/support failure, cushion wear | Check floor level, frame, base, mounts, and seat support |
| Power recliner stops | Power loss, loose accessible connector, obstruction, actuator or power-supply fault | Unplug, inspect for damage/obstruction, then follow the manual |
Stiff Reclining Motion
A stiff reclining motion often points to contamination, alignment, tension adjustment, a binding cable, a worn component, or an approved lubrication point that has become dry.
| Check | Action |
|---|---|
| Moving parts | Inspect for dust, debris, bending, and interference |
| Joints | Lubricate only manufacturer-approved points if required |
| Fasteners | Tighten accessible loose hardware correctly |
| Tension adjustment | Follow the model-specific adjustment procedure |
If resistance remains after cleaning and the approved checks, inspect the frame, springs, cables, mounts, and linkage for visible wear. A damaged or deformed component may need replacement rather than lubrication. Do not force a recliner through a stiff spot; forcing it can increase damage.
Unusual Squeaks Or Pops
A new squeak can come from friction at a pivot, spring contact, upholstery rubbing, a loose fastener, or another contact point. First identify where in the movement the sound occurs.
If the manufacturer specifies lubrication for that exact point, apply the approved product sparingly. Do not assume silicone spray is correct for every mechanism.
A pop, knock, or clunk that repeats at the same point in the stroke deserves closer inspection for looseness, excessive play, misalignment, or a bent component. Persistent noise after cleaning and approved maintenance may indicate a worn spring, cable, pivot, mounting point, or linkage that needs repair.
Uneven Leaning Or Sagging
Uneven leaning can come from a damaged frame, loose mechanism mount, worn spring or support system, uneven flooring, bent base component, or degraded seat cushioning.
Inspect the base and visible frame for cracks, bends, looseness, or movement between components. Tighten only accessible hardware that the manufacturer permits the owner to service.
The seat cushion also deserves attention because compressed foam, damaged webbing, or a failed spring can make the chair feel tilted even when the reclining linkage remains straight.
Follow the manufacturer’s occupant and weight limits. If the frame or mechanism is cracked, bent, unstable, or separating from its mounts, stop using the chair until it is repaired.
When to Stop DIY Maintenance
Cleaning, visual inspection, clearing an obstruction, and tightening approved accessible fasteners are reasonable owner tasks on many recliners. More serious faults should not be treated as routine maintenance.
Contact the manufacturer, dealer, or qualified furniture technician when you find a broken spring, cracked frame, bent linkage, stripped mounting point, damaged actuator, repeated electrical shutdown, burnt smell, damaged power cord, wet electrical component, or a mechanism that moves unpredictably.
Power-recliner motors and power supplies may contain no user-serviceable internal parts. Opening them can create an electrical hazard and may affect warranty coverage.
Recliner Maintenance Schedule
A maintenance schedule is useful, but it should not override the chair’s manual. The intervals below are practical household checks rather than universal manufacturer service requirements.
| When | Maintenance |
|---|---|
| About monthly or when debris is visible | Vacuum beneath the chair, clear the operating path, and look for loose objects, pet hair, or cord interference. |
| Periodically | Inspect accessible fasteners, mounts, springs, cables, linkage, and frame condition. |
| When squeaking or stiffness appears | Clean and identify the source; lubricate only if the manufacturer specifies the product and location. |
| For power models | Inspect cords, plugs, accessible connectors, and routing regularly; unplug before cleaning or underside inspection. |
| Immediately after a new fault appears | Investigate grinding, popping, leaning, electrical interruption, damaged wiring, or abnormal movement instead of waiting for the next scheduled check. |
Rotate or fluff removable cushions when appropriate to distribute wear, and keep the chair on a stable, level surface. Consistent observation is more useful than blindly applying lubricant on a fixed calendar.
Frequently Asked Questions
How to Lubricate a Recliner Mechanism?
First clean loose dust and debris from the accessible mechanism and identify the lubrication instructions for your exact recliner. Protect the floor and upholstery, apply only the manufacturer-approved lubricant to the specified points, return the chair to its normal position, cycle the mechanism, and wipe away excess. Do not spray every pivot or rivet by default.
What Is the Best Lubricant for a Recliner?
The best lubricant is the one approved by the recliner manufacturer for that mechanism. There is no universal answer. For example, La-Z-Boy recommends clear mineral oil when lubrication is needed on certain mechanisms, while another manufacturer, Champion, specifies silicone lubricant for particular Care Cliner pivot points. Follow the product manual rather than choosing lubricant by category alone.
What Is the Most Common Problem With Recliners?
There is no reliable industry-wide dataset proving one failure is the most common. Common owner-visible problems include stiffness, squeaking, a footrest that will not open or close correctly, loose movement, leaning, a jammed cable or linkage, and power loss on electric models. The correct repair depends on the underlying cause.
How to Fix Your Recliner Mechanism?
Start by identifying the symptom and checking for debris, a loose accessible fastener, an obstruction, a tangled or misplaced cable, or another visible problem. Clean the mechanism and perform only the adjustments or lubrication approved by the manufacturer. Broken springs, bent linkage, frame damage, stripped mounts, damaged wiring, or faulty power components generally require replacement parts or professional service.
How Often Should a Recliner Mechanism Be Lubricated?
There is no universal three-month or six-month interval for every recliner. Follow the maintenance schedule in the chair’s manual. If the manufacturer does not call for routine owner lubrication, inspect and clean the mechanism periodically and seek model-specific guidance before applying a product.
Why Does My Power Recliner Stop Moving?
Possible causes include loss of outlet power, a disconnected accessible plug, an obstruction, pinched wiring, a damaged power supply, or an actuator or control fault. Unplug the chair before looking underneath it. If wiring or electrical components are damaged, or the problem repeatedly returns, stop using the chair and follow the manufacturer’s service procedure.
Sources
- La-Z-Boy Customer Care FAQ — manufacturer guidance on recliner mechanism lubrication, including clear mineral oil and excluded rivet locations.
- La-Z-Boy Product Manuals — current manufacturer library for model-specific operating, adjustment, electrical, and safety instructions.
- La-Z-Boy Power Recliner Operating Instructions — electrical safety, cord inspection, moving-part hazards, unplugging, and service guidance.
- La-Z-Boy General Operating Instructions — mechanism safety, clearance, moving-part hazards, and reclining-tension adjustment guidance.
- Champion Care Cliner Owner’s Operating and Maintenance Manual — example of a manufacturer that specifies silicone-based lubricant for designated mechanism pivot points, demonstrating why lubricant instructions are model-specific.
Conclusion
Smooth recliner operation depends on keeping the mechanism clean, catching looseness or damage early, and following the maintenance instructions for the specific chair. Dust, obstructions, loose mounts, worn linkage, cables, springs, and power components can all create resistance or unusual movement.
The biggest mistake is treating every squeak or stiff spot with the same lubricant. Inspect first and use only manufacturer-approved products and locations. For powered recliners, unplug before underside work and stop using the chair if wiring or electrical components are damaged. With sensible cleaning, inspection, and timely repair, a recliner mechanism can remain quieter, safer, and more dependable over years of use.