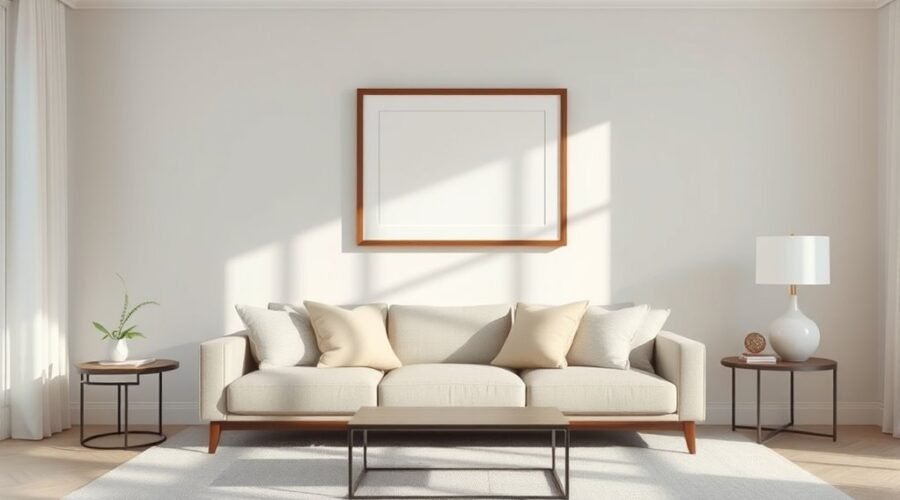
Getting the scale above your sofa right is easier when you treat the sofa and artwork as one visual group. Start with the artwork about 6 to 10 inches above the sofa back and aim for a total art width of roughly 60% to 75% of the sofa. Then step back and adjust for the artwork’s height, your ceiling, and the room around it.
Quick Answer
For most sofas, start with the art 6 to 10 inches above the sofa back and make the piece or grouping about 60% to 75% as wide as the sofa. Center it over the sofa, not the wall. Treat 57 to 60 inches to the artwork’s center as a reference, not an absolute rule.
Key Takeaways
Key Takeaways
- Leave about 6 to 10 inches between the sofa back and the bottom of the artwork as a practical starting point.
- Size a single piece or full grouping to roughly 60% to 75% of the sofa width; about two-thirds is an easy default.
- Center the artwork over the sofa or the main seated section, not automatically over the entire wall.
- Use the 57-to-60-inch eye-level guideline as a cross-check. Above furniture, keeping the artwork connected to the sofa usually matters more.
- For a gallery wall, treat all frames and the gaps between them as one overall shape.
- Choose hanging hardware for the artwork’s actual weight and wall type rather than relying on one nail or adhesive product for every installation.
At a Glance
| Time Required | About 20–45 minutes for measuring, testing the layout, and hanging a typical piece |
| Difficulty | Easy to moderate, depending on artwork weight and wall construction |
| Tools Needed | Tape measure, pencil, painter’s tape, level, appropriate hanging hardware, and a stud finder or drill when required |
| Cost | Often $0–$30 for basic hanging supplies if you already own the artwork; specialty anchors or heavy-duty hardware can cost more |
How High Should Art Hang Above a Sofa?
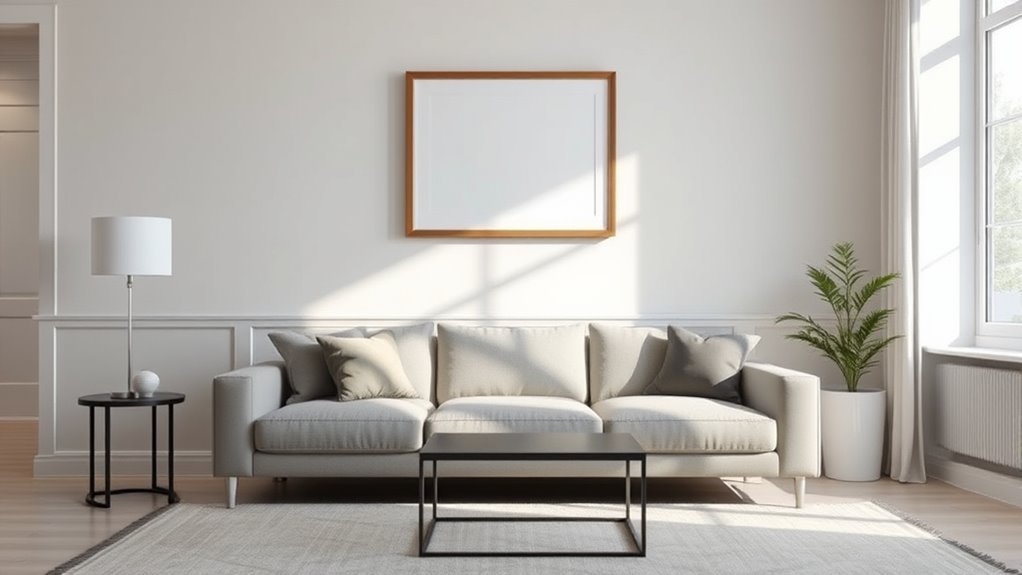
To hang art above a sofa, begin with about 6 to 10 inches of clear space between the top of the sofa back and the bottom of the frame. This is a decorating guideline rather than a building standard, but it usually keeps the artwork close enough to feel related to the furniture instead of floating high on the wall.
The familiar 57-to-60-inch rule can still be useful, but it should be treated as a reference point for the artwork’s center rather than a measurement that overrides the furniture below it. If placing the center at 57 inches would force a large frame too close to the sofa, or if a tall-backed sofa pushes the art higher, adjust the center point.
Note: “Eye level” is not one universal height. National Park Service exhibit-accessibility guidance uses a broad eye-level zone of roughly 40 to 60 inches for exhibit text, which is a useful reminder that room context and the viewer matter more than one magic number. See the NPS exhibit accessibility guidelines.
If the two measurements conflict, use the sofa as the main anchor: keep the art visually connected to the furniture, then check the result from normal standing and seated viewing positions. In a low-ceiling room, a slightly tighter gap can also prevent the artwork from appearing pushed toward the ceiling.
Pick the Right Art Size for Your Sofa
For most rooms, start with artwork or a complete grouping that spans about 60% to 75% of the sofa’s width. The familiar two-thirds rule sits near the middle of that range and is easy to calculate.
If you are using several smaller pieces, measure the arrangement from the outside edge of the left frame to the outside edge of the right frame, including the spaces between frames. Treat the group as one large piece.
This is a proportion guideline, not a requirement. A deliberately small work can succeed when the surrounding architecture or styling supports it, but the 60% to 75% range is a dependable starting point when you want the art and sofa to read as one composition.
Sofa Width Rule
Measure the sofa from outer arm to outer arm. Multiply that number by about 0.60 to 0.75 to get a practical target range. If you prefer a narrower range, multiply by roughly 0.67 and 0.75.
For example, an 82-inch sofa works well with an artwork or complete arrangement around 55 to 62 inches wide. A single work that is much narrower than half the sofa may look undersized unless the small scale is intentional.
Center the artwork over the sofa rather than automatically centering it on the entire wall, especially when the sofa sits off-center because of a doorway, window, or adjoining furniture.
Grouped Art Balance
For a grouped arrangement, think of the frames as one unified shape. An 82-inch sofa still calls for roughly 55 to 62 inches of total visual width if you are following the two-thirds-to-three-quarters guideline.
Keep the group centered over the sofa and use consistent spacing. About 2 to 3 inches often works well for small and medium frames, while larger pieces may look better with 3 to 5 inches between them. The important point is that the gaps feel deliberate and repeat consistently.
When calculating total width, include those gaps. Three 16-inch-wide frames with two 3-inch spaces create a 54-inch-wide arrangement, not a 48-inch one.
Before making holes, outline the complete outside dimensions with painter’s tape or paper templates and view the layout from across the room.
Center Art Over the Couch
Start by finding the sofa’s center and aligning the artwork with the seating area. This matters more than centering the piece on the wall when the furniture is not centered within the room.
Leave enough negative space around the artwork for the wall to breathe, but do not let so much empty space separate the art from the sofa that they look unrelated.
For a sectional, center the artwork over the main horizontal seating section rather than including a chaise that projects into the room when that would pull the artwork noticeably off-center.
Find The Sofa Center
Measure the sofa’s total visible width, divide it by two, and mark that midpoint lightly on painter’s tape placed on the wall. Use this mark as the centerline for a single piece or the complete gallery-wall arrangement.
Then outline your planned artwork size with painter’s tape. This lets you judge width and height together before you drill, hammer, or apply adhesive strips.
Once the width looks right, set the bottom edge about 6 to 10 inches above the sofa back and adjust as needed for the frame height and ceiling.
Align To Seating Area
Center the artwork over the part of the sofa that visually anchors the room. On a symmetrical three-seat sofa, that is usually the physical midpoint. On an L-shaped sectional or sofa with a long chaise, the main seated section may be the better reference.
For an 82-inch sofa, a total art width of about 55 to 62 inches is a useful target. Once you select the width, establish the lower edge above the sofa before worrying about the exact nail position.
- Measure the sofa or main seating section.
- Choose a single piece or grouping with enough visual width.
- Set the intended bottom edge about 6 to 10 inches above the sofa back.
- Mark the artwork centerline.
- Convert the planned frame position into the actual hook or anchor position.
Balance Wall And Furniture
The sofa should remain the visual base of the arrangement, while the art supplies height and interest above it. These ranges provide a useful starting point:
| Sofa Width | Approx. Art/Grouping Width | Useful Starting Point |
|---|---|---|
| 72 in. | 48–54 in. | Two-thirds to three-quarters |
| 82 in. | 55–62 in. | Balanced default range |
| 90 in. | 60–68 in. | Good for one large work or a group |
These numbers are guides, not pass-or-fail limits. Frame thickness, visual weight, lamps, nearby windows, and the amount of open wall can all justify a small adjustment.
Choose a Single Piece or Gallery Wall
A single statement piece is usually the simplest option because you only need to solve one width, one centerline, and one hanging position. A gallery wall offers more flexibility and personality, but the complete arrangement still needs to relate to the sofa as one visual unit.
- Choose one large work for the simplest, cleanest layout.
- Use a diptych, triptych, or gallery wall when several pieces suit the room better.
- Include frame gaps when calculating the full width.
- Keep spacing consistent unless an intentionally irregular layout is part of the design.
- Map the entire arrangement with painter’s tape or paper templates before hanging.
If you use three, five, or seven pieces, that can create an appealing odd-number composition, but there is no requirement that a gallery wall contain an odd number of frames. Symmetrical pairs and four-piece grids can also work well.
Test Your Above-Sofa Layout Before Hanging
Before you hang anything, use painter’s tape or paper templates to sketch the outside dimensions on the wall. Mark the intended lower edge about 6 to 10 inches above the sofa back, then compare the taped shape with the sofa’s full width.
For an 82-inch sofa, a layout around 55 to 62 inches wide fits the common two-thirds-to-three-quarters range. If you are arranging several pieces, include the spaces between the frames in that overall measurement.
| Check | What to Look For |
|---|---|
| Height | Connected to the sofa without feeling crowded |
| Width | Enough visual weight for the sofa |
| Spacing | Consistent gaps in grouped layouts |
| Center | Aligned with the sofa or main seating zone |
| Viewing distance | Looks right from the doorway and across the room |
Pro Tip: Leave the painter’s-tape outline in place for several hours and look at it from different seats and doorways. A placement that seems correct from two feet away can feel too high or too small from the normal viewing distance.
Measure the Hook Position Before You Drill
The frame position and the nail or hook position are not the same thing. Before installing hardware, measure the distance from the top edge of the frame to the point where the hanging wire, D-ring, sawtooth hanger, or bracket will actually rest on the wall hardware.
For picture wire, pull the wire upward with the same tension it will have when hanging and measure from that point to the top of the frame. If the top of your planned frame position is 68 inches from the floor and the tensioned wire sits 4 inches below the frame top, place the hook at about 64 inches.
With two D-rings, measure both their vertical distance from the top of the frame and their horizontal distance from the centerline. Use a level before installing the fasteners.
This small step prevents a common mistake: carefully planning the artwork’s final height and then installing the hook at that same height, which causes the finished frame to hang too low.
Choose Hanging Hardware for the Wall and Artwork
Use hardware that is appropriate for both the wall material and the artwork’s total weight. Drywall, plaster, masonry, and wood framing do not use the same anchors, and a heavy framed work may need two suspension points rather than one.
The National Park Service’s guidance for framed works notes that appropriately sized anchors should be used when mounting to drywall and that two widely separated suspension points can be useful for wide pictures. See the NPS secure-hanger guidance.
If you use adhesive picture-hanging strips, follow the exact manufacturer instructions rather than estimating capacity. 3M publishes different frame-size and weight limits for different strip sizes, and its instructions also specify compatible surfaces and preparation requirements. See the 3M picture-hanging selection guide.
Warning: Do not choose a hanger only by convenience when mounting heavy, glass-fronted, or valuable artwork above seating. Check the frame weight, wall construction, anchor or hanger rating, and manufacturer instructions. Also consider what may be behind the wall before drilling or driving long fasteners.
For adhesive systems, surface preparation and curing time matter. For example, current 3M instructions for applicable Command picture-hanging products specify cleaning and preparation requirements and a waiting period before loading the strips. Always follow the instructions for the exact product in your package rather than assuming all adhesive hangers work the same way. See 3M installation instructions.
Adjust for Sectionals, Tall Sofas, and Low Ceilings
The standard measurements need adjustment when the furniture or room is unusual. A tall sofa back may push the artwork’s center above 60 inches even while the bottom edge remains only 6 to 10 inches above the sofa. That is not automatically a problem.
With a low-backed sofa and very tall artwork, the opposite can happen: forcing the art’s center down to 57 inches may make the lower frame edge feel crowded. Increase the gap slightly if needed.
For a sectional, use the main horizontal seating section as your reference when the chaise projects outward and would otherwise pull the artwork away from the visual center. If the sectional spans nearly the entire wall, you can also center the artwork on the usable wall zone behind the seating.
In a room with a low ceiling, keep the arrangement visually connected to the sofa and avoid leaving a large empty band between the furniture and artwork. With a high ceiling, resist the urge to raise the art simply to fill vertical wall space; larger artwork or a taller grouped composition usually solves the scale problem more naturally.
Fix Common Above-Sofa Hanging Mistakes
Even with a taped layout, several mistakes can make an above-sofa display feel disconnected or create installation problems.
- Centering on the wall instead of the sofa: use the furniture or main seating zone as the visual anchor.
- Hanging too high: start around 6 to 10 inches above the sofa back before applying a rigid eye-level rule.
- Choosing art that is too small: try roughly 60% to 75% of the sofa width as a starting range.
- Ignoring gaps in a gallery wall: include frame spacing in the total arrangement width.
- Using inconsistent spacing: repeat the same gap where possible unless the layout is intentionally irregular.
- Marking the frame height instead of the hook height: account for wire, D-rings, brackets, or other hardware behind the frame.
- Using unrated or unsuitable hardware: match the hanging system to the frame weight and wall type.
Correcting those details usually matters more than chasing a single perfect measurement. The goal is a secure installation that looks connected to the furniture and proportionate from normal viewing distances.
Add Finishing Touches Around the Art
Once the artwork is in place, add only the supporting pieces that improve the composition. Decorative sconces, lamps on side tables, or smaller companion works can help a wide wall feel complete, but they should not compete with the main artwork.
Add supporting pieces only when they strengthen the main composition; empty wall space is also part of the design.
If you build a mini gallery, keep the frame spacing consistent and repeat one or two colors, frame finishes, or materials across the grouping. Plants, pillows, throws, or ceramics elsewhere in the seating area can echo colors from the artwork without matching it exactly.
Because the sofa already anchors the wall, you usually do not need another large furniture piece directly below the art. Side tables, a floor lamp, or a plant beside the sofa can add dimension without crowding the composition.
A decorative ledge or shelf above the sofa can work, but treat it as a mounted object rather than purely as decoration: secure it with hardware appropriate for the wall and the expected load, especially above a seating area.
Keep the surrounding decor proportional and give the primary artwork enough space to remain the focal point.
Frequently Asked Questions
What Are the Rules for Hanging Art Above a Sofa?
Start with the artwork about 6 to 10 inches above the sofa back and roughly 60% to 75% as wide as the sofa. Center the piece or full grouping over the sofa, then use 57 to 60 inches to the artwork’s center as an eye-level reference rather than an absolute requirement.
How Should Art Be Placed Above a Sofa?
Place the artwork so it relates directly to the seating area. Center it over the sofa or main section of a sectional, keep the lower edge reasonably close to the sofa, and choose enough width that the art does not look stranded on the wall. Test the full outline with painter’s tape before installing hardware.
What Is the 3-5-7 Rule in Decorating?
The 3-5-7 rule refers to arranging decorative objects in odd-numbered groups such as three, five, or seven. It is a styling guideline for creating asymmetrical visual interest; it does not mean artwork should hang 3, 5, or 7 inches above furniture of different sizes. You can use the idea for a gallery wall, but even-numbered layouts can work just as well.
What Is the 57 Rule for Hanging Art?
The 57-inch rule is a common starting point that places the center of a picture or grouped arrangement about 57 inches above the floor. It works well on many open walls, but above a sofa you may need to adjust it so the lower edge of the art remains comfortably connected to the furniture.
Should the 57-Inch Rule Override the Sofa Gap?
Usually no. When artwork is directly above furniture, the relationship between the art and the sofa is often more important than forcing the center to exactly 57 inches. Start with the sofa gap, then check the artwork’s center height and adjust until both the furniture relationship and viewing height feel comfortable.
What Size Art Works Above an 82-Inch Sofa?
Using the common two-thirds-to-three-quarters guideline, an 82-inch sofa pairs with artwork or a complete grouping about 55 to 62 inches wide. That measurement should include the gaps between frames when you are planning a gallery wall.
Conclusion
Hang your art so it relates to the sofa rather than following one measurement blindly. Start with about 6 to 10 inches above the sofa, size the artwork or complete grouping to roughly 60% to 75% of the sofa width, and center it on the seating area. Use the 57-to-60-inch center guideline as a cross-check, test the layout with painter’s tape, and choose mounting hardware that is rated for the artwork and appropriate for your wall. Measure twice, verify the hardware position, and then hang.
Sources
- National Park Service — Fabricating Secure Hangers for Framed Works of Art — secure suspension points, anchors, and considerations for wide or heavy framed artwork.
- National Park Service — Exhibit Accessibility Guidelines — accessibility and practical eye-level considerations for visual exhibits.
- 3M Command Picture Hanging Selection Guide — manufacturer frame-size and weight limits for applicable picture-hanging products.
- 3M Command Picture Hanging Instructions — surface preparation, application, waiting time, and removal instructions.