
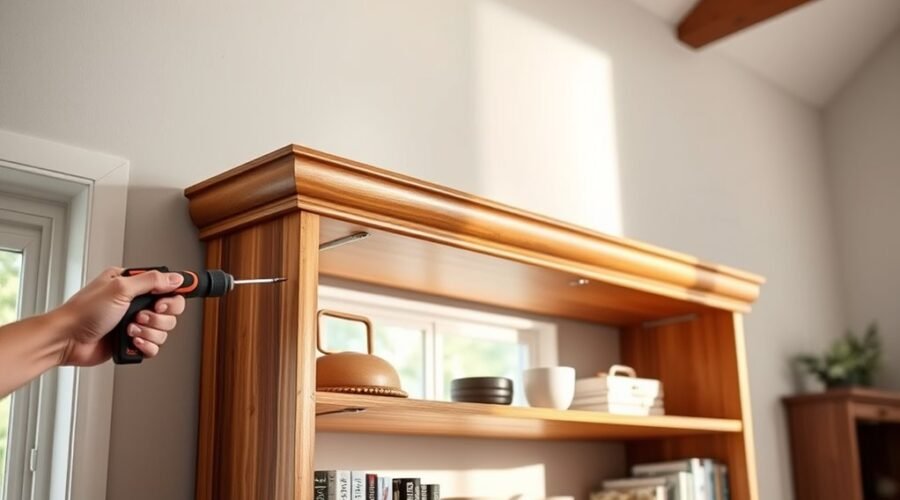
To keep a bookcase from tipping, secure it to the wall with an anti-tip system that is suitable for both the furniture and your wall construction. In most homes, the strongest approach is to fasten the wall-side hardware to verified framing, attach the furniture-side hardware to a strong structural part of the bookcase, and then tighten the strap or bracket according to the manufacturer’s instructions.
Quick Answer
Anchor a bookcase with a manufacturer-approved anti-tip strap or bracket. Locate solid framing when the system calls for it, use fasteners designed for your wall type, attach the furniture end to a strong part of the case rather than a thin back panel, tighten the connection, and keep heavy items on lower shelves.
Key Takeaways
- Follow the bookcase and anti-tip kit instructions first because screw size, anchor type, attachment points, and hardware quantity vary by product.
- Use a stud finder to locate framing when the anchoring system requires a stud, and verify the location before drilling.
- Attach the furniture-side bracket to solid wood or another strong structural part of the bookcase, not a thin stapled back panel.
- Use hardware made for your actual wall material, whether that is wood framing, masonry, or another approved substrate.
- Keep heavier objects on lower shelves, stay within the bookcase manufacturer’s shelf-load limits, and recheck the anchor after moving the unit.
At a Glance
| Time Required | About 15–30 minutes for a straightforward installation; unusual walls or difficult access can take longer. |
| Difficulty | Easy to moderate for common framed walls; harder for masonry, uncertain framing, or difficult-to-access locations. |
| Tools Needed | Anti-tip kit, stud finder when applicable, pencil, drill and correct bits, screwdriver, tape measure, and level. |
| Cost | Many basic anti-tip kits cost less than $20 if you already own the required tools; specialty masonry or other hardware can cost more. |
Warning: Do not guess where framing, electrical wiring, plumbing, or other concealed building components are located. Stop drilling if the wall construction is uncertain or you encounter unexpected resistance. Use the furniture and anchor manufacturers’ instructions, and get qualified help when you cannot identify a safe attachment point.
Why Bookcases Tip Over
Bookcases can tip when their center of gravity moves far enough forward that the base can no longer support the load. A tall, narrow case can become less stable when heavy objects are stored high, a child climbs the shelves, someone pulls on the furniture, the floor is uneven, or the unit is not secured as its manufacturer requires.
The U.S. Consumer Product Safety Commission continues to advise consumers to anchor furniture such as bookcases securely to the wall and to keep heavier objects on lower shelves. The agency also warns against placing tempting objects where children may try to climb to reach them. See the CPSC’s 2026 furniture tip-over guidance.
CPSC’s 2023 annual report estimated an average of 17,800 emergency-department-treated tip-over injuries per year during 2020–2022. Among children, about 1,000 estimated injuries per year involved shelving, shelving units, or bookcases.
Weight placement still matters after a bookcase is anchored. Put heavier books and objects on lower shelves and follow the manufacturer’s stated shelf-load limits. Do not assume that a heavy bookcase is safe simply because it feels difficult to move.
ASTM F2057 should not be used as a bookcase standard. Its current scope addresses clothing-storage units and explicitly excludes shelving units such as bookcases. For bookcases, follow the furniture manufacturer’s instructions and current furniture tip-over guidance instead.
Tools and Hardware for Anchoring a Bookcase
Before you start, read the bookcase instructions and the anti-tip kit instructions from beginning to end. The correct screws, anchors, drill bits, and attachment points depend on the furniture and wall construction.
A typical installation may require an anti-tip strap or bracket system, stud finder, pencil, tape measure, level, drill, appropriate drill bit, screwdriver, and wall-specific fasteners. The CPSC’s Anchor It guidance recommends checking the selected kit for the required supplies and hardware.
Essential Measuring Tools
Use a stud finder when you need to locate framing, a tape measure to position the furniture and brackets, and a level to check that the case sits upright. Mark proposed drilling points with a pencil before making holes.
| Tool | Purpose | Safety Tip |
|---|---|---|
| Stud finder | Helps locate framing behind finished walls | Scan from both directions and verify before drilling |
| Tape measure | Positions the bookcase and hardware | Measure the actual furniture, not just the wall space |
| Level | Checks that the unit is upright | Correct floor wobble before tensioning the anchor |
Right Anchors And Screws
Choose fasteners for the actual wall material and the specific anchoring system. There is no single screw length, diameter, or anchor that is correct for every bookcase.
- Wood framing: Use the screws specified or approved by the bookcase or anti-tip kit manufacturer and fasten them into verified framing when instructed.
- Drywall or plaster over framing: Locate the framing first when the system requires a stud connection. Do not assume drywall itself provides the same resistance as framing.
- Hollow-wall attachment: Use a hollow-wall or toggle-type anchor only when the anchoring system permits that method and the hardware is suitable for the wall construction.
- Brick or concrete: Use masonry-rated hardware and the drill bit specified for that fastener. Anchor It advises fastening into the face of brick rather than the mortar joint when following its masonry method.
- Metal framing or uncertain construction: Follow hardware instructions specifically approved for that framing. If the wall type or load path is unclear, get professional help rather than improvising.
Do not select an anchor by a generic load number alone. Published capacities depend on the substrate, anchor size, installation quality, loading direction, edge distance, and other conditions.
Drill And Pilot Holes
After you have identified a safe fastening point, mark the hole locations and use the drill-bit size specified by the hardware instructions. When attaching a bracket to a solid wooden part of the furniture, a pilot hole smaller than the screw can help the screw start cleanly and reduce splitting.
| Step | What You Do | Why It Matters |
|---|---|---|
| Identify structure | Confirm the wall material or framing | Prevents using the wrong fastener |
| Select the bit | Follow the fastener or kit instructions | Helps the anchor fit correctly |
| Drill carefully | Keep the drill aligned and stop if conditions are unexpected | Reduces wall and hardware damage |
| Fasten | Install the specified screw or anchor without stripping it | Creates a dependable connection |
Find the Best Wall Studs
For anchoring systems that call for framing attachment, use a stud finder to locate a stud near the bookcase. The CPSC’s Anchor It installation guide notes that studs in many modern U.S. homes are commonly spaced 16 or 24 inches apart, but spacing should only be used as a clue. Verify the actual framing before drilling.
Move the stud finder slowly across the wall and mark the edges indicated by the tool. Re-scan from the opposite direction when possible. Follow the stud finder manufacturer’s instructions because detection methods vary.
If a likely stud does not line up with the bookcase, do not automatically substitute a random drywall anchor. Check the furniture and anchor-kit instructions for permitted alternatives. You may be able to reposition the furniture, use a compatible mounting system designed to span framing, or use approved hollow-wall hardware when the manufacturer allows it.
Note: A stud finder is a locating tool, not proof that every point behind the wall is safe to drill. Wall cavities can contain wiring, plumbing, blocking, metal plates, and other building components.
Choose the Right Anchoring Method
Use the anti-tip hardware supplied with the bookcase when the manufacturer provides it, unless the instructions direct you to obtain wall-specific fasteners separately. If you need a replacement or aftermarket system, choose one intended for furniture anchoring and follow its installation requirements.
Flexible straps are useful when a small amount of adjustment is needed between the wall and furniture. Rigid brackets can create a more fixed connection where their geometry suits the bookcase. Neither type is automatically stronger in every installation; the complete system is only as reliable as its wall fastener, furniture attachment, hardware, and installation.
The CPSC’s Anchor It program says the selected kit should tell you how many straps are required. Two are commonly used, but the product instructions should control the installation rather than a universal rule.
Anchor a Bookcase to Drywall
When a bookcase stands against drywall, first determine what is behind the drywall. If the anti-tip system is designed to be fastened to a wood stud, locate the stud and place the wall bracket at the approved height. Drill and fasten it according to the kit instructions.
If a stud cannot be used, check whether the furniture or anti-tip manufacturer permits a hollow-wall anchor. If it does, choose an anchor designed for that wall construction and follow the anchor manufacturer’s installation and load requirements. Do not treat a light-duty plastic expansion plug as an automatic substitute for a framing connection.
| Method | Best Use | Safety Note |
|---|---|---|
| Fastening to framing | When the kit calls for a stud connection | Verify the framing location before drilling |
| Approved hollow-wall anchor | When the anchoring system allows it | Match the anchor to wall thickness and construction |
| Professional installation | Unknown walls, difficult framing, or unusual loads | Safer than guessing at a hidden structure |
Once anchored, keep heavy items on the lower shelves and stay within the furniture manufacturer’s load limits. Anchoring reduces tip-over risk, but correct loading and a stable floor still matter.
Anchor a Bookcase to Brick or Concrete
Brick and concrete require masonry-rated drilling and fastening equipment. The Anchor It installation guide recommends checking the kit instructions, marking the bracket holes, drilling with the specified masonry bit, and using suitable masonry fasteners.
For brick, Anchor It advises drilling into the face of the brick rather than the mortar joint for its described installation method. Because masonry types and conditions vary, use the fastener manufacturer’s instructions for hole diameter, depth, spacing, and installation torque.
If the brick is cracked, the concrete is deteriorated, the wall is hollow masonry, or you are unsure what fastener is appropriate, use a qualified installer.
Install Bookcase Straps or Brackets
Once you know the wall construction and have selected an appropriate anti-tip system, position the bookcase where it will remain. Check the floor for wobble and make sure doors, trim, or baseboards do not prevent the furniture from sitting in the position required by the anchoring instructions.
Choosing Straps Or Brackets
Select straps or brackets designed for furniture tip-over restraint. Do not assume every strap has the same capacity. Review the product instructions for compatible furniture materials, wall attachment requirements, hardware quantity, and any stated limitations.
If the bookcase came with anti-tip hardware, start with that system and the manufacturer’s instructions. Some furniture manufacturers intentionally leave wall screws or plugs to the consumer because the correct fastener depends on the wall.
For example, IKEA’s current BILLY bookcase safety information says the product must be securely anchored and instructs owners to use suitable screws and plugs for the home. See IKEA’s current BILLY safety information.
Mounting To Studs
If the anchoring system requires a stud, line up the wall-side bracket with the verified framing rather than simply choosing the visually centered location behind the bookcase.
- Locate and verify the stud.
- Mark the bracket holes at the installation height specified by the anti-tip kit.
- Drill the required pilot hole using the bit size specified for the selected screw.
- Fasten the wall-side bracket with the approved hardware.
- Check that the bracket sits firmly against the wall and the screw head is not stripped.
If the fastener does not tighten normally or the bracket moves, stop and correct the installation rather than relying on the strap to compensate for a weak wall connection.
Attach the Wall Side Securely
The wall side of an anti-tip system needs a dependable load path into the wall structure or another approved substrate. Hold the bracket where the kit specifies, confirm the hole locations, and install the correct fasteners without overtightening or stripping them.
Do not rely on a fixed minimum screw length as a universal rule. Screw selection must account for bracket thickness, wall finish, framing or anchor type, and the fastener manufacturer’s requirements.
If a baseboard leaves a gap between the bookcase and wall, do not force a rigid bracket into a position it was not designed for. Use the furniture or anti-tip system’s approved spacing method, reposition the bracket if permitted, or choose a compatible restraint system.
Attach the Furniture Side to a Strong Part of the Bookcase
The furniture-side connection is just as important as the wall connection. The CPSC’s Anchor It instructions recommend choosing a thick, sturdy attachment point and specifically warn against fastening into thin material such as a stapled-on back panel or near weak veneered edges.
- Check the bookcase instructions for the designated anti-tip attachment point.
- If the manufacturer provides no marked point, identify a strong structural rail, top panel, side panel, or other substantial member that the anchoring kit permits.
- Mark the bracket holes.
- Drill a pilot hole if the instructions call for one.
- Fasten the bracket without splitting or crushing the furniture material.
Pro Tip: Before drilling the bookcase, look inside and behind the upper section so you know exactly where the screw will enter. A thick structural panel is a far better attachment point than a thin decorative backer.
Tighten the Strap or Bracket and Position the Bookcase
With both ends installed, move the bookcase into its final position and connect the strap or restraint. Tighten it according to the manufacturer’s directions. The goal is to remove unnecessary slack without pulling the bookcase out of level or deforming the hardware.
If the furniture has more than one restraint point, tension them evenly. Confirm that the bookcase remains upright and that the wall and furniture brackets stay flat against their mounting surfaces.
Check Bookcase Stability
Check the furniture before and after anchoring. A wall restraint is not a repair for a broken shelf, loose frame, damaged joint, or badly uneven floor.
Test For Wobble
Before anchoring, gently press the bookcase from side to side to identify floor wobble or loose joints. Use a level to check whether the case is standing upright.
- Check whether all feet or base edges contact the floor properly.
- Confirm that shelves, joints, and fasteners are secure.
- Correct floor-related wobble with a stable, appropriate leveling method that does not interfere with the anchoring system.
- After anchoring, apply only a gentle stability check. Do not intentionally yank or tip the furniture to “test” the restraint.
Place heavy objects on lower shelves to reduce the height of the loaded center of gravity. Keep objects children may want to reach off high shelves whenever practical.
Inspect Shelf Integrity
Look for sagging shelves, cracks, pulled-out shelf pins, loose fasteners, damaged joints, or separating panels. Repair or replace damaged parts before heavily loading the unit.
Do not estimate shelf capacity from the material alone. A solid-wood shelf, plywood shelf, or particleboard shelf can have very different capacities depending on its span, thickness, support system, and construction. Follow the specific bookcase manufacturer’s maximum shelf-load information when it is available.
Fix Common Installation Problems
If installation does not go as expected, stop and identify the reason instead of forcing the hardware.
| Problem | Likely Cause | What to Do |
|---|---|---|
| Screw spins without tightening | Missed framing, damaged hole, or wrong anchor | Remove it and verify the wall and approved fastener method |
| Unexpected resistance while drilling | Metal, masonry, protection plate, or another concealed component | Stop drilling and identify the obstruction before continuing |
| Bracket does not reach the bookcase | Baseboard or excessive wall gap | Use an approved strap, spacer method, or alternative mounting position |
| Furniture bracket pulls loose | Attached to weak or thin furniture material | Move it to a structural attachment point allowed by the manufacturer |
| No suitable stud lines up | Furniture position does not match framing | Reposition the unit or use a manufacturer-approved alternative instead of improvising |
Also confirm that the drill is operating in the correct direction, the drill bit matches the required hole size, and the screw and anchor are designed to work together.
When to Call a Professional
Professional help is sensible when you cannot confidently identify the wall construction, the proposed drilling location may contain utilities, the wall is deteriorated, the bookcase is unusually large or valuable, masonry requires equipment you do not have, or the manufacturer’s instructions do not match the conditions in your home.
If you rent, also check the property rules before modifying walls. Do not substitute adhesive strips or improvised cords for a required mechanical anti-tip connection unless the furniture manufacturer specifically approves that system.
Keep Your Bookcase Secure Over Time
Once your bookcase is anchored, inspect the restraint periodically and after moving the furniture, changing its location, or making major changes to what it holds.
Check for loose screws, damaged straps, bent brackets, cracked furniture panels, enlarged holes, or wall movement. Correct problems promptly rather than simply tightening a fastener that no longer has a sound mounting point.
Keep heavier items on lower shelves and distribute the load within the bookcase manufacturer’s limits. Do not let children climb the furniture or use shelves as steps, and avoid placing toys or other tempting items high on the unit.
If the floor is uneven, use an appropriate leveling method so the bookcase does not rock. The anti-tip restraint should back up a stable piece of furniture, not hold an otherwise unstable case upright.
Keeping a record of the anchor system and its installation instructions can also help when you move, replace hardware, or inspect the setup later.
Frequently Asked Questions
How do you stop a bookcase from tipping over?
Secure it with the anti-tip hardware specified by the bookcase or an appropriate furniture-anchoring system. Connect the wall side to an approved substrate, attach the furniture side to a strong structural part of the case, keep heavier items low, and stay within the manufacturer’s shelf-load limits.
How do I securely anchor a bookcase to the wall?
Start with the furniture and anchor-kit instructions. Identify the wall type, locate framing when required, install the specified wall hardware, fasten the furniture bracket to a strong part of the bookcase, connect the restraint, and tighten it without pulling the case out of level.
What is the best way to secure a bookshelf to the wall?
The best method is the one approved for that bookshelf and wall construction. A manufacturer-supplied anti-tip restraint attached to the intended furniture point and a verified wall attachment is preferable to choosing hardware only by a generic weight rating.
How do you anchor a freestanding bookshelf?
Place the bookshelf in its final position, correct any wobble, identify the wall construction, install the wall-side anti-tip hardware, attach the furniture-side hardware to a structural part of the case, connect the restraint, and tension it according to the manufacturer’s instructions.
Can I anchor a bookcase to drywall if there is no stud behind it?
Sometimes, but only when the bookcase or anti-tip system permits a hollow-wall attachment and you use an anchor designed for the specific wall construction. If the system requires a stud, reposition the furniture or use another manufacturer-approved solution rather than substituting an unapproved drywall anchor.
How often should I check bookcase anchors?
Inspect them periodically and whenever the bookcase is moved, reassembled, heavily reloaded, or disturbed. Replace damaged straps or brackets and correct loose or damaged attachment points instead of relying only on retightening.
Conclusion
A secure bookcase depends on more than one screw or strap. Identify the wall correctly, use hardware approved for that surface and anchoring system, fasten the furniture side to a strong structural point, and follow the manufacturer’s instructions throughout the installation. Afterward, keep heavy items low, respect the shelf-load limits, and inspect the restraint whenever the furniture is moved or changed. These steps give the bookcase a much safer, more dependable connection to the wall.
Sources
- U.S. Consumer Product Safety Commission — 2026 furniture tip-over guidance — supports anchoring bookcases and keeping heavier objects on lower shelves.
- U.S. Consumer Product Safety Commission — 2023 Annual Tip-Over Report — supports current injury statistics and bookcase/shelving injury context.
- CPSC Anchor It — How to Install a Kit — supports stud locating, wall-side installation, masonry guidance, and furniture-side attachment practices.
- CPSC Anchor It — What You’ll Need — supports anti-tip kit selection, required tools, typical kit quantity, and general cost guidance.
- ASTM F2057-23 — confirms that this clothing-storage-unit standard excludes shelving units such as bookcases.
- IKEA BILLY Bookcase Safety Information — example of a manufacturer requiring secure wall anchoring and wall-appropriate screws and plugs.


