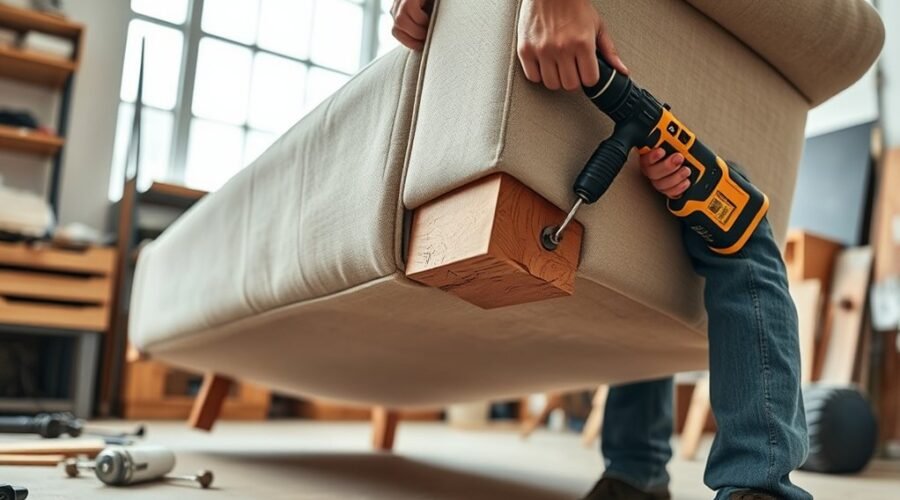
A broken sofa leg is usually repairable when the surrounding frame is still sound. The correct fix depends on what actually failed: the wooden leg itself, a glued or doweled joint, a hanger bolt, a threaded insert, a mounting plate, or the wood that holds the hardware. Start by identifying the failure, then clean and dry-fit the parts before using wood glue, dowels, screws, or reinforcement. Let the adhesive cure for the time specified by its manufacturer and test the leg gradually before normal use.
Quick Answer
To fix a broken sofa leg, first determine whether the wood, mounting hardware, or sofa frame failed. Remove the leg, clean and dry-fit the joint, repair stripped holes or damaged hardware, then glue and reinforce sound wood as needed. Clamp it securely, allow the adhesive to cure fully, and test the repair gradually before sitting on the sofa.
Key Takeaways
- Identify whether the problem is a cracked leg, loose hanger bolt, stripped screw hole, damaged mounting plate, or broken frame before choosing a repair.
- PVA wood glue works well for clean, close-fitting wood-to-wood joints; structural epoxy may suit some damaged or gap-prone repairs when its manufacturer recommends the application.
- A loose structural fastener should bite into sound wood or suitable replacement hardware instead of relying on a longer screw driven into damaged material.
- Dowels, corner blocks, and metal brackets can reinforce a repair only when they attach to solid material and are installed in correct alignment.
- Follow the adhesive manufacturer’s cure time and test the repaired leg slowly before returning the sofa to normal use.
At a Glance
| Time Required | About 45–90 minutes of hands-on work for a straightforward repair, plus the adhesive’s full cure time before the joint is loaded. |
| Difficulty | Moderate. Advanced repair may be needed if the frame rail, mounting block, engineered wood, or reclining mechanism is damaged. |
| Tools Needed | Screwdriver or wrench, scraper, clamps, measuring tools, and—when dowels, pilot holes, or mounting hardware are involved—a drill and correctly sized bits. |
| Cost | Usually low to moderate if the original leg can be reused. Cost increases if you need new clamps, mounting hardware, a replacement leg, or professional frame repair. |
What Broke the Sofa Leg?
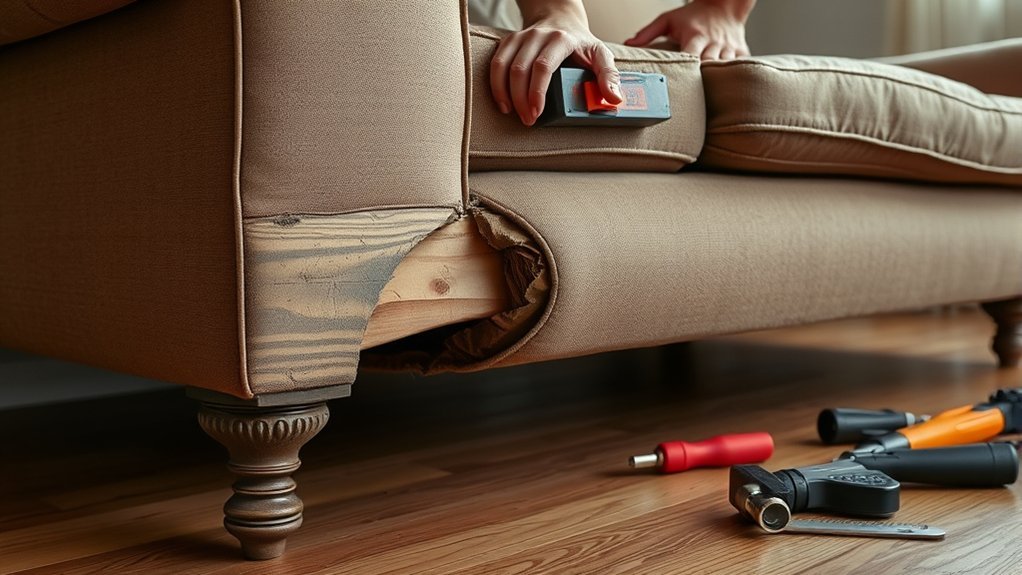
A sofa leg can fail because of a sudden impact, repeated side-to-side movement, overloaded furniture, weak joinery, loose hardware, or damage that accumulated over time. The visible break is not always the original problem.
Before repairing anything, look at how the leg attaches to the sofa. Common systems include a hanger bolt screwed into a T-nut or threaded insert, a metal mounting plate, wood screws, dowels, corner blocks, or a glued wooden joint. A leg that looks broken may simply have pulled out of stripped mounting hardware.
Check the leg itself for cracks, splits, missing wood, and bent or loose threaded hardware. Then inspect the frame rail or mounting block where the leg attaches. If the frame is split, crushed, or separating from the rest of the sofa, repairing only the leg will not solve the underlying problem.
Repeated loading from normal use can gradually loosen a connection, especially once movement begins. Improper lifting or dragging can also twist the leg sideways and place much greater leverage on the joint than ordinary vertical loading.
Deep or poorly positioned holes can weaken a wooden part if too little sound material remains around them, but hole depth alone does not determine joint strength. Wood species, grain direction, hole diameter, dowel fit, remaining wall thickness, and the overall joint design all matter.
Decide Whether to Repair or Replace the Leg
A clean crack in a solid-wood leg is often a good candidate for repair when the pieces fit tightly together and little material is missing. A loose hanger bolt, stripped mounting plate, or damaged screw hole may also be repairable without replacing the entire leg.
Replacement is usually the better choice when the leg is badly crushed, has large missing sections, will not return to its original shape, or has failed repeatedly in the same place. The same applies when a threaded fastener has split the leg so extensively that there is no sound wood around it.
Stop and consider professional furniture repair if the sofa’s main frame rail is cracked across a large area, several joints are failing, the mounting block has torn away from the frame, or the damaged area is made from badly crushed particleboard or MDF that can no longer hold a fastener reliably.
Warning: Stabilize the sofa before working underneath it. Remove loose cushions, protect the floor, and get help turning a heavy sofa. Unplug powered sofas and recliners before working near their frames or mechanisms. Wear eye protection when drilling. Never use an open flame or heat source near alcohol, acetone, or another flammable solvent.
Gather Glue, Dowels, Clamps, and Screws
Gather the materials after you know what failed. A typical wood repair may require wood glue, hardwood dowels, clamps, suitable wood screws, a drill and bits, a scraper, and a square or straightedge for checking alignment. Threaded legs may instead require a replacement hanger bolt, T-nut, threaded insert, or mounting plate.
For a close-fitting wood-to-wood joint, a quality PVA wood glue is usually appropriate when the product is intended for the materials and conditions involved. Wood glue performs best on sound, clean wood with properly fitting mating surfaces.
Dowels add internal reinforcement when they are correctly sized and aligned. Screws or brackets can provide additional mechanical support when they fasten into solid wood rather than damaged fibers or an empty upholstery cavity.
Strong repairs come from sound material, accurate alignment, correct adhesive use, and reinforcement that transfers load into solid wood.
Clamps keep the parts aligned while an adhesive develops strength. Have the correct clamps ready before applying glue so the repair can be assembled within the adhesive’s working time.
Remove the Broken Sofa Leg
First examine the attachment method. If the leg is threaded, determine whether the entire leg unscrews, whether a bolt passes through a mounting plate, or whether separate screws hold the plate to the frame.
Use the correct screwdriver, wrench, Allen key, or other fitting tool. Support the leg while loosening the hardware so its weight does not tear the remaining wood fibers as the final fastener comes free.
If the connection is glued, do not immediately pry it apart. Determine what adhesive was probably used and whether the joint can be separated without damaging the frame. For dried water-based woodworking glue, mechanical scraping or sanding is generally safer and more predictable than applying an unknown solvent.
Do not treat methylated spirits, denatured alcohol, acetone, or heat as universal glue-release methods. Solvents can damage finishes and upholstery, and some alcohol products are highly flammable. Use a solvent only when the adhesive or finish manufacturer specifically recommends it, provide ventilation, and keep every ignition source away.
Collect bolts, screws, washers, mounting plates, and inserts as they are removed. Photographing the original arrangement can also make reassembly easier.
Once the leg is off, inspect the attachment point for stripped holes, bent hanger bolts, loose threaded inserts, cracked mounting blocks, and splits in the surrounding frame.
Clean Old Glue and Debris
Old adhesive, dust, loose wood fibers, and broken dowel fragments can prevent a joint from closing properly. Remove loose material carefully without enlarging a sound hole or changing the shape of matching fracture surfaces.
Wet water-based wood glue is commonly cleaned with a damp cloth. Once dried, residue can usually be removed mechanically with a scraper, chisel used with control, or light sanding. Avoid removing sound wood simply to make the surface look perfectly clean.
Inspect the joint closely for cracks, splits, crushed fibers, or missing material that had been hidden beneath the old adhesive. If the break surfaces no longer fit together closely, decide whether reinforcement, a gap-filling structural adhesive, a replacement part, or professional repair is more appropriate.
After cleaning, remove dust and make sure the repair surfaces are dry and ready for the selected adhesive.
Pro Tip: Dry-fit the entire repair before opening the glue. Confirm that the leg sits at the same angle and height as the other legs, the fracture closes fully, the clamps can reach the joint, and any dowel holes line up correctly.
Repair Stripped Holes and Loose Mounting Hardware
If the wooden leg is intact but the attachment spins or pulls out, repair the mounting system instead of gluing the leg to the sofa.
A loose hanger bolt should be inspected on both ends. The machine-threaded end must match the T-nut, insert, or mounting plate, while the coarse wood-threaded end must remain firmly anchored in the leg. Replace badly bent or damaged hardware rather than forcing it back into service.
For a stripped screw hole in solid wood, a fitted hardwood dowel provides a strong way to restore material. Drill the damaged hole clean and round only when necessary, glue in a matching hardwood dowel, allow the adhesive to cure, trim it flush, and drill a correctly sized pilot hole for the replacement screw.
Small wood splints or toothpicks with wood glue can restore grip in a lightly worn noncritical screw hole, but a heavily loaded sofa-leg connection deserves a more substantial dowel, insert, or mounting-plate repair.
If a mounting plate has torn out, position the replacement or reinforcement so its screws enter sound frame wood. Do not simply install longer screws unless you have confirmed their path and length. An overly long screw can penetrate upholstery, a visible surface, wiring, or a reclining mechanism.
Glue the Broken Sofa Leg Back Together
Before applying adhesive, verify that the mating surfaces come together in their original position. Patch or rebuild damaged mounting holes separately rather than expecting glue squeezed into a loose hole to restore the original structure by itself.
Apply an adhesive that is appropriate for the leg material and the condition of the joint. Assemble the repair within the product’s working time, bring the leg into exact alignment, and clamp it securely without crushing the wood.
Follow the adhesive manufacturer’s instructions for clamp time and full cure. For many woodworking glues, manufacturers recommend avoiding stress on a new joint for at least 24 hours, but the exact requirement depends on the product, wood, temperature, humidity, and joint design.
Assess The Break
Clean, matching fracture lines that return to their original position are generally the easiest to repair. Dry-fit the pieces and check whether the surfaces meet without twisting, rocking, or leaving a large gap.
Look beyond the visible crack. A break near a hanger bolt may indicate that the fastener split the leg from inside. A leg that broke at the frame may point to a damaged mounting block or frame rail rather than a simple leg fracture.
Remove only loose fibers that prevent the joint from closing. Do not sand away matching fracture texture unnecessarily because those surfaces can help the pieces register in their original position.
If the fracture is crushed, heavily splintered, missing material, or impossible to align, reinforce or replace the leg instead of relying on glue alone.
Choose Strong Adhesive
Select the adhesive according to the materials and the fit of the joint. A conventional PVA woodworking glue is well suited to many clean, close-fitting wood-to-wood furniture repairs. A structural two-part epoxy formulated for bonding wood can be useful where its gap-filling characteristics or material compatibility are needed, but epoxy is not automatically stronger in every furniture joint.
| Adhesive | Best use | Application |
|---|---|---|
| PVA wood glue | Sound, close-fitting wood-to-wood joints | Cover the mating surfaces evenly and clamp them in full contact according to the manufacturer’s directions. |
| Structural epoxy for wood | Compatible repairs where limited gap filling or difficult bonding conditions justify epoxy | Mix exactly as directed, wet the prepared surfaces properly, and maintain the bond-line thickness recommended by the manufacturer. |
Do not assume that a thicker layer of adhesive makes a joint stronger. The goal is complete surface contact and the correct bond line for the selected adhesive. Follow the product instructions for mixing, temperature, open time, clamping, and cure.
For manufacturer-specific guidance, see Titebond’s woodworking glue guidance and WEST SYSTEM’s epoxy bonding and clamping guidance.
Clamp And Cure
Once the adhesive is applied, bring the surfaces together in exact alignment. Tighten the clamps gradually while watching the leg so it does not rotate or lean away from its original position.
- Tighten the clamps gradually and re-check alignment.
- Use pads or scrap wood beneath clamp jaws to protect the finish.
- Remove excess adhesive according to the adhesive manufacturer’s instructions.
- Keep the repair undisturbed for the required clamp and cure time.
- Add dowels, screws, or another reinforcement only when the repair design calls for them.
After the appropriate cure period, remove the clamps and inspect the glue line. Do not load the sofa simply because the adhesive feels dry on the surface.
Reinforce the Sofa Leg Joint With Dowels
Hardwood dowels can reinforce a broken wooden leg or rebuild a damaged hole when they are accurately fitted into sound wood. Precision matters more than simply adding a larger dowel.
Mark the centers carefully and drill straight holes into both mating parts. A crooked hole can force the leg out of alignment or remove too much material from one side of the repair.
If an existing dowel hole is enlarged or stripped, rebuild it before installing a new dowel. One method is to drill the damaged opening to a clean, uniform diameter, glue in a fitted hardwood dowel, allow it to cure, and then redrill the connection where appropriate.
Coat the dowel and mating surfaces as directed for the selected wood glue, insert the dowel without splitting the wood, and assemble the joint while the parts can still be adjusted.
Clamp the joint squarely while it cures. Once complete, the dowel should help transfer load across a larger area of sound wood instead of concentrating stress at the original fracture.
Add Corner Blocks or Metal Brackets
If the original joint needs additional mechanical support, corner blocks or metal brackets can brace the connection between the leg area and sofa frame.
A wooden corner block spreads force over a larger section of the frame. A suitable metal bracket or mounting plate can also reinforce a weak attachment, especially when the original threaded mounting point has failed.
- Select a block or bracket that fits the available frame area without interfering with upholstery or mechanisms.
- Position it against sound frame wood.
- Mark the fastener locations.
- Drill correctly sized pilot holes where needed to reduce the risk of splitting.
- Use screws that are long enough to obtain solid purchase but short enough to remain safely within the wooden frame member.
- Tighten firmly without stripping the new holes.
A bracket fastened to damaged or crushed material will not provide reliable reinforcement. Move the load into sound wood or repair the damaged mounting structure first.
Note: Adding a mounting plate or spacer can slightly change the leg’s installed height. Compare the repaired corner with the other legs before final tightening so the sofa does not rock on an uneven base.
Clamp the Repair and Let It Cure
Use enough clamp pressure to bring the joint completely together and keep it from moving, but do not tighten so aggressively that the clamp dents the wood, distorts the leg, or squeezes an epoxy joint excessively.
Keep the clamp arrangement stable throughout the manufacturer’s required clamping period. Check alignment immediately after tightening because correcting a crooked leg becomes much harder once the adhesive begins to set.
The repair should remain unloaded until the adhesive has reached the strength required for service. Do not substitute a generic cure time for the instructions on the product you actually used.
Apply Even Clamp Pressure
Choose clamps that fit the shape and size of the repair. Bar clamps, C-clamps, or other suitable clamps can work as long as they hold the pieces without forcing them sideways.
- Set the pieces in their correct position before tightening.
- Place clamp pads or scrap material where needed.
- Tighten gradually from one clamp to the next.
- Stop when the joint is fully seated and stable.
- Re-check the angle of the leg from more than one direction.
Excessive pressure is not a substitute for a poorly fitting joint. If a large gap remains after reasonable clamping, correct the fit or reconsider the repair method.
Protect The Repair Surface
Place a thin cloth, cork pad, cardboard, or scrap wood between a clamp jaw and a finished sofa surface where necessary to prevent dents and scratches.
Make sure the protective pad cannot slide into the glue line or push the leg out of position. The repaired joint should remain aligned with the sofa’s original geometry throughout curing.
Check the clamped repair shortly after assembly for movement, slipping, dents, or unexpected gaps. Correct a problem while the adhesive is still within its workable stage rather than after it hardens.
Allow Full Cure Time
Adhesive cure time is product-specific. For many PVA woodworking glues, a joint should not be stressed for at least 24 hours even when the required clamp time is shorter. Epoxy cure can vary substantially with the resin, hardener, temperature, and application.
- Keep the joint at a temperature allowed by the adhesive manufacturer.
- Maintain the required clamp time.
- Do not sit on or heavily load the sofa during the cure period.
- After curing, inspect for gaps, looseness, cracking, or adhesive failure.
For epoxy, cure stages and working times should be taken from the exact product instructions rather than from a universal 24-hour rule.
Test the Sofa Leg Before You Use It
Testing the repaired sofa leg should be gradual. Begin with the sofa upright on a level floor and inspect the repaired corner without anyone sitting on it.
Press downward gently near the repaired leg while watching the joint. Look for movement between the leg and frame, widening cracks, clicking, creaking, or a mounting plate that shifts under load.
If the connection remains stable, increase the load gradually. Then sit near the repaired area carefully and shift your weight slowly while another person watches the leg if possible.
Stop immediately if the leg changes angle, the joint opens, a screw begins pulling out, or the frame makes a new cracking sound. Reinforcing a failed repair without diagnosing why it moved can simply transfer the failure to another part of the frame.
After several normal uses, inspect the connection again. A repair that remains tight after repeated loading is a much better sign than one that only survives the first test.
Frequently Asked Questions
How to Fix a Wobbly Couch Leg?
Start by identifying whether the leg itself is loose or the mounting hardware is moving. Tighten sound bolts or screws without overtightening. If a screw hole is stripped, rebuild it with sound wood such as a fitted hardwood dowel and drill a new pilot hole. Replace damaged hanger bolts, inserts, T-nuts, or mounting plates rather than forcing loose hardware back into the same damaged material.
How to Reinforce a Sofa Frame?
Inspect the frame first and find the actual weak joint. Tighten sound fasteners, glue close-fitting wood joints, replace damaged mounting hardware, and use fitted wood blocks or appropriate metal brackets to spread load into solid frame members. A badly split rail, detached mounting block, or crushed engineered-wood section may require replacement material or professional furniture repair.
How to Make Couch Legs More Sturdy?
Keep every mounting connection tight, replace bent or stripped hardware, and make sure each leg transfers its load into sound frame wood. Properly fitted mounting plates, corner blocks, hardwood dowels, and correctly sized screws can reduce wobble when installed in the right location. Check all legs periodically because one loose leg can increase side loading on the others.
How to Fix a Snapped Couch Frame?
Expose the damaged frame member and determine how much sound wood remains. A clean split may be glued, clamped, and reinforced with a properly fitted sister piece, block, dowel, or bracket. If the rail is extensively fractured, crushed, or supporting a reclining mechanism, replacement or professional structural repair is safer than simply adding screws around the break.
Can Wood Filler Fix a Stripped Sofa-Leg Screw Hole?
Ordinary cosmetic wood filler is not the best choice for a heavily loaded structural screw connection. For solid wood, rebuilding the hole with a glued hardwood dowel and then drilling a correctly sized pilot hole generally gives the fastener real wood to grip. Threaded inserts or a suitable mounting plate may be better for some sofa designs.
When Should a Broken Sofa Leg Be Replaced Instead of Repaired?
Replace the leg when large pieces of wood are missing, the leg is badly crushed, a long split leaves little sound material around the mounting bolt, alignment cannot be restored, or the same repair has already failed. Also inspect the sofa frame because a replacement leg will not solve a cracked or detached mounting block.
Conclusion
A repaired sofa leg should not be trusted until the entire connection has been inspected, cured, and tested. Make sure the leg is attached to a sound frame, not just held temporarily by extra glue or longer screws. Keep the joint unloaded for the adhesive’s required cure period, then apply weight gradually while watching for movement, gaps, creaking, or shifting hardware. If the repair will not remain stable, replace the damaged component or have the frame professionally repaired before regular use.
Sources
- Titebond Wood Glue Resources — manufacturer guidance on wood-glue surface preparation, clamping, cleaning, and time before stressing a joint.
- WEST SYSTEM Epoxy: Bonding and Clamping — guidance on epoxy surface preparation, bond-line control, clamping, and avoiding excessive pressure.
- USDA Forest Products Laboratory: Adhesives With Wood Materials — technical background on wood bonding, joint preparation, and adhesive performance.
- NIOSH Pocket Guide: Methyl Alcohol — safety information on methanol exposure and flammability relevant to solvent-based repair advice.