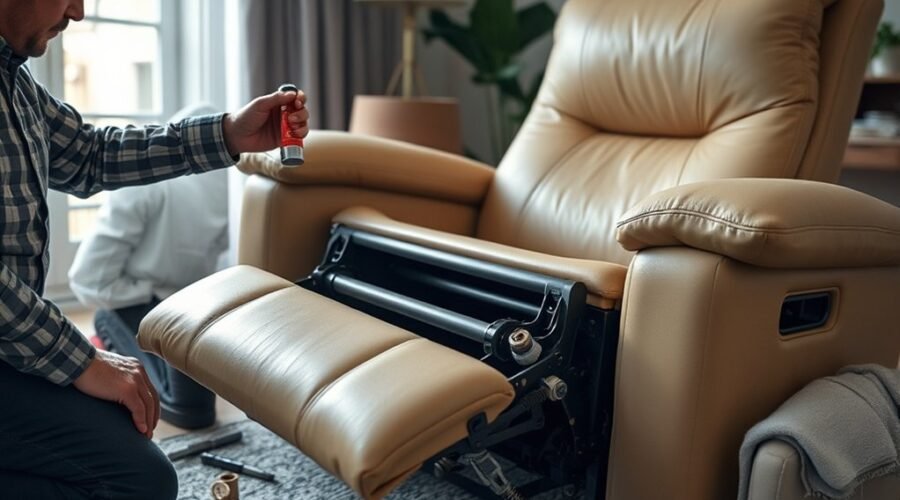
A squeaky recliner is usually caused by loose hardware, dry or rubbing contact points, upholstery friction, or a worn or misaligned mechanism. The safest repair starts by reproducing the sound and finding its exact source before tightening or lubricating anything. Power recliners should be unplugged before inspection, and damaged or bent mechanism parts should be left to a qualified service technician.
Quick Answer
To fix a squeaky recliner, first reproduce the noise and identify whether it comes from upholstery, loose hardware, wood contact, or the reclining mechanism. Unplug power models before inspection. Tighten loose fasteners, use only the lubricant approved by the manufacturer, protect upholstery from drips, and stop if you find bent, broken, or binding parts.
Key Takeaways
- Find the exact squeak before applying lubricant; loose bolts, upholstery, wood contact, springs, and pivots can make similar noises.
- For a power recliner, unplug it before inspecting or servicing the underside and keep hands away from moving parts.
- Use the lubricant specified by the chair manufacturer. Different mechanisms can require different products and application points.
- Do not bend damaged mechanism parts, open motors, or work on broken springs, cracked welds, or damaged electrical components yourself.
- Use only leather-care products approved for the specific upholstery type; household powders and petroleum jelly are not universal leather-squeak remedies.
At a Glance
| Time Required | About 20–45 minutes for basic diagnosis, tightening, and lubrication |
| Difficulty | Easy to moderate for loose hardware and approved lubrication; damaged mechanisms require professional service |
| Tools Needed | Flashlight, screwdriver or correct-size wrench/socket, clean rags, drop cloth, and manufacturer-approved lubricant if needed |
| Cost | Low for basic DIY maintenance if you already own the tools; replacement parts or technician service cost more |
Warning: Unplug a power recliner before moving, tipping, cleaning, or servicing it. Keep hands, fingers, children, and pets away from the mechanism and pinch points. Do not open or lubricate a motor, control box, power supply, or wiring. If the chair must be tipped for access, use a padded surface and a helper for a heavy chair, and never operate a powered mechanism while the chair is on its side or back.
Find the Squeak Source First
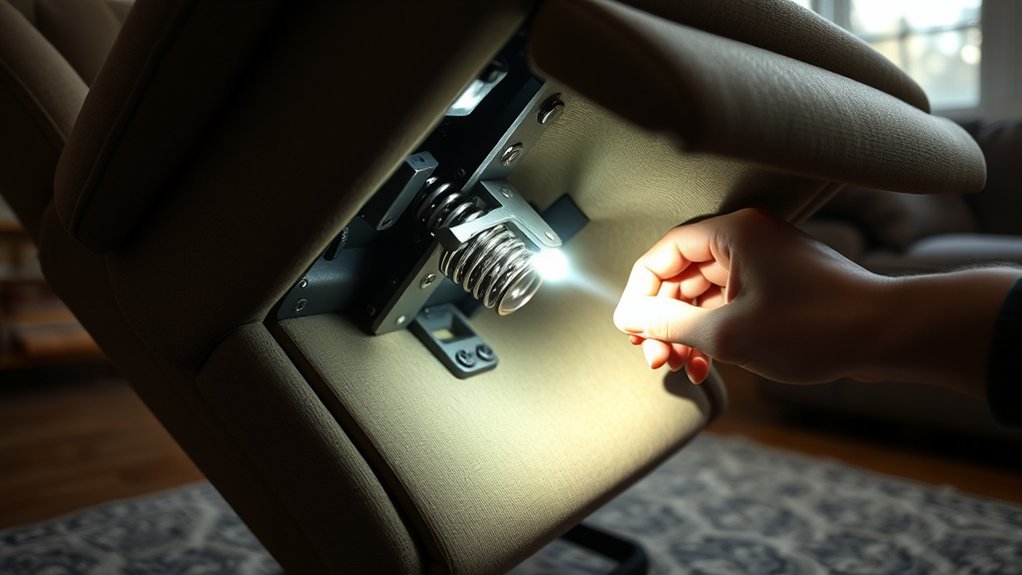
Start by identifying exactly when the noise occurs. Sit in the recliner normally and move it slowly through the motion that produces the squeak. Listen separately while sitting down, rocking, swiveling, raising the footrest, reclining the back, and returning the chair upright.
The sound itself gives useful clues. A soft creak or rubbing sound near the upholstery may come from leather or fabric contact. A sharper squeak underneath the seat is more likely to involve a pivot, spring, fastener, or another mechanical contact point. Scraping, grinding, repeated popping, or a powered mechanism that hesitates or binds deserves closer attention before you continue using the chair.
Also check simple causes before turning the chair over. Remove any object trapped under the seat or footrest. Confirm that the recliner sits solidly on the floor and does not rock because of an uneven surface. A twisted frame or uneven base can produce creaks that sound like an internal mechanism problem.
When underside access is needed, close the footrest, disconnect power if applicable, place a blanket or drop cloth on the floor, and carefully tip the recliner only as the manufacturer permits. Inspect pivots, mounting points, rocker springs, frame joints, and places where metal or wood surfaces appear to rub.
Pro Tip: Have a second person reproduce the noise while you listen from different sides of the chair. Mark the suspected point with removable tape before making a repair. Changing only one thing at a time makes it much easier to prove what actually fixed the squeak.
Tighten Loose Bolts and Joints
Loose hardware is a common source of recliner squeaks because even a small amount of movement can let a bracket, frame member, or mechanism plate shift under load. With the chair safely positioned and powered models unplugged, inspect every accessible mounting bolt, nut, screw, and bracket near the noisy area.
- Check visible fasteners with the correct-size screwdriver, wrench, or socket.
- Tighten only hardware that is actually loose.
- Inspect wood joints for separation, cracked material, stripped screw holes, or movement.
- Test the recliner again before moving to lubrication.
Fasteners should be snug, not forced. Overtightening a screw into wood or engineered wood can strip the hole, crush the material, or create a new problem. If a fastener will not tighten normally, the mounting point may need repair rather than more torque.
Wood glue can help with an appropriate separated wood-to-wood joint, but it should not be used as a substitute for a damaged bracket, stripped hardware, broken frame member, or manufacturer-specified fastener. On a chair that may still be under warranty, check the warranty terms before modifying a structural joint.
Powders and lubricants do not fix loose structural hardware. Correct the movement first, then decide whether a separate friction point still needs treatment.
Lubricate the Recliner’s Moving Parts
Lubrication can quiet a squeak caused by friction, but the correct product and application point depend on the recliner. Check the owner’s manual or manufacturer guidance before spraying every hinge, spring, bolt, or rivet.
For example, La-Z-Boy’s current FAQ says that when lubrication is needed for a squeaking Reclina-Rocker mechanism, clear mineral oil should be used and rivet locations should not be lubricated. That manufacturer-specific instruction takes priority over generic advice.
For other equipment, a manufacturer may permit a dry or silicone-based lubricant. Products such as WD-40 Specialist Silicone are designed for general-purpose linkages, hinges, and similar moving surfaces and leave a clear lubricating film. That does not mean every recliner mechanism should receive silicone spray, and it is different from simply telling readers to use or avoid anything carrying the WD-40 brand name.
When the approved lubricant is known, place a rag or drop cloth behind the target so overspray or oil cannot reach fabric, leather, carpet, electrical components, or finished wood. Apply a small amount directly to the confirmed friction point, wipe away excess, return the chair to its normal upright position, and then test it.
Lubricate the confirmed friction point, not the entire underside of the chair. The owner’s manual should decide which lubricant and locations are appropriate.
Silence Rocker Springs and Metal Rubbing
A rocking recliner can squeak where a spring, spring mount, pivot, bracket, or adjacent metal part moves under load. Inspect the suspected area with a flashlight and look for a polished rub mark, displaced component, unusual gap, or fine metal debris that indicates repeated contact.
- Confirm that the noise comes from the rocker or spring area.
- Check accessible mounting hardware for looseness.
- Compare the left and right sides for obvious differences in position or clearance.
- Apply only the lubricant and application method approved for that mechanism.
- Return the chair upright and test it through its normal motion.
Do not force a spring into a new position while it is under tension. If a spring is broken, badly shifted, heavily worn, or no longer seated as designed, stop using the chair until the part can be inspected or replaced.
Some mechanical noise is normal. La-Z-Boy notes that reclining mechanisms contain moving metal parts and that some sound can occur as a footrest releases. A new or worsening squeak, scrape, grind, or binding sensation is more useful diagnostically than expecting every mechanism to operate in complete silence.
Fix Wood-On-Wood Squeaks With Wax
If the frame is secure but two internal wooden surfaces rub against each other, a thin dry wax coating can sometimes reduce the friction. First confirm that the noise is genuinely wood-on-wood rather than a loose joint.
Use wax only on an appropriate hidden contact surface where it will not damage a finish, upholstery, adhesive, or warranty-covered component. A small amount of plain paraffin or candle wax can be rubbed directly onto the contact point when the chair manufacturer permits this type of treatment.
Wax Friction Points
Before applying wax, reproduce the squeak and locate the exact pair of wooden surfaces that touch. Inspect them for cracking, looseness, protruding hardware, or a separated joint. Wax reduces surface friction; it does not repair structural movement.
- Identify the rubbing wooden surfaces.
- Make sure the joint itself is stable.
- Rub a thin coating of suitable wax onto the hidden contact point.
- Move the chair gently to distribute the wax.
- Recheck the noise and stop once the rubbing is quiet.
A thin coating is enough. Heavy wax buildup can collect dust and make future inspection more difficult.
Apply Candle Wax
A plain, uncolored paraffin-type candle can serve as a simple dry wax source for an appropriate unfinished internal wood contact area. Avoid scented, dyed, oily, or decorative candles that could transfer color or residue.
| Item | Use | Result |
|---|---|---|
| Plain paraffin wax | Thin coating on an approved wood contact point | Reduces dry wood-on-wood friction |
| Application | Rub directly on the confirmed hidden contact surface | Keeps treatment targeted |
| Maintenance | Reapply only if the same friction squeak returns | Avoids unnecessary buildup |
After applying the wax, return the chair to its normal position and reproduce the original movement. If the sound remains unchanged, do not keep adding wax; the noise is probably coming from another source.
Check Wood Joints
Wood joints should be stable before any friction treatment is considered. Inspect for a screw that backs out under load, a separated glued joint, cracked wood, or movement between the mechanism and frame.
- Check the fasteners first.
- Look for visible joint separation or cracks.
- Correct an appropriate loose joint using the proper repair method rather than simply masking its noise.
- Use wax only if a stable wood-to-wood contact point still squeaks.
If a structural frame member is cracked or a mounting area is damaged, professional repair is safer than repeatedly tightening, gluing, or lubricating the area.
Stop Leather Rubbing and Break-In Noise
A leather recliner can make a soft creak when two upholstered surfaces rub as the chair moves. Before treating the leather, confirm that the noise is actually coming from the upholstery rather than the metal mechanism underneath it.
Leather finishes differ, so use the chair manufacturer’s care instructions for the specific upholstery. La-Z-Boy’s leather-care guidance, for example, recommends regular dusting and vacuuming, gentle wiping with a soft lint-free cloth slightly dampened with distilled water, prompt spill care, and treatment appropriate to the leather type.
If the manufacturer approves a leather conditioner for your exact leather, apply it according to those directions and test an inconspicuous area first. Do not assume that baby powder, talcum powder, petroleum jelly, silicone spray, mineral oil, or another household lubricant is safe for the upholstery. These products are not interchangeable with leather-care products and can change the appearance or finish of some materials.
Note: Vaseline is petroleum jelly, not a silicone-based lubricant. Do not apply it to furniture leather unless the upholstery manufacturer specifically approves that treatment.
New leather may become quieter as contact surfaces flex with normal use, but persistent squeaking should still be diagnosed. If the sound occurs only while the reclining mechanism moves, inspect the mechanism rather than repeatedly treating the leather.
Check for Bent Parts and Misalignment
If tightening and correct lubrication do not solve the problem, inspect the mechanism for a visibly bent linkage, cracked bracket, damaged spring, worn pivot, loose mounting point, or component that no longer tracks normally. Fine metal debris, a fresh scrape mark, or a shiny rubbed area can help identify abnormal metal-to-metal contact.
- Compare both sides of the mechanism for obvious differences.
- Look for cracked welds, elongated holes, warped linkage plates, broken springs, and damaged fasteners.
- Check whether the mechanism binds, hesitates, or changes direction unevenly.
- On a power recliner, inspect only accessible cords and connectors visually; do not open the motor, control box, or power supply.
Do not bend a recliner mechanism back into shape as a routine DIY repair. Springs and linkages can be loaded, and an apparently minor deformation may indicate a damaged part that should be replaced. A chair that binds, scrapes heavily, has a broken spring or cracked weld, or has damaged electrical components should be serviced before further use.
Test for Squeaks After Each Repair
Testing after each individual repair is the fastest way to learn what caused the squeak. Make one change, return the chair to its normal upright operating position, and reproduce the same motion that originally caused the noise.
If the squeak disappears, stop. Adding more lubricant or adjusting unrelated hardware after the problem is solved only creates opportunities for mess or damage.
Test After Tightening
After tightening loose hardware, put the recliner upright and move it slowly through the affected motion. Listen for the original squeak and for any new rubbing or binding sound.
- Rock, recline, or move the footrest slowly.
- Note the exact point in the movement where any sound occurs.
- If the hardware is secure but a confirmed friction point still squeaks, consult the manual for the correct lubricant.
- Test again after that single adjustment.
A short maintenance note recording the date, location, and remedy can be useful if the same noise returns later.
Recheck Between Fixes
A squeak may appear only at one reclining angle, under body weight, or while rocking in a particular direction. Test the chair in the same normal positions in which the problem occurred instead of assuming one silent movement proves the repair.
Rechecking also prevents unnecessary work. If tightening one loose mounting bolt solves the noise, there is no reason to spray every pivot. If a sound returns quickly in the same location, repeated lubrication may be masking wear rather than correcting it.
Reproduce the Squeak
Use the original noise as your reference point throughout the repair:
- Move the chair slowly until the sound occurs.
- Press separately on the back, arms, seat, and base to help isolate frame or upholstery movement.
- Have a helper listen near the suspected area while keeping hands completely clear of moving parts.
- Compare the result after each repair with the original sound.
If the squeak changes into grinding, scraping, popping, binding, or abnormal powered movement, stop troubleshooting and arrange service rather than continuing to cycle the chair.
Maintain Your Recliner to Prevent Noise
Preventive recliner maintenance is simple when it follows the manufacturer’s instructions rather than a fixed one-size-fits-all schedule. Inspect the chair when you notice a new sound, looseness, rough motion, or a change in how the footrest, rocker, swivel, or back operates.
Keep accessible areas free of debris, periodically check visible hardware, and correct loose fasteners before repeated movement enlarges a mounting hole. Lubricate a mechanism only where and when the manufacturer calls for it. Do not routinely coat every spring, rivet, or hinge simply because the chair has been in use for several months.
Leather upholstery should also be maintained according to its specific finish. Dust, crumbs, body oils, and debris along seams and contact areas can contribute to rubbing and should be removed using the approved care method.
A brief maintenance log can help with recurring problems. Record the date, where the sound occurred, what you tightened or treated, and whether the repair worked. That information is also useful if you later contact a technician or make a warranty claim.
When to Call for Warranty Service
Stop DIY troubleshooting and check service or warranty options when a squeak is accompanied by a bent linkage, broken spring, cracked weld, damaged mounting point, heavy metal scraping, binding, electrical damage, abnormal motor noise, or a mechanism that no longer moves normally.
Warranty coverage is not determined simply by whether the recliner is less than a year old. Parts coverage, labor coverage, and exclusions can differ by component and model. For example, La-Z-Boy’s current warranty information lists different coverage periods for reclining mechanisms, springs, frames, electrical parts, upholstery, and other components.
- Find the chair’s model, style, serial, or product-identification information.
- Locate the original receipt and warranty documentation.
- Photograph or record the noise and the affected area if it can be done safely.
- Document any basic inspection or maintenance already performed.
- Contact the retailer or manufacturer before making a repair that could alter the mechanism.
Some warranties exclude damage associated with improper treatment or unauthorized alteration, so checking the terms before bending, drilling, disassembling, or substituting parts can prevent an avoidable warranty problem.
Frequently Asked Questions
What Is the Best Lubricant to Use for a Squeaky Recliner?
The best lubricant is the one specified for your recliner’s mechanism by its manufacturer. There is no universal product for every chair. La-Z-Boy, for example, says clear mineral oil should be used if lubrication is required on a squeaking Reclina-Rocker mechanism and says not to lubricate rivet locations. Some other mechanisms may permit silicone or another dry lubricant. Check the manual before applying anything.
Why Is My La-Z-Boy Recliner So Noisy?
Some sound from moving metal parts can be normal, especially as a footrest releases. A new or worsening squeak can also come from loose hardware, a dry friction point, upholstery rubbing, a rocker component, or wear. La-Z-Boy recommends contacting the dealer to diagnose a squeaking rocker and, when lubrication is actually required, following its specified lubrication guidance.
How Do I Lubricate a Recliner Mechanism?
First identify the exact friction point and check the chair’s manual for the approved lubricant. Unplug a power recliner, protect the upholstery and floor with clean rags, and apply only a small amount to the specified mechanical contact point. Wipe away excess, return the chair upright, and test it. Never spray lubricant into a motor, electrical control, power supply, or wiring.
How Do I Stop My Leather Recliner From Squeaking?
First confirm that the leather itself is making the sound. Clean and maintain the upholstery according to the manufacturer’s instructions, because leather finishes require different care. If an approved conditioner is recommended for that specific leather, use it as directed. Avoid automatically applying baby powder, talcum powder, petroleum jelly, silicone spray, or mechanism oil to the leather.
Can I Use WD-40 on a Squeaky Recliner?
Do not choose a lubricant by brand name alone. WD-40 makes different formulas, including Specialist Silicone, but your recliner manufacturer may specify another product such as clear mineral oil. Use the product type required by the chair’s manual and apply it only to approved locations.
When Should I Stop Trying to Fix a Squeaky Recliner Myself?
Stop DIY work if you find a bent mechanism, broken or displaced spring, cracked weld, damaged frame, heavy scraping, persistent binding, damaged electrical wiring, or abnormal motor or actuator operation. These problems can require replacement parts, special tools, or controlled spring/mechanism work and are better handled through the manufacturer, retailer, or a qualified technician.
Conclusion
A squeaky recliner usually becomes easier to fix once the exact source is identified. Start with simple causes such as debris, an uneven base, or loose hardware, then use only manufacturer-approved lubrication where friction has been confirmed. Treat leather according to its specific care instructions instead of applying household lubricants or powders.
Most importantly, separate ordinary maintenance from mechanism repair. A bent linkage, broken spring, cracked frame or weld, binding mechanism, damaged wiring, or abnormal powered movement is a reason to stop and use warranty or professional service rather than forcing the chair back into alignment.
Sources
- La-Z-Boy Frequently Asked Questions — manufacturer guidance on squeaking rocker mechanisms, clear mineral oil, rivet locations, and normal mechanism noise.
- La-Z-Boy Power Recliner Operating Instructions — electrical, servicing, moving-part, and pinch-point safety guidance.
- La-Z-Boy Fabric & Leather Care — manufacturer guidance for routine leather cleaning and care.
- La-Z-Boy Parts & Warranty Information — current component, labor, service, alteration, and warranty information.
- WD-40 Specialist Silicone Lubricant — manufacturer information on silicone lubricant use for linkages, hinges, and compatible surfaces.