
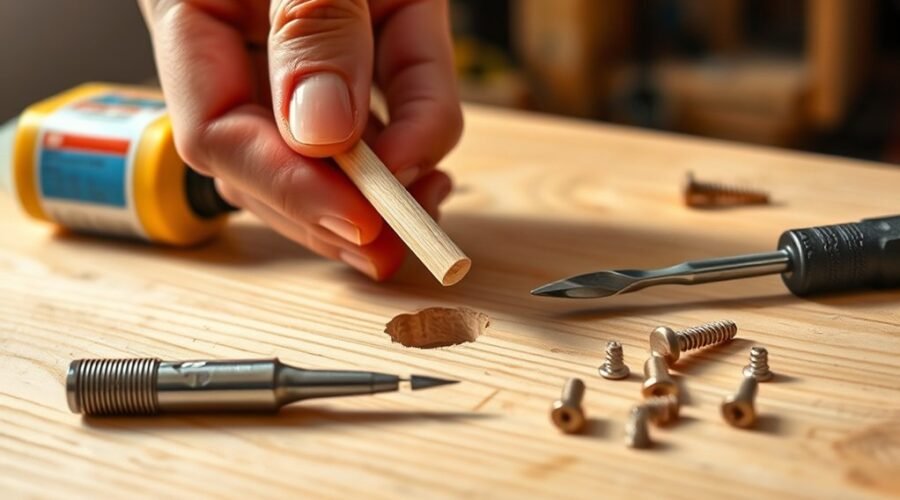
A stripped screw hole in flat-pack furniture can often be repaired without replacing the whole panel. For a small, clean hole in sound wood or particleboard, wooden toothpicks or thin wood splints with PVA wood glue may restore enough material for the original screw to grip. Larger or badly damaged holes may need a hardwood dowel, a drillable repair epoxy, a threaded insert, or replacement of the damaged panel.
Quick Answer
Remove the screw, check that the surrounding panel is still solid, clean out loose material, and pack a minor stripped hole with wood glue-coated toothpicks or wood splints. Let the adhesive cure fully, trim the repair flush, drill a correctly sized pilot hole if needed, and reinstall the screw by hand without overtightening.
Key Takeaways
- Use the toothpick-and-wood-glue method only when the surrounding particleboard, MDF, or wood is still solid.
- Use a hardwood dowel, suitable repair epoxy, or threaded insert when the hole is badly enlarged or must carry more load.
- Do not assume one pilot-hole percentage works for every screw and material; match the hole to the screw’s root diameter, substrate, and manufacturer guidance.
- Follow the adhesive manufacturer’s cure time before drilling, tightening, or loading the repair.
- Stop and consider replacing the panel when it is cracked, swollen, crumbling, hollow around the fastener, or part of a high-load safety-critical joint.
At a Glance
| Time Required | About 15–30 minutes of active work, plus the adhesive’s full cure time |
| Difficulty | Easy for a minor toothpick repair; moderate for dowels or threaded inserts |
| Tools Needed | Correct screwdriver, wooden toothpicks or dowel, PVA wood glue, trimming knife or flush-cut saw, drill and suitable bit if a pilot hole is needed |
| Cost | Usually low when tools are already available; dowels, inserts, or repair epoxy add material cost |
How to Fix a Stripped Screw Hole in Flat Pack Furniture
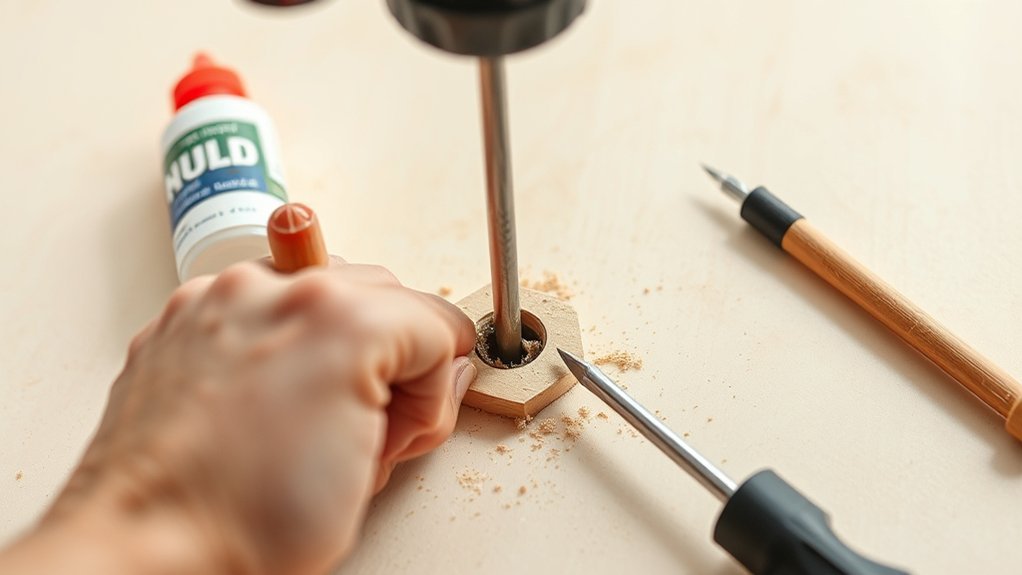
The best repair depends on the material, amount of damage, screw type, and load on the joint. Flat-pack furniture may use particleboard, MDF, fibreboard, solid wood, plywood, or lightweight composite panels, and these materials do not all hold screws in the same way.
For a minor stripped hole surrounded by firm material, wooden toothpicks or thin wood splints coated with PVA wood glue can create fresh material for the screw threads to grip. Titebond, for example, lists particleboard among the porous materials suitable for its Original Wood Glue.
When the damaged opening has become noticeably larger, a hardwood dowel repair generally creates a more substantial plug. Drillable two-part repair epoxy can be useful when the hole shape makes a dowel impractical, but only use a product that is intended to cure hard enough for drilling and fastening.
Warning: Do not keep enlarging a hole in thin particleboard or MDF until you know the panel thickness and what is behind it. A drill bit, dowel, longer screw, or oversized screw can break through the opposite face or split material near an edge.
A larger screw is sometimes usable when the original hole is only slightly worn, but it is not the default fix. Confirm that the fitting accepts the larger diameter, the panel has enough thickness and edge distance, and the replacement will not damage the furniture.
In particleboard, a securely seated screw is better than extra tightening. Once the screw is snug, additional torque can strip the repaired material again.
Inspect the Hole Damage
Before choosing a repair, remove the load from the joint and inspect the stripped screw hole closely. Look for ragged edges, loose fibres, crushed particleboard, swelling, cracks, missing chunks, or a hole that has broken into a hollow section of the panel.
Check the surrounding material as well. A small stripped hole in otherwise solid material is a good candidate for a simple repair. A wide crater, cracked edge, water-swollen particleboard, or soft and crumbling MDF needs a stronger approach and may require replacement of the damaged component.
Identify the fastener too. An ordinary wood screw can often be repaired with the methods in this guide. A cam bolt, cross dowel, threaded furniture connector, or proprietary fitting should be restored with compatible hardware rather than treated as an ordinary wood-screw hole.
Note: If the furniture came with numbered hardware, check the original assembly guide before changing screw size or type. Manufacturers such as IKEA provide replacement screws and other small fittings for many products.
Remove the Screw Without Wrecking It
Use a screwdriver or driver bit that fully matches the fastener head. Press straight into the screw and turn counterclockwise with controlled pressure. If the screw simply spins because the hole is stripped, pull outward gently on the fitting while turning so the remaining threads can climb out.
If the screw head is also damaged, placing a thick rubber band between the driver and screw head may provide enough extra friction to remove a mildly rounded fastener.
If the head is exposed, locking pliers can sometimes turn it out. A screw extractor should be reserved for a fastener that cannot be removed with normal methods because drilling for an extractor introduces additional risk to thin furniture panels.
Once the screw is out, set it aside so its diameter, length, thread shape, and head style can be compared with any replacement.
Pick the Best Repair Method
Select the repair according to the condition of the hole rather than automatically reaching for a bigger screw.
| Condition | Preferred Approach | Best For |
|---|---|---|
| Slightly enlarged hole; surrounding material solid | Wood toothpicks or splints with PVA wood glue | Light to moderate furniture hardware |
| Large round or irregular stripped hole | Drill clean and glue in a hardwood dowel | A stronger rebuilt screw location |
| Awkward cavity that cannot accept a dowel | Drillable two-part repair epoxy rated for the substrate | Irregular damage where a solid plug is impractical |
| Joint repeatedly assembled and disassembled | Threaded insert designed for the panel and matching machine screw | Table legs, removable frames, and repeated servicing |
| Cracked, swollen, crumbling, hollow, or badly broken panel | Replace the panel or use the manufacturer’s approved repair | Damage beyond a dependable local screw repair |
An oversized screw should be treated as a limited option, not a universal repair. Increasing diameter may provide new thread engagement, but it can also split particleboard, interfere with brackets, or make a future repair harder.
Likewise, avoid using the phrase Gorilla Glue as though it described one adhesive. Gorilla sells several different adhesive types. If using Gorilla Wood Glue or another PVA wood glue, follow that exact product’s instructions. If using polyurethane glue or epoxy, follow the cure, moisture, expansion, clamping, and cleanup directions for that specific product.
When Toothpicks Are Not Enough
A toothpick repair works by adding fresh wood fibres to a hole that still has sound surrounding material. It is not a reliable way to reconstruct a large missing section of panel.
Move to a stronger repair when the screw hole has become a crater, the screw carries a heavy bracket, the joint repeatedly works loose, or the furniture will be dismantled often.
For a dowel repair, drill the damaged area only large enough to create a clean round opening, taking care not to drill through the panel. Test-fit a hardwood dowel, coat the mating surfaces with suitable wood glue, insert the dowel, and let it cure fully before trimming and drilling a new centered pilot hole.
A threaded insert can be useful when repeated assembly would otherwise wear out wood fibres. Select an insert specifically intended for wood or engineered wood, and follow the insert manufacturer’s required hole diameter and installation method.
For beds, chairs, wall-mounted cabinets, desks supporting heavy equipment, or any joint whose failure could injure someone, do not rely on a cosmetic filler or improvised repair if the surrounding panel itself is damaged.
Fix the Hole With Toothpicks and Glue
For a small stripped hole in sound material, start by removing loose dust and fragments. Do not aggressively excavate solid surrounding material.
Coat several wooden toothpicks or narrow wood splints with a thin layer of PVA wood glue. Press them into the hole until they fit tightly enough to replace the missing material without forcing the panel apart.
- Use real wood toothpicks or wood splints rather than plastic.
- Coat the wood with glue instead of flooding the hole.
- Pack the opening firmly without hammering hard enough to split the panel.
- Wipe away wet squeeze-out according to the adhesive instructions.
- Leave the repair undisturbed for the manufacturer’s stated cure time.
Once the adhesive has cured, trim the excess material flush with a sharp utility knife, chisel used carefully, or flush-cut saw. Sand lightly only if needed to leave the fitting sitting flat.
Pro Tip: Reinstall the screw with a hand screwdriver for the final turns. The extra feedback makes it easier to feel when the screw is seated so you do not strip the fresh repair with one unnecessary turn.
Let the Repair Cure Fully
The repaired hole should remain unloaded until the adhesive has reached the stage specified by its manufacturer for machining, drilling, assembly, or full service. Do not assume that “dry to the touch” means the bond has reached full strength.
PVA wood glues commonly need substantially longer to reach full strength than their initial grab or clamp time. For example, Titebond recommends avoiding stress on most new joints for at least 24 hours, while Gorilla Wood Glue lists a 24-hour cure time. Always follow the product you actually used.
Epoxy is different. Its working time and cure schedule depend on the resin/hardener combination, temperature, quantity mixed, and product formulation. Use the epoxy manufacturer’s stated time before sanding, drilling, or loading it.
Wait the Full Cure
Read the adhesive label or technical instructions and keep the repair within the recommended application and curing temperature range. Do not substitute a generic “24-hour rule” when the product specifies something different.
Keep the joint still while it cures. Movement can break a weak early-stage bond or shift a dowel before the adhesive has developed enough strength.
- Follow the adhesive’s specified application temperature.
- Observe any clamping requirement.
- Wait for the stated machining or load time.
- Do not accelerate curing with uncontrolled heat.
Avoid Early Stress
Do not reinstall a heavy bracket, load a shelf, sit on a repaired chair, or tighten the screw aggressively before the repair is ready. Early loading can pull the filler, dowel, or adhesive away from the weakened panel.
If the repair still feels soft, flexible, tacky, or easy to mark when the product should have cured, stop and allow more time. Temperature outside the recommended range, incorrect epoxy mixing, excessive moisture, or incompatible surfaces can interfere with curing.
Test Before Reassembly
After curing, inspect the repaired area before drilling. The plug or filler should be hard, stable, and firmly bonded to the surrounding material.
Apply only light hand pressure at first. If a dowel twists, epoxy separates from the walls of the hole, or glued splints move, the repair is not ready for reassembly.
- Check that the repaired material is solid.
- Make sure the fitting can sit flat against the panel.
- Confirm the screw length will not penetrate the opposite face.
- Re-drill only after the repair is stable.
Level the Repaired Hole
After the adhesive has fully cured, trim protruding toothpicks, splints, dowels, or repair filler so the surface is level with the surrounding panel.
Level the repaired area only after it has cured enough to cut or sand without pulling the new material out of the hole.
A flush-cut saw, sharp chisel, utility knife, or sandpaper can be used depending on the repair. Protect thin laminate or veneer around the hole because aggressive sanding can quickly cut through the decorative surface.
Work in small passes and check frequently. The goal is a level mounting surface, not removal of additional panel material.
Once the area is flush, remove dust before marking the new screw center.
Drill a Clean Pilot Hole
A pilot hole can reduce splitting and help keep the screw centered, but its size should be chosen for the screw geometry and substrate. Do not use one fixed percentage of the screw’s outside diameter for every repair.
For conventional wood screws, the pilot is normally related to the root or minor diameter between the threads. Denser solid woods generally use a larger pilot relative to that root diameter than softer woods. Engineered panels and specialty furniture screws can have their own requirements.
Choose the Right Bit
Use a sharp twist bit or brad-point bit that creates a clean hole of the needed diameter. Compare the bit with the screw’s solid core between the threads, and use the fastener manufacturer’s pilot-hole chart whenever one is available.
Do not automatically use a Forstner or spade bit for an ordinary screw pilot hole. Those tools remove substantially more material and are better suited to larger bored holes, recesses, or specific dowel repairs.
Mark the required depth on the bit with tape or use a drill stop so the bit cannot pass through a thin furniture panel.
- Match the pilot to the screw and substrate.
- Use a sharp, straight bit.
- Set a depth limit before drilling.
- Keep the drill perpendicular to the surface unless the original fitting intentionally uses an angle.
Mark the Drill Spot
Mark the center of the repaired hole with a pencil or fine awl. The new hole should align with the fitting so the screw is not forced sideways when tightened.
Temporarily position the hinge, bracket, rail, or other hardware and confirm that its hole lines up with your mark before drilling.
If the original screw location was close to an edge, avoid shifting the new hole farther toward that edge, where the remaining material may split or break away.
Drill Straight and Clean
Support the panel and drill at low to moderate speed with the bit square to the surface. Apply only enough pressure to let the bit cut.
Stop at the planned depth. Remove loose drilling dust and check that the hole remains centered and that the surrounding repair has not cracked or lifted.
- Do not force a wandering bit.
- Do not drill deeper than the screw requires.
- Keep fingers clear of the back side of the drilling area.
- Wear eye protection when drilling or cutting repair material.
Drive the Screw Back In
Clear loose dust from the pilot hole and position the furniture fitting correctly. Start the screw by hand so it enters straight rather than cross-threading or cutting a new path beside the repair.
Turn the screw steadily until the head seats against the fitting. For the final turns, a manual screwdriver gives better control than a high-speed drill or impact driver.
| Option | Effect | When to Use It |
|---|---|---|
| Clean repaired hole | Lets threads seat cleanly | Every repair |
| Original-size screw | Preserves original fitting geometry | Preferred after toothpick or dowel repair |
| Slightly larger screw | Engages additional material | Only when panel thickness, edge clearance, and hardware allow it |
Stop tightening as soon as the fitting is secure. If the screw begins to spin without becoming tighter, do not continue. Remove it and reassess the repair rather than enlarging the hole again.
Prevent Stripped Screw Holes
Preventing stripped screw holes is mainly about alignment, correct hardware, and controlled torque. Start screws straight and tighten them only until the joint is secure.
Use the screw type and length specified for the furniture whenever possible. If the original fastener is damaged or missing, check the assembly instructions for its part number before substituting a different screw.
- Use the correct screwdriver or driver bit.
- Start threaded fasteners by hand.
- Use low clutch settings when assembling with a drill/driver.
- Finish tightening delicate particleboard or MDF joints by hand.
- Do not repeatedly remove and reinstall wood screws unnecessarily.
- Consider a properly installed threaded insert when a joint must be dismantled frequently.
- Check loose fittings before movement enlarges their holes.
A small amount of adhesive should not be routinely added to every screw hole during normal assembly. Glue can complicate future disassembly and may interfere with proprietary fittings. Use adhesive as part of a planned repair when it is compatible with the material.
Frequently Asked Questions
Can a stripped screw hole be fixed?
Yes. A minor stripped hole in sound wood, MDF, or particleboard can often be rebuilt with wood splints or toothpicks and PVA glue. Larger damage may need a hardwood dowel, a suitable drillable repair epoxy, a threaded insert, or replacement of the damaged panel.
How do you fill screw holes in furniture?
Choose the filler according to what the hole must do afterward. Cosmetic holes can use ordinary wood filler, but a hole that must hold a screw needs material that can support threads. Common repairs include glued wood splints, a hardwood dowel, a suitable drillable epoxy repair compound, or a threaded insert.
Can I use a toothpick to fix a stripped screw hole?
Yes, when the hole is only mildly stripped and the surrounding material is firm. Coat wooden toothpicks or thin wood splints with PVA wood glue, pack them into the hole, let the adhesive cure, trim them flush, and reinstall the screw carefully. Use a stronger repair when the surrounding panel is badly damaged.
What can I put in a screw hole to make it tighter?
For a minor furniture repair, glued wooden toothpicks or splints can provide fresh fibres for the threads. A hardwood dowel is better for a larger damaged hole. A suitable two-part repair epoxy or threaded insert may be appropriate in other cases. Ordinary cosmetic wood filler is not the first choice for a loaded screw.
Should I use a bigger screw in a stripped particleboard hole?
Only in limited situations. A slightly wider or longer screw may engage fresh material, but it can also split particleboard, break through a thin panel, or fail to fit the original bracket. Rebuilding the original hole is usually safer when you want to retain the original hardware.
When should I replace the furniture panel instead of repairing the hole?
Consider replacement when the panel is cracked through, badly swollen from moisture, crumbling around the fastener, missing a large section, or hollow where the screw needs solid support. Replacement is also the safer choice for heavily loaded furniture when a local repair cannot reliably restore the joint.
Conclusion
A stripped screw hole in flat-pack furniture is often repairable, but the right method depends on the condition of the panel. Toothpicks or wood splints with PVA glue work best for minor damage in sound material. Larger failures may need a hardwood dowel, repair epoxy, threaded insert, or replacement component.
Whatever method you use, let the repair cure fully, drill only as deep and wide as necessary, keep the screw aligned, and stop tightening when the joint is secure. Controlled preparation usually produces a better repair than extra force.
Sources
- American Wood Council — 2024 National Design Specification for Wood Construction — current technical standard covering wood fasteners and connections.
- USDA Forest Service — Wood Handbook, Chapter 8: Fastenings — technical background on screws, fastening, withdrawal resistance, and wood connections.
- Titebond Original Wood Glue — manufacturer guidance on particleboard compatibility, application, and wood-glue use.
- Gorilla Wood Glue — manufacturer cure, clamping, temperature, and cleanup guidance for its PVA wood glue.
- WEST SYSTEM — Epoxy Chemistry Basics — explains how formulation and temperature affect epoxy working and cure times.


