A chipped veneer edge on wood furniture can often be repaired without refinishing the entire piece, but the correct method depends on what is damaged. Re-bond loose veneer before filling anything. Use a color-matched hard-wax or repair filler for a small cosmetic loss, and use matching real-wood veneer when a larger section is missing. If the substrate is swollen, soft, or crumbling, correct that problem before attempting a surface repair.
Quick Answer
To repair a chipped veneer edge, first secure any loose original veneer with a suitable wood adhesive. Fill small cosmetic chips with a color-matched repair filler or hard wax, but patch larger missing areas with matching veneer. Level the repair carefully, recreate the color and grain, then apply a compatible finish after testing it in a hidden area.
Key Takeaways
- Re-glue intact but loose veneer before filling or patching the chipped area.
- Use color-matched filler or hard wax for small cosmetic losses; use matching veneer for larger missing areas.
- Do not automatically clean old glue with denatured alcohol because alcohol can damage or remove a shellac finish.
- Keep sanding to a minimum because furniture veneer is thin and can be sanded through quickly.
- Match the repair method to the existing finish, especially on antique or historically significant furniture.
At a Glance
| Time Required | About 30–90 minutes of hands-on work, plus adhesive, filler, stain, or finish drying and curing time |
| Difficulty | Easy to moderate for a small chip; moderate for a grain-matched veneer patch |
| Tools Needed | Sharp utility knife, small scraper, wood glue or appropriate hide glue, wax paper, flat caul, clamps, repair filler or matching veneer, fine abrasive if required, and color/finish touch-up supplies |
| Cost | Usually low if you already own clamps and basic tools; higher if you need a burn-in repair kit, specialty color products, or matching veneer |
Warning: Veneer is thin. Aggressive scraping or sanding can cut through the surrounding wood layer, while solvents can soften certain finishes. Use sharp tools away from your hands, protect nearby finished surfaces, ventilate the work area when required, and follow the adhesive, filler, finish, and heated-tool safety instructions.
Inspect the Chipped Veneer Edge
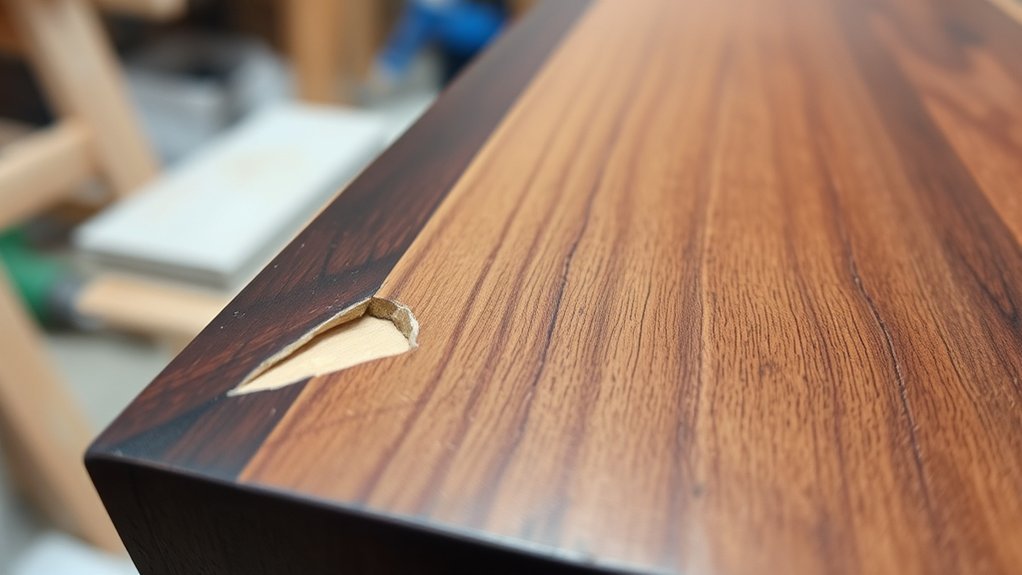
Examine the chipped veneer edge closely to determine how far the damage extends and whether the substrate beneath has been exposed or compromised.
Identify every lifted, cracked, or missing section of damaged veneer. If a loose piece is still present, keep it whenever possible. Original veneer usually gives a better color, grain, thickness, and figure match than a replacement.
Identify every lifted, cracked, or missing section of veneer before choosing between re-gluing, filling, and patching.
Check the exposed base for soft spots, swelling, crumbling particleboard, splits, mold staining, or continuing moisture damage. A cosmetic repair will not last if the substrate beneath the veneer is unstable.
Look for old glue residue, dirt, wax, oil, or finish contamination that could interfere with a new bond. Also compare the surrounding color, grain direction, figure, and sheen so the repaired area can be matched as closely as practical.
Observe the furniture structure as well. If the panel, edge, or frame moves when gently handled, repair the structural problem before treating the veneer.
Choose Filler or a Veneer Patch
The size and type of damage determine the best repair. Using filler for every chip can create an obvious flat patch where natural wood grain should continue.
| Damage | Best Starting Method |
|---|---|
| Veneer is present but lifted | Re-bond the original veneer |
| Tiny nick or shallow cosmetic loss | Color-matched wax, hard fill, or compatible touch-up filler |
| Small-to-medium chip where an invisible grain match is not essential | Hard-wax or compatible repair filler |
| Larger missing area on visible natural wood | Matching real-wood veneer patch |
| Soft, swollen, or crumbling substrate | Stabilize or repair the substrate first |
| Valuable antique, marquetry, or historically significant furniture | Use conservation-aware methods or consult a furniture conservator |
Pro Tip: Photograph the damage and save every detached fragment in a labeled bag or container before cleaning. Even a small original chip may be easier to reattach than to recreate convincingly.
Clean Away Loose Veneer and Old Glue
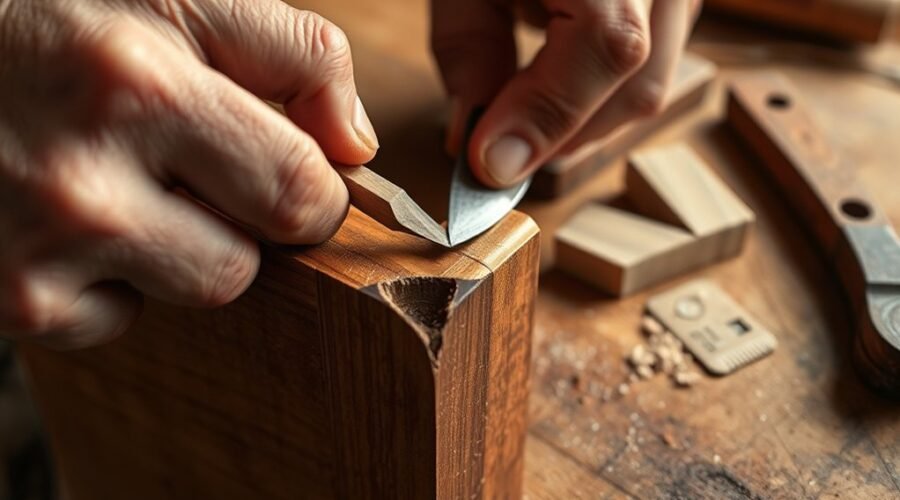
Carefully remove only veneer that is already detached, fractured beyond reuse, or preventing the remaining material from lying flat. Use a sharp utility knife or small chisel with controlled pressure so you do not enlarge the defect.
Remove loose, powdery, or brittle old glue mechanically with a small scraper or knife wherever practical. Do not automatically soften old adhesive with denatured alcohol. Alcohol can soften or remove shellac, so an unknown furniture finish should be identified or tested in a hidden area before any solvent is used.
The National Park Service furniture-cleaning guidance recommends testing solvents in an inconspicuous area before treating clear-finished furniture. Historic furniture can also contain hide glue or other original adhesive that deserves a more conservative approach.
Inspect the exposed base carefully to confirm that a solid substrate remains beneath the veneer. Remove dry dust and loose fibers with a soft brush or clean cloth. Avoid soaking particleboard, MDF, or raw veneer with water.
Only after the area is clean, dry, flat, and stable should you proceed with re-bonding, filler, or a veneer patch.
Glue Down the Loose Veneer
If the original veneer is intact but lifted, re-bond it before repairing the missing chip. Gently raise the loose edge only far enough to clean and introduce adhesive without cracking the thin veneer.
For typical modern wood-to-wood repairs with clean, porous surfaces, a suitable PVA wood glue can work well. Titebond Original Wood Glue, for example, is intended for wood and other porous wood products. Antique furniture may instead call for hide glue or another conservation-appropriate adhesive, especially where reversibility matters.
Spread only enough adhesive to create complete contact. Press the veneer into alignment, wipe away wet squeeze-out carefully, then place wax paper over the repair. Put a smooth, flat wooden caul over the wax paper before adding a clamp or weight. The caul distributes pressure and reduces the risk of a clamp dent or raised spot.
| Step | Action | Result |
|---|---|---|
| 1 | Lift the loose edge only as needed | Access the bonding surfaces without cracking the veneer |
| 2 | Apply a thin, even adhesive layer | Complete contact without excessive squeeze-out |
| 3 | Press the veneer into alignment | Original grain and edge return to position |
| 4 | Add wax paper, a flat caul, and clamp pressure | Flat, evenly supported bond |
| 5 | Clean excess glue while appropriate for the adhesive | Reduced staining and finishing problems |
Follow the adhesive manufacturer’s clamp and cure instructions rather than relying on one universal time. Titebond’s current guidance, for example, recommends roughly 30 to 60 minutes of clamping for many unstressed wood-glue joints, 24 hours for stressed joints, and at least 24 hours before stressing a new joint.
Note: Contact cement is sometimes used for specific laminates or manufacturer-specified applications, but it should not automatically replace wood or hide glue in a furniture-veneer repair. Match the adhesive to the actual veneer, substrate, existing adhesive, and restoration goal.
Patch the Chip With Color-Matched Filler
A small chipped edge can often be rebuilt with a color-matched repair filler. Hard-wax systems such as Mohawk Hard Fill are designed for minor-to-medium defects in wood and laminate and are available in many colors.
Clean the chip and remove loose material without widening the damage. Choose a shade that matches the surrounding background color rather than automatically choosing the darkest grain line.
For Mohawk Hard Fill, the manufacturer’s current directions call for pre-coloring the damaged area when necessary, melting the material with an appropriate burn-in knife, and flowing it into the defect slightly above the surrounding surface. Use the manufacturer’s recommended heated applicator rather than an improvised pyrography pen.
Allow the filler to set as directed, then use the compatible leveling tool or scraper to shave excess material flush without gouging the surrounding finish. Mohawk describes Hard Fill as requiring little-to-no sanding, while its Quick Fill burn-in product specifically states that no sandpaper is required.
After leveling, add fine grain or color details with compatible touch-up products if needed. A hard-wax repair is already colored material, so do not treat it like raw wood and expect ordinary penetrating stain to behave the same way.
Patch Larger Missing Areas With Matching Veneer
When a noticeable section of veneer is completely missing, a matching veneer patch usually gives a more natural repair than building the entire area from filler. This is especially important on stained or clear-finished furniture where real grain remains visible.
- Find matching veneer. Match the wood species or appearance, grain direction, figure, thickness, and general color as closely as possible.
- Prepare a clean repair boundary. With a sharp knife, trim only enough damaged material to create stable edges. Avoid unnecessarily enlarging the loss.
- Cut and dry-fit the patch. Make the replacement slightly oversized, orient its grain with the surrounding veneer, and refine the fit before applying glue.
- Glue the patch. Apply a thin, appropriate adhesive layer to clean bonding surfaces. Place the patch, cover it with wax paper, then add a flat caul.
- Clamp until cured. Follow the adhesive manufacturer’s pressure and curing instructions.
- Trim and level carefully. Pare any proud edge with a sharp blade or scraper. Sand only when needed and with minimal pressure so the surrounding veneer is not thinned or cut through.
A well-fitted wood patch may still require color adjustment because raw replacement veneer can look lighter or different from an aged finished surface. Make color changes gradually and test the finishing system on scrap veneer whenever possible.
Level, Color, Stain, and Seal the Repair
The correct finishing sequence depends on what was used to rebuild the chip.
For a hard-wax or burn-in filler repair: level the fill with the manufacturer’s scraper or leveling tool. Add compatible touch-up color or grain lines if needed, then use only a topcoat the repair-product manufacturer and existing furniture finish can accept. Do not assume that penetrating wood stain will soak into wax.
For a real-wood veneer patch or stainable wood filler: lightly level the repair with a scraper or fine abrasive if necessary. Protect the surrounding original veneer and finish, and use the minimum sanding required. A replacement veneer patch can then be color-matched with a suitable stain, dye, toner, or touch-up system before finishing.
Always test color and finish in an inconspicuous location or on scrap material first. Matching sheen is nearly as important as matching color: a satin patch on a gloss surface can remain obvious even when the color is accurate.
A protective clear finish can then be applied if it is compatible with the existing finish and repair material. Dixie Belle Clear Coat, mentioned in the original repair method, is a water-based polyacrylic marketed primarily for painted furniture and similar projects; it should therefore be treated as one possible finishing product rather than a universal sealer for every veneer repair. Follow the product’s instructions and test compatibility first.
Allow each coating to dry and cure according to its manufacturer instructions before exposing the repaired edge to normal handling, cleaning, moisture, or abrasion.
Troubleshooting a Visible Veneer Repair
The repair is too dark: Do not immediately add more finish. Let the applied color dry fully, compare it under normal room lighting, and adjust with a lighter compatible touch-up color if the system allows it.
The filler forms a raised bump: Level the repair with the recommended scraper rather than sanding broadly across the surrounding veneer.
The patch seam is obvious: Check whether the grain direction, background color, and sheen match. Fine grain lines or toner can disguise a sound seam better than applying a heavy dark stain.
The veneer lifts again: Look for inadequate adhesive contact, trapped old glue, insufficient clamping, moisture exposure, movement in the substrate, or a failed substrate beneath the veneer.
The substrate is swollen: Stop treating the issue as a surface chip. Particleboard or MDF that has expanded from moisture may need stabilization, reshaping, or partial replacement before a veneer repair can hold.
Repairing Antique or Valuable Veneer
Antique veneer deserves a more conservative approach than ordinary modern furniture. Historically, furniture veneers were often attached with hide or fish glue, and older veneer can be thicker and more irregular than modern material. The National Park Service Museum Handbook notes that hide glue is readily resoluble and remains useful in conservation work because reversibility can be important.
Avoid stripping a historic finish, aggressive sanding, permanent adhesive substitution, or unnecessary removal of original veneer merely to make a repair look new. The Smithsonian Museum Conservation Institute also identifies improper repairs and inappropriate materials as potential causes of furniture deterioration.
If the furniture is valuable, historically important, highly figured, marquetry-decorated, or already has previous restoration work, a furniture conservator can determine whether re-bonding, filling, patching, or leaving the damage stable is the most appropriate treatment.
Frequently Asked Questions
Can You Fix Chipped Wood Veneer?
Yes. Loose veneer can often be re-glued, small missing chips can be rebuilt with a compatible color-matched filler or hard wax, and larger losses can be patched with matching real-wood veneer. The substrate must be firm and dry, and the repair should be matched to the existing finish.
What to Do if Veneer Is Chipped?
Inspect the chip first and save any detached original veneer. Re-bond loose edges, make sure the substrate is stable, then choose a filler for a small cosmetic loss or matching veneer for a larger missing section. Finish by leveling the repair and matching its color, grain, and sheen.
What Is the Best Wood Filler for Repairing Veneer?
There is no single best filler for every veneer repair. A hard-wax repair product such as Mohawk Hard Fill is suitable for many minor-to-medium cosmetic defects. Conventional stainable wood filler can be useful when the surrounding finishing system allows it. Larger visible losses usually look better with matching real veneer rather than a large filler patch.
How to Repair Veneer on Antique Furniture?
Preserve all original veneer fragments and avoid aggressive sanding, stripping, or irreversible repairs. Traditional hide glue may be appropriate when compatible with the original construction because it is reversible, but valuable or historically significant furniture is best assessed by a furniture conservator before major intervention.
Should I Use Wood Filler or a Veneer Patch?
Use filler or hard wax for a relatively small cosmetic defect where recreating real grain is not essential. Choose a veneer patch when a larger area is missing from clear-finished or stained furniture and you want the wood grain to continue naturally across the repair.
Can I Sand Chipped Veneer Smooth?
Only very lightly and only when the repair material requires sanding. Veneer is thin, so broad or aggressive sanding can cut through the wood layer. Scraping or using the filler manufacturer’s leveling tool is often safer for a localized repair.
Conclusion
Repairing a chipped veneer edge is usually manageable when the method matches the damage. Re-bond intact loose veneer first, use color-matched filler or hard wax for small cosmetic losses, and patch larger missing areas with matching veneer. Careful leveling, restrained sanding, accurate color and sheen matching, and a compatible finish help the repair blend with the surrounding furniture while preserving as much original material as possible.
Sources
- Mohawk Finishing Products — Hard Fill Product Data Sheet — application, burn-in knife, filling, leveling, and color-repair procedure.
- Mohawk Finishing Products — Hard Fill — intended use for minor-to-medium defects in wood and laminate.
- Titebond — Woodworking Glue Guidance — clamping, curing, surface preparation, and glue-cleanup guidance.
- National Park Service Museum Handbook — Curatorial Care of Wooden Objects — veneer, historic adhesives, hide glue, and conservation considerations.
- National Park Service — Cleaning Wood Furniture — finish assessment and solvent-testing precautions.
- Smithsonian Museum Conservation Institute — Furniture Deterioration — risks associated with inappropriate repairs, finishes, and restoration techniques.