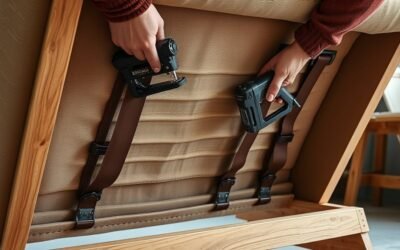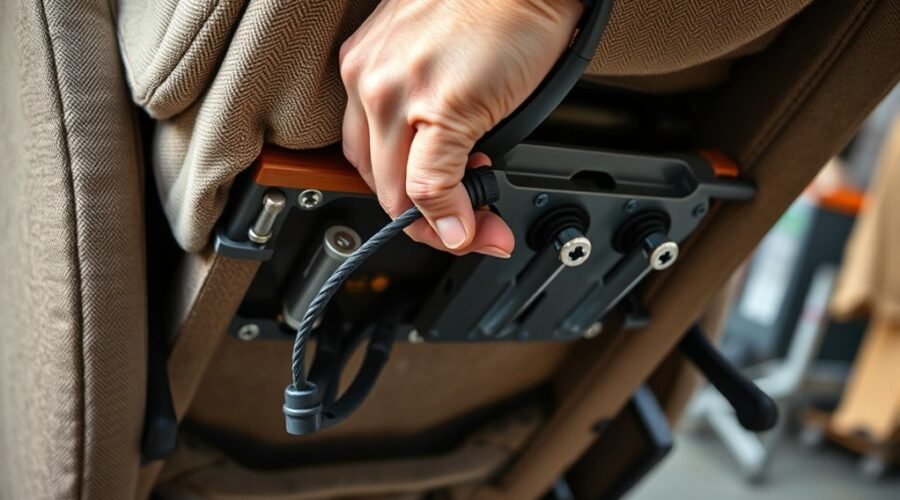
If a manual recliner handle moves but the footrest will not release, the problem is often a slipped, loose, stretched, or broken recliner release cable. The safest repair is to close the legrest, expose the underside carefully, inspect the handle end, cable sheath clip, and linkage end, then reseat or replace the cable with a correctly matched part. Never force a jammed footrest or linkage.
Quick Answer
A slipped recliner release cable is usually fixed by closing the legrest, carefully tilting the chair, removing the handle if needed, and reseating the cable sheath clip and S- or Z-shaped end at the release linkage. Replace the cable if it is frayed, stretched, kinked, or broken, then test the chair upright.
Key Takeaways
- This repair applies mainly to manual, cable-operated recliners; a power-only recliner may use switches, wiring, and actuators instead.
- Close the footrest, disconnect power if the chair has electrical components, and keep fingers away from moving linkage and spring-loaded parts.
- A loose handle does not automatically mean the cable is broken. First check whether the cable end or outer-sheath retaining clip has simply slipped out.
- When replacing a cable, match the exposed wire length, barrel diameter, end fitting, sheath clip, and handle mounting dimensions.
- Stop DIY work if the linkage is bent, the frame is cracked, a spring is damaged, or the mechanism moves unpredictably.
At a Glance
| Time Required | About 20–45 minutes for inspection and reseating; replacement can take longer if access is difficult. |
| Difficulty | Easy to moderate for a basic cable or handle repair. |
| Tools Needed | Flashlight, Phillips screwdriver, needle-nose pliers, standard pliers, and the correct socket or driver for the chair. |
| Cost | No parts cost if an intact cable only needs reseating; replacement cable or handle prices vary by dimensions, brand, supplier, and shipping. |
What Causes a Recliner Release Cable to Slip?
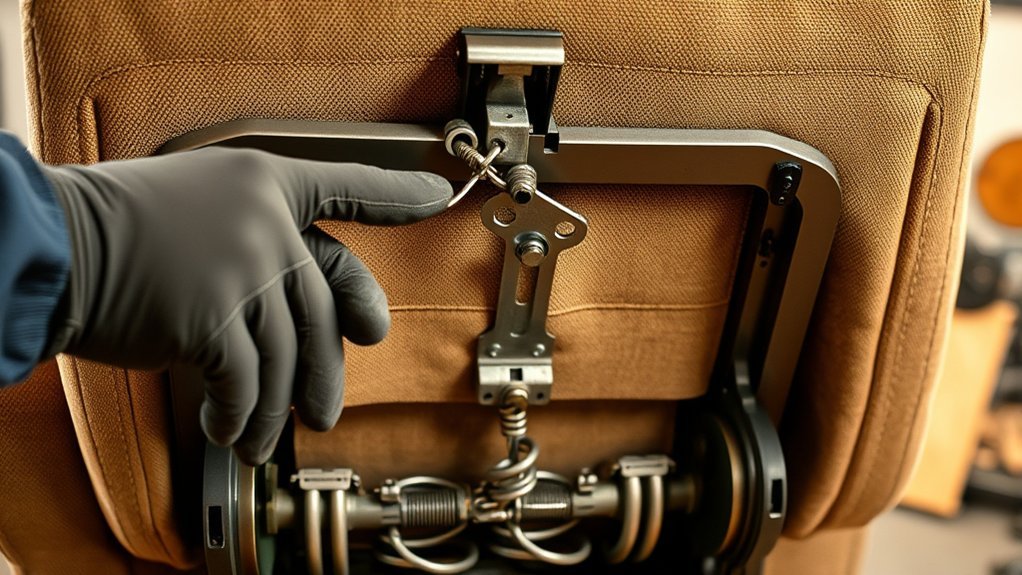
A recliner release cable can stop working when the inner wire stretches or frays, the outer cable sheath pops out of its retaining bracket, the handle-end barrel slips from its seat, or the hook at the reclining linkage becomes disconnected. A damaged handle can create the same loose or “dead” feeling at the lever.
Incorrect installation can also cause repeat failures. If the cable is routed around a sharp edge, twisted, kinked, or installed with the wrong exposed-wire length, the release linkage may not receive enough travel to open or close correctly. Dirt or an obstruction can contribute to binding, but a cable that repeatedly comes free should also be checked for a damaged retaining clip, worn handle, or incorrect replacement part.
Some recliners use an S-shaped or Z-shaped cable end, while others use a different fitting. The connection should therefore be inspected before buying a replacement rather than assuming every chair uses the same cable.
| Symptom | Likely area to inspect | What it may mean |
|---|---|---|
| Handle suddenly feels loose with almost no resistance | Handle-end barrel, cable, sheath clip, linkage hook | The cable may have slipped free or broken. |
| Handle moves normally but the footrest will not release | Linkage end and cable travel | The cable may be misrouted, stretched, incorrectly sized, or attached to a binding linkage. |
| Cable repeatedly pops out | Retaining clip and bracket | The clip, bracket, or cable housing may be damaged or incompatible. |
| New cable works only with excessive force | Exposed-wire length and routing | The replacement may have the wrong travel or the mechanism may have another fault. |
Gather Tools for Recliner Cable Repair
Before starting the repair, gather the tools needed to access the handle and cable without forcing the mechanism. The exact fastener size varies by recliner, so inspect the chair before choosing a socket or driver.
| Tool | Primary use | Notes |
|---|---|---|
| Needle-nose pliers | Release clips and cable ends | Useful in tight spaces; avoid crushing plastic retainers. |
| Channel-lock or standard pliers | Hold selected hardware | Use only where a firm grip is actually required. |
| Socket set or suitable driver | Remove chair-specific fasteners | Fastener size varies by manufacturer and model. |
| Phillips screwdriver | Remove or secure handle screws | Many pull handles use Phillips screws, but verify first. |
| Flashlight | Inspect the underside mechanism | Helps identify the cable route, clip, hook, and damage. |
Needle-nose pliers are especially useful for manipulating a cable end or retaining clip without reaching deeply into the mechanism. Organizing the tools before tilting the recliner reduces unnecessary movement once the underside is exposed.
Warning: Recliner mechanisms contain moving and sometimes spring-loaded parts that can create pinch points. Close the legrest before working underneath the chair, keep children and pets away, disconnect electrical power on any powered recliner, and never place fingers in a linkage while someone operates the handle.
Access the Recliner Mechanism
Before moving the chair, return the back and legrest to their normal closed position. If the recliner contains powered functions, unplug it from the wall before working underneath it. For a heavy chair or sofa section, use another adult to help control the furniture while it is tilted.
La-Z-Boy’s general operating instructions, for example, warn that reclining furniture contains moving parts and advise keeping hands and body parts away from the mechanism. The same manual instructs owners to close the legrest before tilting certain recliners for mechanism adjustment. Follow the instructions for your specific brand and model whenever they differ.
- Tilt the recliner carefully. Rest it in a stable position that gives access to the underside without allowing it to fall or roll.
- Locate the handle assembly. Most cable-operated pull handles are held by screws or another small fastener arrangement.
- Photograph the cable route. Capture where the outer sheath is clipped to the frame and where the inner cable attaches to the release linkage. This makes correct reassembly much easier.
- Remove the handle fasteners if necessary. Set the screws aside so they are not lost.
- Inspect the retaining clip. The outer cable housing must remain anchored. If that housing slips instead of staying fixed, the handle can move without producing enough pull at the release arm.
- Inspect the linkage end. Look for an S-shaped hook, Z-shaped end, or other fitting and confirm that it is still seated in the correct hole or slot.
If the handle is cracked, the cable housing clip is broken, or the linkage attachment is damaged, replacement is usually more reliable than repeatedly pushing the failed part back into place.
Pro Tip: Take two photos before disconnecting anything: one showing the complete cable route and another close-up showing the sheath clip and linkage attachment. Cable routing errors are a common reason a new part feels too tight, too loose, or fails to release the chair correctly.
Reattach the Recliner Release Cable
Locate the cable connection at the handle and reclining mechanism. Before pulling on the wire, make sure the outer cable sheath is seated firmly in its retaining bracket. A loose sheath can create apparent cable slack even when the inner wire itself is intact.
- Seat the handle end. If the cable barrel has slipped from the pull handle, place it back into the handle’s intended recess or lever connection.
- Lock the outer sheath in place. Snap the retaining clip completely into its bracket. Replace a cracked or distorted clip rather than relying on friction alone.
- Align the linkage end. Reconnect the S-shaped, Z-shaped, or other cable fitting to the same release-arm location used originally.
- Restore the original routing. Remove twists and sharp bends, and keep the cable away from moving arms, springs, and edges that could pinch the housing.
- Check the travel without forcing it. Move the handle carefully while keeping your hands away from the mechanism. The release arm should move cleanly without the cable housing pulling out of its bracket.
Do not try to create extra tension simply by pulling the inner cable tighter. If the lever still has excessive slack after both cable ends and the outer sheath are correctly seated, the cable may be stretched, the handle may be worn, or the replacement cable may have the wrong exposed-wire length.
If the cable slipped from the handle, unscrewing the handle may be necessary to reseat the barrel correctly. Reattach the handle securely after verifying that the cable moves freely and is not trapped behind the trim.
Tighten Loose Bolts and Screws
Inspect the bolts and screws supporting the handle and nearby recliner mechanism. Repeated use can loosen mounting hardware, but a release-cable problem should not be treated by randomly tightening every nut visible under the chair.
Tighten genuinely loose handle or mounting fasteners with the correct screwdriver, socket, or wrench. Avoid overtightening screws that pass through a plastic handle housing, because the housing can crack. Any stripped or damaged fastener should be replaced with a matching fastener that meets the chair or replacement-part specifications.
Replace stripped, damaged, or missing mounting hardware instead of compensating by overtightening the remaining fasteners.
Do not alter spring-tension adjustment hardware simply to fix a loose release cable. Some recliner manufacturers specify exact limits for tension-adjustment nuts; for example, La-Z-Boy warns against fully tightening or fully loosening certain tension wing nuts because doing so can damage the spring assembly or affect stability.
If a metal threaded mounting fastener repeatedly loosens and the furniture manufacturer permits threadlocker, a medium-strength removable threadlocker such as Loctite Blue 242 is designed for metal fasteners that may later need normal hand-tool disassembly. Do not apply threadlocker indiscriminately to plastic screws, cable clips, pivots, or factory tension-adjustment components.
Replace a Broken Recliner Cable or Handle
A broken recliner cable or damaged handle is likely when the lever moves without transferring motion to the release mechanism and the cable is visibly frayed, snapped, stretched, kinked, or separated from its fitting. Replacement cost varies with the cable dimensions, handle design, furniture brand, supplier, and shipping, so a fixed “under $10” price should not be assumed.
Before ordering a replacement, remove or expose enough of the original assembly to measure it accurately. A cable labeled “universal” is not automatically compatible with every recliner.
Diagnosing Cable Failure
Diagnosis should begin at the handle and continue along the entire cable path to the reclining mechanism. Check for fraying, broken strands, an unseated barrel, excessive slack, a damaged outer sheath, a missing retaining clip, or separation at the linkage end.
If the cable is intact but detached, the repair may only require reseating the original cable. If the handle is cracked, the retaining clip no longer locks into the frame, or the cable has stretched enough to change the lever travel, replacement is the better option.
Also inspect the release arm itself. If the cable pulls the release arm through its normal travel but the chair still will not unlock, the problem may be in the latch, linkage, spring, or reclining mechanism rather than in the cable.
Measure a Replacement Recliner Cable
Replacement suppliers offer cables with different lengths and fittings. Furniture Rehab’s replacement-cable guidance emphasizes matching the exposed-wire length and barrel fitting, while other specialist suppliers also document multiple overall lengths and exposed-cable dimensions.
| Measurement or feature | Why it matters |
|---|---|
| Exposed wire length | Controls how much usable travel reaches the release linkage. An incorrect length can make the handle feel loose, overly tight, or unable to operate the latch correctly. |
| Handle-end barrel diameter | Must fit the recess or lever inside the replacement handle. |
| Linkage-end fitting | Match the original S-hook, Z-hook, barrel, dog-leg, or other connection style. |
| Outer sheath clip | Must lock into the chair’s bracket so the cable housing stays stationary while the inner wire moves. |
| Overall cable length | Must route from the handle to the linkage without being stretched, kinked, or trapped in moving parts. |
| Handle dimensions and screw spacing | Determine whether a replacement handle fits the existing opening and mounting holes. |
If the recliner has a model or manufacturing tag, record it before shopping for parts. For branded furniture, checking the manufacturer or authorized dealer first can reduce the risk of ordering an incompatible part.
Installing Replacement Hardware
To install replacement hardware, keep the chair stable in the same safe access position and compare the new cable with the old one before fitting it.
| Step | Action |
|---|---|
| 1 | Confirm that the exposed wire, barrel, end fitting, sheath clip, and handle dimensions match the original assembly. |
| 2 | Disconnect the old cable from the linkage and release its sheath clip without bending the surrounding bracket. |
| 3 | Route the replacement along the same path as the original, keeping it away from sharp edges and moving linkage. |
| 4 | Seat the handle end, snap the outer sheath firmly into its bracket, and attach the cable end to the correct release-arm location. |
| 5 | Reinstall the handle and mounting hardware, then verify cable travel before returning the chair upright. |
The cable should move smoothly and remain retained at both ends. If the new assembly appears to preload the release arm even when the handle is at rest, stop and recheck the cable dimensions and routing before operating the chair.
Test the Recliner Before Reinstalling
Before closing upholstery flaps or reinstalling any removed covers, visually check the lever mechanism, cable housing, retaining clip, and linkage end. The cable should remain clear of sharp edges and moving mechanism arms.
With your hands away from the linkage, operate the handle gently enough to confirm that the release arm responds. Do not run the mechanism through a full loaded cycle while the chair is unstable or while anyone’s fingers are underneath it.
Return the recliner to its normal upright position before carrying out the final functional test. Keep children, pets, and loose objects clear of the footrest.
- Pull the handle normally and confirm that the footrest releases without excessive force.
- Return the footrest to its closed position according to the manufacturer’s operating instructions.
- Repeat the cycle several times.
- Confirm that the outer cable housing remains locked in its bracket and the handle returns normally after each pull.
- Listen and feel for binding, scraping, or abnormal resistance.
If movement is uneven or the handle requires significantly more force than before, stop and recheck the routing, exposed cable travel, retaining clip, and release linkage rather than forcing the mechanism.
Troubleshoot a Recliner Cable That Still Does Not Work
| Problem after repair | Likely causes | Next step |
|---|---|---|
| Handle still has no resistance | Cable end disconnected, broken inner wire, barrel not seated, sheath clip not retained | Inspect both cable ends and the sheath anchor again. |
| Handle feels normal but chair will not release | Incorrect cable travel, wrong linkage hole, stretched cable, binding or damaged latch | Compare the replacement dimensions with the old cable and observe release-arm travel. |
| Chair operates once, then cable pops free | Broken retaining clip, worn bracket, incorrect fitting, misrouting | Replace the damaged retainer or incompatible cable rather than repeatedly reseating it. |
| New cable makes the chair difficult to open or close | Wrong exposed-wire length, preloaded cable, kinked routing | Stop forcing the mechanism and verify the replacement measurements and routing. |
| Cable pulls the release arm correctly but the mechanism remains stuck | Bent linkage, worn latch, damaged spring, or other mechanism fault | Move beyond cable troubleshooting and inspect or service the reclining mechanism. |
Note: Do not spray lubricant throughout the mechanism simply because it feels stiff. Lubrication requirements are manufacturer-specific. La-Z-Boy, for example, advises contacting the dealer for diagnosis and states that clear mineral oil should be used only where lubrication is actually required, while avoiding rivet locations.
Call a Recliner Repair Pro if Needed
If troubleshooting and basic cable repair do not restore normal operation, a furniture-repair technician can inspect the handle, cable, release linkage, springs, and reclining mechanism more closely.
Professional service is especially appropriate when the linkage is bent, a spring or frame component is damaged, the mechanism will not latch securely, the chair opens unexpectedly, or the furniture is too heavy to tilt safely. A power recliner with switch, wiring, control-box, transformer, or actuator problems also requires a different diagnostic process from a manual pull-cable repair.
If the recliner is still under warranty, check the manufacturer’s service process before modifying the mechanism or installing a non-original part. La-Z-Boy also maintains customer-care videos covering recliner handle replacement, maintenance, and mechanism operation.
If repair requires a complete mechanism, structural work, or several expensive components, compare the quoted repair cost with the chair’s age, condition, comfort, and replacement value before deciding whether further repair is worthwhile.
Frequently Asked Questions
How to Fix Pull Cable on Recliner?
Close the footrest, disconnect power if the chair has electrical components, and carefully tilt the recliner to inspect the cable. Check the handle-end barrel, outer-sheath retaining clip, and linkage end. Reseat any intact connection that has slipped out. Replace the cable if it is frayed, stretched, kinked, broken, or unable to stay secured, then return the chair upright and test it several times.
Is It Worth It to Repair a Recliner?
Often, yes, when the problem is limited to a loose cable, damaged handle, retaining clip, or small mounting part and the rest of the chair is in good condition. The decision is less clear when the frame, springs, or complete reclining mechanism are damaged. Compare the repair estimate, warranty coverage, chair age, overall condition, and replacement cost before deciding.
Are All Recliner Cables the Same?
No. Recliner release cables differ in exposed-wire length, overall routing length, barrel diameter, linkage-end shape, sheath-retaining clip, and handle configuration. Measure the old cable and handle before ordering. A part described as “universal” still needs the correct dimensions and fittings for the mechanism.
Where Can I Find a Recliner Cable Repair Kit?
Start with the recliner manufacturer or an authorized dealer when model-specific parts are available. Replacement cables and handles are also sold by specialist furniture-repair suppliers and large marketplaces such as Amazon and eBay. Before purchasing, compare the exposed-wire length, barrel size, cable-end fitting, clip style, handle dimensions, and screw spacing with the original part.
Why Does a New Recliner Cable Still Feel Too Loose or Too Tight?
First confirm that the outer sheath is fully locked into its retaining bracket and that both cable ends are seated correctly. If the routing is correct but the handle still has excessive slack or keeps the release arm under tension, the replacement may have the wrong exposed-wire length or fitting geometry. Do not force the mechanism; compare the new cable with the original measurements.
Conclusion
A slipped recliner release cable is often repairable without replacing the entire reclining mechanism. Start by closing and safely positioning the chair, inspect the handle end, sheath clip, cable routing, and linkage fitting, then reseat an intact cable or install a correctly matched replacement. For example, if a loose pull handle is caused by the outer cable housing popping out of its retaining bracket, fully reseating or replacing that retainer may restore proper cable travel without replacing the mechanism itself. Finish by returning the chair upright and cycling it several times to confirm smooth, secure operation. If the linkage, spring, frame, or latch is damaged, stop and move to professional repair.
Sources
- La-Z-Boy General Operating Instructions — moving-part hazards, safe furniture handling, legrest precautions, and tension-adjustment limits.
- La-Z-Boy Customer Care Videos — current manufacturer material on handle replacement, recliner operation, and maintenance.
- Furniture Rehab Recliner Cable Fit Guidance — exposed-wire length, barrel sizing, and replacement-cable compatibility considerations.
- CouchGuard Recliner Cable Measuring Guide — cable length, exposed-wire, barrel, and handle measurement guidance.
- Loctite Threadlocker Blue 242 — manufacturer guidance for removable medium-strength threadlocking on appropriate metal fasteners.