Canvas wall art should be cleaned dry first with a soft microfiber cloth or natural-hair brush, using light one-directional strokes. Paint type should be checked before any moisture is used, since acrylic tolerates more than oil, and uncertain surfaces should remain dry. If needed, a barely damp cloth with distilled water can be spot-tested on a hidden area, then blotted immediately. Frames should be cleaned carefully to avoid seepage, and more detail follows below.
How to Clean Canvas Wall Art Safely
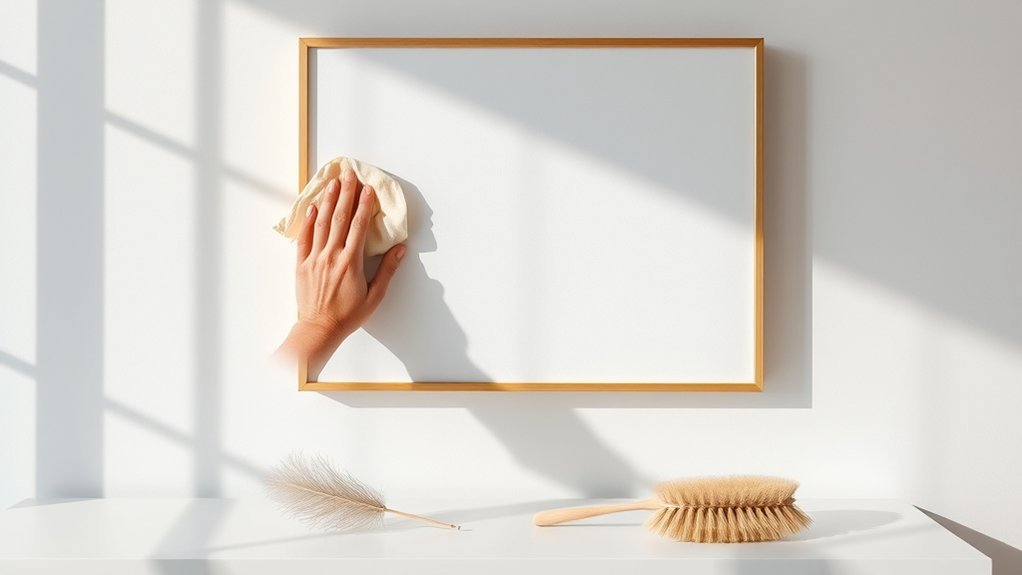
Regular dusting with a soft, dry microfiber cloth or a natural-hair brush helps preserve canvas wall art without exposing it to water damage. This gentle dusting routine supports art cleaning by removing loose particles before they can settle into the weave.
Gentle dusting with a soft, dry cloth helps preserve canvas art by removing loose particles before they settle into the weave.
For canvas paintings, movement should remain light and one-directional, with no pressure that might disturb the paint film or stretch the support. Cleaning sprays and excessive moisture should be avoided, since they can cause warping, staining, or other surface distortion.
When grime persists, a dry-cleaning sponge may be used, but only after testing a small, inconspicuous area to verify that no abrasion or color lift occurs. The process should remain deliberate and restrained, allowing the work to retain its condition with minimal intervention.
Such care preserves visual clarity while respecting the material limits that safeguard artistic freedom.
Check the Paint Type First
The paint type should be identified before any cleaning begins, since oil and acrylic finishes respond differently to moisture and solvents.
Acrylic surfaces are generally more tolerant of light damp cleaning, while oil-based surfaces require stricter control to limit water exposure and coating damage.
A cautious spot test with a pH-neutral cleaner helps confirm that the selected method is compatible with the specific paint.
Identify The Paint
Before any cleaning begins, the paint type should be identified because oil, acrylic, and watercolor finishes respond differently to moisture and handling. A careful observer should identify the paint by examining texture, gloss, and any manufacturer marks, since oil or acrylic surfaces tolerate moisture differently.
Acrylic is usually more water-resistant, while oil paintings may react poorly to damp treatment. When the medium remains uncertain, the safest assumption is that the surface is water-sensitive. In that case, dry dusting with a soft, clean tool is the preferred initial action. This conservative approach preserves the artwork’s integrity and prevents avoidable harm.
For valuable pieces, or where identification is ambiguous, consultation with a professional conservator is the most responsible path for safeguarding the canvas and maintaining artistic freedom.
Match Cleaning Method
Once the paint type has been identified, the cleaning method can be matched to the surface with greater safety: acrylic usually tolerates light rinsing with water, while oil requires a more restrained approach to avoid surface disturbance.
Dry dusting should precede any wet cleaning on water-sensitive areas, reducing risk before moisture touches the canvas.
- Acrylic: test a minimal damp swab first.
- Oil paint: favor dry methods, then proceed cautiously.
- Large canvas pieces: support the back to prevent denting.
A spot test in an inconspicuous area remains essential before any solution is applied.
This measured sequence preserves the artwork’s freedom from avoidable damage while allowing effective cleaning with disciplined, surface-specific control.
Best Supplies for Cleaning Canvas
Soft microfiber cloths and soft natural-hair or soft-bristled brushes are preferred for dry dust removal because they reduce the risk of surface abrasion.
For damp cleaning, a mild pH-neutral soap diluted with distilled water is the least aggressive option and should be handled sparingly.
Before any wiping, a spot test on an inconspicuous area is necessary to confirm that the canvas and paint remain stable.
Soft Brushes And Cloths
The safest tools for removing surface dust from canvas are soft natural-hair or soft-bristled brushes, which lift debris without abrading the weave. For routine dusting, soft brushes should move in light strokes, maintaining control and preserving the work’s surface integrity.
White microfiber cloths or lint-free cloths may be used for gentle wiping when contact is necessary, because they resist scratches and do not shed fibers.
- Use only clean, dry microfiber cloths.
- Avoid colored or shedding cloths that can transfer dye or lint.
- Use compressed air in brief bursts for recessed areas.
For edges and textured passages, cotton swabs with fresh tips help remove loosened dust without redepositing particles.
This cautious method supports the freedom to maintain canvas wall art independently, while minimizing avoidable wear and preserving visual clarity.
Gentle Cleaning Solutions
When dry dusting is no longer sufficient, canvas care should move to mild cleaning supplies that minimize surface stress.
For light residues, a dry-cleaning sponge can lift smudges and sticky dust without saturating fibers. If wiping is necessary, white microfiber or other lint-free cloths reduce shedding and color transfer.
Any damp method should rely on distilled water, since tap water can leave mineral spotting. The preferred cleaning solutions are gentle soapy water made with a small amount of mild dish soap and a pH-neutral solution.
These mixtures should remain weak, controlled, and minimally wet to protect the weave, paint layer, and freedom of the artwork from avoidable damage.
Spot-Test Before Wiping
Before any wiping begins, a small spot-test should be performed on an inconspicuous area using a white microfiber cloth or other lint-free cloth to check for color transfer, sheen changes, or surface disturbance. This spot-testing step verifies whether later cleaning attempts can proceed safely.
If the canvas remains stable, a diluted pH-neutral soap solution may be prepared with only a few drops in distilled water.
- Use soft, lint-free materials only.
- Reject colored cloths and harsh chemicals.
- Test textured zones with damp cotton swabs, rolling gently.
Dry dust should be lifted first with soft natural-hair or soft-bristled brushes, which trap debris without abrasion.
Any moisture application must stay minimal, controlled, and reversible, preserving the artwork’s integrity and the viewer’s freedom from avoidable damage.
Dust Canvas Wall Art Without Scrubbing
Canvas wall art should be dusted with a soft, dry microfiber cloth or a natural-hair brush, moving gently from the top downward so loose debris is lifted away rather than worked into the fabric. This method allows dust to be removed from canvas wall art without scrubbing, preserving surface integrity and visual clarity.
A microfiber cloth should be passed lightly, never pressed hard, because friction can distort fibers. For textured sections, a soft-bristled brush can dislodge particles with minimal contact and no added stress. Feather dusters are unsuitable; their strands may snag and abrade delicate weave edges.
Regular maintenance every one to three months helps keep artwork vibrant while avoiding water damage and unnecessary intervention. The piece should be handled carefully, and if possible raised off the floor before cleaning, reducing the chance of accidental impact. Such restrained care supports a freer, safer preservation routine.
Spot-Test a Barely Damp Cloth
A barely damp cloth should first be tested on a hidden area of the canvas before any broader cleaning is attempted.
The cloth must remain only slightly moist, with excess water thoroughly removed to reduce moisture exposure.
During the test, any color transfer or surface change should be treated as a sign to stop immediately.
Test In Hidden Area
An inconspicuous area of the canvas should be spot-tested with a barely damp cloth before any full cleaning is attempted, as this verifies whether the surface will tolerate moisture without color transfer or texture change.
This test in a hidden area should use distilled water, since mineral residues can distort results. The spot-test is especially important for watercolor or mixed media, where moisture sensitivity is common.
After contact, the area should be observed for several minutes for delayed discoloration, lifting, or warping. If any adverse response appears, the surface should be left untouched and dry cleaning methods selected instead, preserving material integrity and personal freedom from avoidable damage.
- Distilled water reduces contamination risk.
- Hidden testing reveals fragile coatings.
- Delayed checks prevent false reassurance.
Use Barely Damp Cloth
Once the hidden-area test confirms tolerance, cleaning should proceed with a barely damp cloth rather than a wet one. The cloth should be prepared with distilled water and only a few drops of mild, pH-neutral soap, then wrung until merely moist.
Each pass should be light, controlled, and limited to small sections, allowing the canvas to remain free from saturation. After each area is wiped, it should be followed immediately with a clean dry cloth or dry portion of the same cloth to remove residual moisture. Excess pressure should be avoided so the paint film and weave are not disturbed.
Fresh cloth sections should be used regularly, keeping lifted dirt from being spread back onto the surface. This restrained method preserves material integrity while maintaining visual freedom.
Check For Color Transfer
Before cleaning proceeds, a spot test should be performed with a barely damp white, lint-free cloth on an inconspicuous area of the canvas to check for color transfer or surface reaction.
This controlled step verifies whether the artwork can tolerate moisture without compromise. The cloth should be dabbed gently, not rubbed, so any bleeding, fading, or texture shift is immediately visible.
If the test area remains stable, limited cleaning may continue with caution. If color transfer appears, stop at once and switch to dry methods such as a soft brush or dry-cleaning sponge.
This measured approach protects artistic integrity and preserves freedom from avoidable damage.
- Check for color transfer before broader cleaning.
- Use a lint-free cloth to avoid contamination.
- Watch for bleeding, fading, or texture changes.
Remove Stains From Canvas Carefully
Light stains on canvas should be addressed with a dry-cleaning sponge, using gentle dabbing to lift residue without abrading the surface. This cautious cleaning method preserves canvas integrity and limits stain spread. Water should not be applied directly; moisture can warp fibers and disturb oil-based paint layers.
| Tool | Use | Risk |
|---|---|---|
| Dry sponge | Lift dust | Low |
| Cotton swab | Detail cleaning | Minimal |
| Mild soap | Spot treatment | Moderate |
| Barely damp cloth | Controlled application | Limited |
| Dry cloth | Final drying | Essential |
For tougher stains, a pH-neutral soap solution may be tested first on an inconspicuous edge. If the mark remains, a barely damp cloth should touch only the stained area. Textured details benefit from cotton swabs rolled, not scrubbed, so the canvas surface stays stable and stains are removed with restraint. Once complete, the piece must dry fully before rehanging, allowing viewers the freedom of a clean display without mold or further damage.
Clean Framed Canvas Without Seepage
To clean framed canvas art without seepage, the cleaner should be applied to a cloth rather than directly to the frame, preventing liquid from migrating onto the artwork. This controlled cleaning method preserves the canvas and supports careful maintenance without compromising structural integrity.
A soft, dry microfiber cloth or a natural-hair brush should be used to dust the frame gently, minimizing abrasion and limiting risk to the surface. The top of the frame should be addressed first so debris does not fall onto the canvas during cleaning of the sides or front.
In tight areas, a shield or barrier can help block particles from dropping inward. Glazing should be inspected regularly for dust and fingerprints; if the material is verified safe, a lightly damp cloth may be used, especially on acrylic.
- Apply moisture to the cloth, not the frame.
- Dust top edges before side cleaning.
- Protect the canvas with a barrier.
Handle Loose or Stretched Canvas
Loose or stretched canvas should be evaluated carefully before any cleaning begins, with the artwork kept elevated off the floor to reduce pressure and prevent accidental damage.
A pre-cleaning assessment should confirm the paint type, canvas tension, and any existing weakness before attempts to handle loose or stretched canvas proceed. Low-tac masking tape may be applied around the edges to shield margins, while contact with the fabric itself should remain minimal to avoid denting or further stretch.
For acrylic works, a controlled rinse may be acceptable, but oil-based surfaces require greater restraint. If a soaking method is necessary, the canvas may need removal from its frame, and the cleaning solution should be contained in a tray to limit water damage.
Every motion should remain deliberate, measured, and free from unnecessary pressure, so the artwork retains integrity and the handler preserves freedom from avoidable loss.
Dry and Rehang Canvas Without Damage
Once cleaning is complete, the canvas should remain undisturbed until it is fully dry and free of dust, since residual moisture can weaken fibers and invite surface damage. A dry microfiber cloth may be used lightly to clear final particles without abrading paint.
During handling, low-tac masking tape can protect edges, while support from the bottom and sides reduces pressure on the face.
- Confirm complete dryness before rehanging.
- Lift canvas from the sides, not the top.
- Use a floater frame for canvas without contact stress.
Rehanging should occur in stable light and temperature conditions to prevent fading and warping. Direct sunlight should be avoided because it accelerates deterioration and compromises visual freedom.
A careful placement strategy preserves structure, keeps the surface clean, and supports long-term display. Each step should be executed with restraint, allowing the artwork to remain secure, unrushed, and protected without unnecessary intervention.
How to Prevent Water Damage on Canvas
Preventing water damage on canvas wall art depends on controlling the surrounding environment and limiting direct exposure to moisture. To prevent water damage, maintain relative humidity between 40 and 55 percent; this range reduces swelling, warping, and mold growth.
Canvas wall art should not be placed near kitchens, bathrooms, radiators, or direct sunlight, because heat swings can produce condensation and weaken fibers. During cleaning, low-tac masking tape may be applied along the edges to reduce moisture seepage and limit stretching.
Any sign of discoloration, spotting, or mold requires immediate inspection, since delay can allow deterioration to spread. Unframed canvases should be stored upright or flat in a cool, dry location and wrapped in acid-free paper.
Such disciplined handling supports long-term preservation and gives the artwork the freedom to remain stable, clean, and structurally sound.
Frequently Asked Questions
What Happens if I Don’t Gesso My Canvas?
Without gesso, the canvas absorbs paint unevenly, so color can dull, spread irregularly, and lose control.
The canvas preparation importance is clear: unprimed fibers also draw in oils or acrylics, weakening adhesion and increasing cracking, flaking, or warping.
Gesso application benefits include a smoother surface, better detail, and improved resistance to moisture.
These art longevity factors are essential for preserving clarity, stability, and lasting creative freedom.
Does Water Damage Canvas?
Yes, water damages canvas, warps canvas, and lifts paint. It can stain fibers, distort tension, and weaken adhesion.
Canvas preservation techniques require dry handling, careful inspection, and minimal contact. Common cleaning mistakes include soaking, scrubbing, and rinsing too aggressively.
Protecting artwork surfaces depends on prompt drying, stable humidity, and paint-type awareness. For those seeking liberation from avoidable loss, caution is not restriction; it is the means of preserving creative freedom.
What Do Conservators Use to Clean Paintings?
Conservators use conservation techniques such as low-pressure air, micro-vacuuming, dry-cleaning sponges, and cotton swabs for precision work.
For stubborn grime, they may test cleaning solvents or a dilute, pH-neutral solution applied sparingly with a barely damp cloth. Each treatment is selected for material preservation, minimizing risk while respecting the artwork’s integrity.
Work typically occurs in stable humidity and temperature, with cautious observation guiding every step.
What’s the Best Cleaner for Canvas?
The best cleaner for canvas is a mild, pH-neutral soap diluted in distilled water, applied sparingly.
For routine canvas cleaning techniques, a dry microfiber cloth or dry-cleaning sponge is often safer. These safe cleaning products help remove dust and light grime while preserving artwork integrity.
A conservator would avoid harsh solvents, excessive moisture, and abrasive wiping. For stubborn contamination, a discreet spot test should precede any damp treatment.
Conclusion
To summarize, canvas wall art should be cleaned with minimal moisture, controlled pressure, and careful attention to paint type and frame construction. Studies on indoor art conservation indicate that even brief exposure to excess humidity can accelerate pigment and fiber degradation by a measurable margin. This underscores a critical point: preservation depends less on aggressive cleaning than on restraint. When handled cautiously, canvas can be maintained safely without introducing water damage or structural distortion.