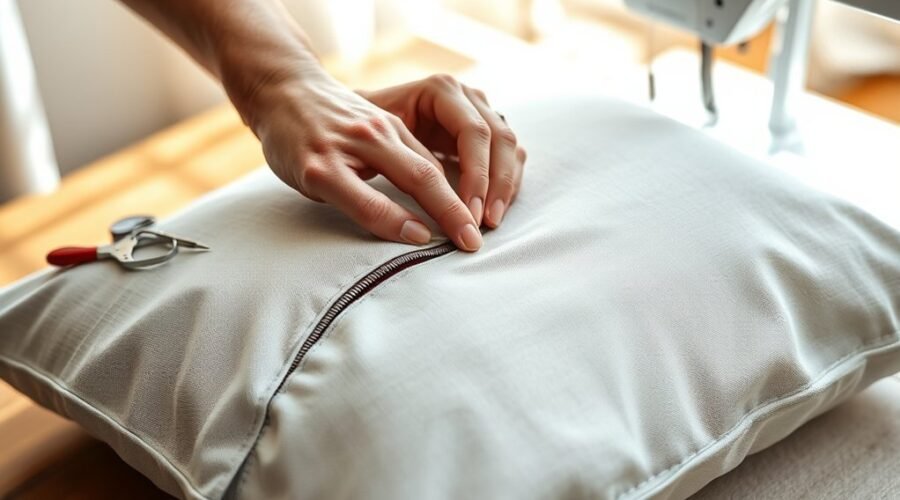
You can replace a cushion cover zipper by hand without a sewing machine if the fabric around the opening is still sound. The safest method is to study the original installation before removing it, choose a replacement that matches the old zipper’s type and usable length, pin or baste it accurately, and hand-sew each side with small, secure stitches. Careful alignment matters more than speed.
Quick Answer
Remove the damaged zipper carefully, measure the old zipper while it is closed, and choose a similar replacement. Position the new zipper so the pull is accessible from the outside of the cushion cover, pin or baste it in place, hand-sew both tapes securely, reinforce the ends, and test the slider before reinstalling the cushion.
Key Takeaways
- Photograph or mark the original zipper position before removing any stitches.
- Match the old zipper’s type, approximate size, tape width, color, and usable length instead of relying on a standard cushion-zipper length.
- Keep the zipper tape flat and the teeth centered in the opening before sewing either side permanently.
- Use small, consistent hand stitches and reinforce the ends without stitching so close to the teeth that the slider binds.
- If the slider jams, stop and clear the obstruction instead of forcing or prying it.
At a Glance
| Time Required | About 30–60 minutes for a straightforward replacement; longer for thick upholstery or complicated seams |
| Difficulty | Beginner to moderate |
| Tools Needed | Seam ripper, hand-sewing needle, matching strong thread, pins or clips, measuring tape or ruler, scissors, and optional thimble |
| Cost | Varies by zipper size, material, and brand; normally only a replacement zipper and thread are required |
Inspect the Zipper Before Replacing It
Before removing anything, confirm that the entire zipper actually needs replacement. Open the cushion cover as far as possible and inspect the slider, zipper teeth or coil, zipper tape, stitching, and end stops.
A zipper that only catches on loose thread or folded fabric may work normally after the obstruction is removed. A zipper whose stitching has come loose may only need to be sewn back to the cover. Full replacement makes more sense when the tape is torn, teeth or coil sections are missing or badly damaged, the zipper has separated repeatedly, or the existing zipper no longer provides a reliable closure.
Zippers also come in different constructions, including metal, coil, molded-plastic, and concealed styles. YKK’s zipper guidance also notes that sewing position can affect operating force, so copying the original construction is usually safer than improvising a completely different installation.
Warning: Seam rippers, scissors, and hand-sewing needles can easily puncture skin or cut the cushion fabric. Work away from your supporting hand, keep the seam ripper tip under only the stitch you intend to cut, and do not force a jammed zipper slider.
Gather the Tools and Choose a Replacement Zipper
For a basic hand-sewn repair, gather a seam ripper, sharp hand-sewing needle, matching thread, straight pins or sewing clips, measuring tape or ruler, small scissors, and the replacement zipper. A thimble is useful with denim, canvas, upholstery fabric, or several layers of zipper tape.
Whenever possible, match the original zipper type and approximate gauge. Also compare the tape width, color, slider style, and end configuration. Keeping the old zipper nearby makes this much easier.
Do not assume every cushion needs a zipper within one standard length range. Cushion dimensions and zipper-panel construction vary widely. What matters is whether the replacement provides an opening comparable to the original and fits the existing seam.
Remove the Old Cushion Cover Zipper
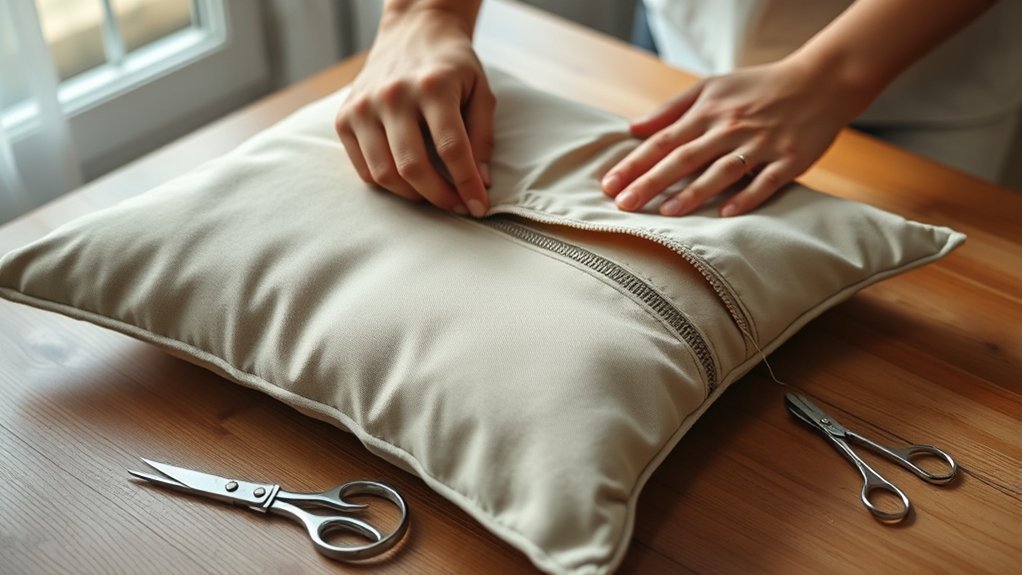
Before cutting stitches, take a clear look at how the old cushion cover zipper is installed. Note which side faces outward, where the zipper teeth sit relative to the opening, where the stitching lines run, and how the ends are secured. A quick photo can serve as a useful reference during reassembly.
Use a seam ripper to carefully unpick the stitches securing the zipper. Slide the pointed end beneath individual stitches instead of pushing the tool deeply into the seam. This reduces the chance of cutting the cushion fabric or decorative trim.
If the zipper sits beneath embroidered edges, piping, welting, or a fabric flap, work especially slowly. Open only the seams necessary to free the zipper. Do not remove decorative stitching that does not interfere with the replacement.
Pull out loose thread, fragments of damaged zipper tape, and lint from the seam. Keep the original zipper instead of throwing it away immediately. It provides a direct reference for length, zipper type, tape width, slider orientation, and original placement.
This approach is consistent with SINGER’s zipper-replacement guidance, which recommends removing the old zipper carefully, clearing the old threads, and using a similarly sized replacement.
Measure the Replacement Zipper
Close the original zipper and measure its functional length before buying or fitting the replacement. Do not simply measure every loose piece of zipper tape from end to end. Zipper measurement conventions depend on the construction and location of the slider and stops.
Coats’ zipper-length guidance explains that the ordering length of a closed-end zipper is based on its fitted components and that the effective opening can be shorter than the zipper’s nominal length. This is why matching the old zipper and confirming the cushion opening are both useful.
Check these points before sewing:
- Length: The new zipper should provide at least the usable opening the cushion needs.
- Type: Match coil, molded-plastic, metal, concealed, or other construction when practical.
- Tape width: Make sure enough tape remains available for secure stitching inside the existing seam allowance.
- Slider direction: Confirm that the pull will end up where it is easy to reach when the cover is finished.
- Color: A close match keeps visible portions of the repair discreet.
Pro Tip: Before removing the old zipper completely, mark the position of its top and bottom ends with tailor’s chalk, removable fabric marker, or pins. Those reference points make it much easier to position the replacement accurately.
If the replacement zipper is slightly longer, do not immediately cut through it. How a zipper can be shortened depends on its construction. Some coil zippers can be given a new stop before excess length is removed, while metal or molded-element zippers may require different hardware or treatment. When in doubt, use a zipper of the correct finished length rather than improvising around the stops.
Pin the New Cushion Zipper in Place
Lay the cushion cover flat so the zipper opening is not stretched. Use the old stitch lines and seam folds as your primary positioning guides.
For a typical replacement in an existing cushion opening, position the zipper so that the teeth or coil are centered beneath the opening, the zipper tape lies flat against the seam allowance, and the pull is accessible from the right side of the finished cover. If the original zipper used a different orientation, copy the original construction instead of forcing a generic arrangement.
- Match the top and bottom ends with the original reference points.
- Pin or clip both ends first.
- Center the teeth along the opening.
- Add pins or clips along the tape without stretching either the zipper or fabric.
- Close the zipper and inspect the opening from the right side.
- Correct any twisting, waves, or unequal ends before sewing.
Opening the zipper as needed can make sections easier to reach while sewing, but its position is not what prevents puckering. Flat tape, even fabric tension, accurate placement, and consistent stitching are more important.
Note: If pins distort a thick upholstery fabric, use sewing clips or temporarily baste the zipper with long removable hand stitches. Basting lets you test the alignment before committing to the final seam.
Hand-Sew the First Side
Thread a hand-sewing needle with a strong thread appropriate for the cushion fabric. Polyester all-purpose thread is a practical choice for many household covers because it has some flexibility and good general durability. For very heavy upholstery, choose a needle and thread that can pass through the existing seam layers without excessive force.
Secure the First Edge
Begin near one end of the zipper tape and anchor the thread securely. Keep the zipper tape flat and follow the previous seam line when it is still visible. Avoid putting stitches directly through the zipper elements or so close to them that the slider rubs against the thread.
- Anchor the thread with several small stitches or a secure knot on the hidden side.
- Pass the needle through the zipper tape and seam allowance.
- Work steadily along the first side while keeping the teeth centered in the opening.
- Check the right side of the cover every few inches to make sure the fabric remains even.
- Reinforce the end with several secure backstitches.
Backstitching is useful where a permanent seam needs extra security. Utah State University Extension sewing guidance likewise uses backstitching at the beginning and end of permanent seams to lock the stitching.
Stitch With Small, Consistent Stitches
Use small, even hand stitches rather than trying to follow one universal stitch length. Dense upholstery, lightweight cotton, zipper tape thickness, needle size, and thread weight all affect what works best.
A backstitch creates a strong continuous hand-sewn line. Another option is to use closely spaced running stitches with periodic backstitches for reinforcement. Whichever method you choose, keep the stitch line straight and make sure the thread is firm without pulling the fabric into gathers.
Pause several times and move the slider gently past the area you have sewn. If it brushes the thread, catches fabric, or feels noticeably tighter at one spot, correct that section before continuing.
Sew the Second Side
Before stitching the second tape permanently, close the zipper and inspect the cushion opening from the right side. Both ends should meet at the same height, the fabric should lie flat, and the opening should not spiral.
Once the alignment looks correct, pin, clip, or baste the second zipper tape without stretching it.
Close and inspect the zipper before sewing the second side permanently. Correcting alignment now is much easier than removing a completed seam.
- Anchor the thread at one end.
- Follow the original seam line or a parallel line that keeps the tape flat.
- Use small, consistent stitches along the zipper tape.
- Maintain enough clearance that the thread and fabric cannot enter the slider path.
- Recheck the alignment as you work.
- Reinforce the final end with several secure stitches.
Do not pull the fabric tightly while stitching. The cover should remain in its natural shape. Excess tension can make the zipper bow or cause the finished opening to ripple.
Reinforce the Zipper Ends
The top and bottom of a cushion zipper receive repeated stress when the cover is opened and closed. Inspect the original construction to see whether the ends were secured by the zipper’s own stops, a short seam across the opening, reinforced stitching, or surrounding cushion seams.
Add several firm hand backstitches where the zipper tape meets the end of the opening. The goal is to keep the tape from pulling away without blocking the slider or damaging the existing stop.
If a coil zipper is intentionally being shortened, form a secure new stopping point using a method appropriate to that zipper before trimming excess material. Do not casually cut through metal teeth or molded elements. If the replacement requires removing and reinstalling metal stops, using a correctly sized zipper or having a sewing/upholstery shop alter it is safer than improvising a weak end stop.
Test the Cushion Cover Zipper
Test the repair before putting the cushion insert back inside. Lay the empty cover flat and move the slider slowly from one end to the other several times.
Look for:
- fabric caught near the teeth or coil;
- thread crossing into the slider path;
- uneven zipper ends;
- sections where the tape twists or puckers;
- damaged or missing elements;
- stitches pulling through weakened fabric.
The zipper should move without unusual resistance and the two sides should close evenly. SINGER’s replacement guidance similarly recommends testing a newly installed zipper to confirm that it moves easily before considering the repair finished.
Next, insert the cushion. Compress or fold the cushion slightly rather than forcing it through an opening that is barely large enough. Close the zipper again while keeping the fabric and cushion filling away from the slider.
A final loaded test is important because the cushion can place tension on the opening that was not present while the cover was empty.
Fix a Stuck or Misaligned Zipper
If the replacement zipper catches during testing, stop pulling. Forcing a jam can bend the slider, damage zipper elements, tear the tape, or pull the new stitches loose.
YKK’s zipper operating guidance advises backing a jammed slider away from the obstruction, clearing the obstruction, and then trying again slowly rather than forcing the slider.
Realign the Zipper Teeth or Coil
Open the zipper as far as it will move freely and lay the cover flat. Check whether the problem is caused by caught fabric, loose thread, crooked installation, damaged elements, or the slider itself.
- Gently pull loose fabric or thread away from the slider.
- Back the slider away from the jam rather than pulling harder through it.
- Straighten the zipper tape so both sides run parallel.
- Check whether the problem occurs at one of your new stitches.
- Remove and restitch any small section that pulls the tape toward the teeth.
If teeth are missing, a coil is torn, or the zipper repeatedly separates behind the slider, alignment alone may not solve the problem. The zipper or slider may need replacement.
Ease the Slider Back
If the elements appear intact but the slider resists, reduce tension around the zipper and gently move the slider backward. Examine the mouth of the slider for trapped thread, lint, folded fabric, or frayed zipper tape.
Do not pry the slider off with a fork or other improvised lever. That can distort the slider or damage the zipper. If the slider has come completely off one side of the chain, is visibly bent, or no longer closes otherwise intact elements, fitting the correct replacement slider may be possible, but it requires matching the zipper type and slider size.
When the slider or stops cannot be repaired without damaging the tape, replacing the zipper is the more dependable option.
Frequently Asked Questions
What is the easiest way to replace a zipper on a cushion cover?
The simplest approach is to copy the original installation. Photograph the old zipper, remove its stitches carefully, measure and match the zipper, position the replacement along the old seam line, then hand-sew one side at a time. Test the zipper before putting the cushion back inside.
How can I close a cushion cover without a zipper?
Alternatives include an envelope or fold-over flap, buttons and buttonholes, sew-on snaps, hook-and-loop tape, or fabric ties. Choose a closure that suits the fabric and the amount of tension placed on the opening. A slip-stitched opening also works when the cover rarely needs to be removed.
How do I add a zipper to a cushion cover by hand?
Create or open a suitable seam, choose a zipper long enough to provide practical access to the cushion, center its teeth in the opening, and pin or baste the tape to the seam allowances. Hand-sew both sides with small, consistent stitches, reinforce the ends, and test the slider before inserting the cushion.
What are alternatives to replacing a broken cushion zipper?
If the zipper itself is beyond repair, the opening can sometimes be converted to hook-and-loop tape, snaps, buttons, ties, or an envelope-style flap. However, repairing loose zipper stitching may be easier than changing the closure when the zipper elements and slider are still in good condition.
Can I use a zipper that is longer than the old cushion zipper?
Sometimes, but shortening methods differ by zipper construction. Certain coil zippers can be given a new stop before excess length is removed. Metal and molded-element zippers may require different hardware or techniques. A correctly sized replacement is the simplest option when you are sewing by hand.
Why does my newly sewn cushion zipper keep getting stuck?
Common causes include fabric or thread entering the slider, stitches placed too close to the elements, uneven zipper-tape alignment, a twisted seam, or damage to the slider or zipper elements. Back the slider away from the problem, clear the obstruction, and restitch any section that pulls the tape out of line.
Conclusion
Replacing a cushion cover zipper by hand is mainly an alignment job. Remove the old zipper without damaging the fabric, use it as a reference for the replacement, center the new zipper carefully, and sew each tape with small, secure stitches. Reinforce the ends and test the slider before reinstalling the cushion. If the slider jams, stop and find the obstruction rather than forcing it. A careful hand-sewn repair can restore a removable cushion cover without requiring a sewing machine.
Sources
- SINGER — How Do I Replace a Zipper in a Jacket? — supports careful zipper removal, replacement sizing, securing stitches, and final operation testing.
- Coats — Effective Openings and Zip Lengths — explains closed-end zipper measurement and the difference between zipper length and effective opening.
- YKK — AQUASEAL Technical Support — supports backing off a jammed slider, removing obstructions, and avoiding excessive force.
- BERNINA WeAllSew — Invisible Zipper Pillow Cover Tutorial — provides cushion-cover-specific zipper positioning, alignment, and testing context.
- Utah State University Extension — Four Square Pillow — supports securing permanent sewing lines with backstitching.