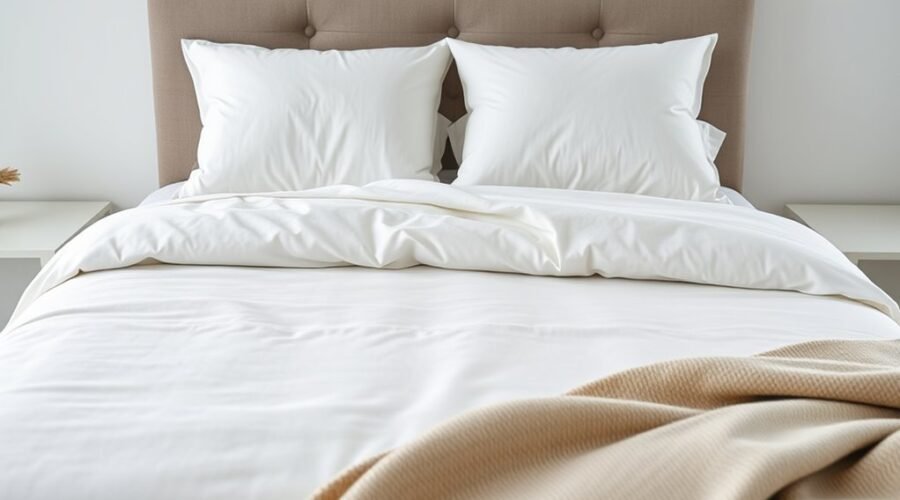
You can turn a basic mattress into a crisp, inviting bed by working from the bottom layer up. Start with a clean, protected mattress, fit the bottom sheet smoothly, add the top sheet and blanket if you use them, center the duvet or comforter, and finish with neatly arranged pillows. The goal is a bed that looks tidy and is comfortable to sleep in.
Quick Answer
To make a bed neatly, start with a clean mattress and protector, stretch the fitted sheet tightly over the corners, center the flat sheet, add any blanket, and place the duvet or comforter evenly on top. Smooth each layer as you go, tuck the foot neatly, then fluff and arrange the pillows.
Key Takeaways
- Work from the mattress upward so every bedding layer stays smooth and aligned.
- Use a fitted sheet deep enough for the mattress, topper, and protector combined.
- A flat or top sheet is optional; use one if you like the extra layer or prefer to wash it more often than your duvet cover.
- Hospital corners give the foot of the bed a crisp, secure tuck without requiring special tools.
- Center the duvet or comforter before styling the pillows so both sides of the finished bed look balanced.
At a Glance
| Time Required | About 5–10 minutes with clean bedding ready |
| Difficulty | Easy |
| Tools Needed | None; a vacuum is optional when cleaning the mattress |
| Cost | $0 if you already own the bedding; protectors, pads, and decorative items are optional |
Gather Your Bedding
Before you start, place the bedding you plan to use within reach. A basic setup normally includes a fitted sheet, sleeping pillows, and a duvet, comforter, quilt, or blanket. A flat sheet, bed skirt, mattress topper, mattress pad, protector, shams, throws, and decorative pillows are optional.
If you use a bed skirt, it normally sits over the foundation and beneath the mattress, so position it before making the rest of the bed. A mattress topper or comfort pad goes above the mattress, followed by the mattress protector or encasement and then the fitted sheet.
Pro Tip: Check the mattress depth after adding a topper or thick pad. If the fitted sheet repeatedly pops off the corners, you may need a deeper-pocket sheet rather than a tighter tuck.
Prepare the Mattress
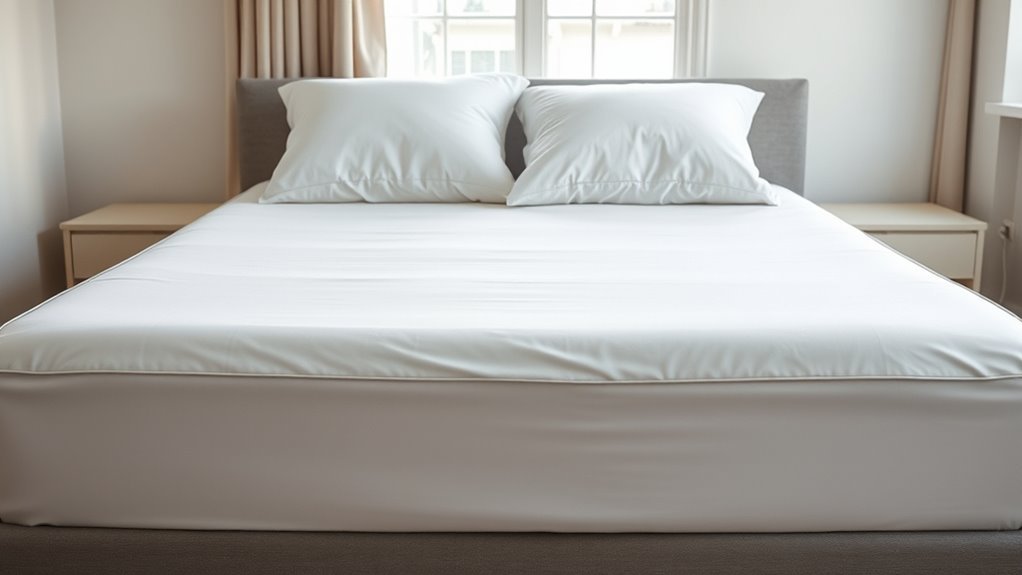
Start with a clean surface. Remove the old bedding and vacuum the mattress if it has visible dust, hair, or debris. Pay particular attention to seams and edges.
Next, choose the protective or comfort layer that matches your needs. A mattress protector primarily shields the sleep surface from moisture, stains, dirt, and other contaminants. An allergen-proof encasement surrounds the mattress more completely and is commonly recommended for people trying to reduce exposure to dust-mite allergens. A mattress pad mainly adds a small amount of cushioning, while a thicker topper is intended to change the feel of the mattress.
The National Institute of Environmental Health Sciences recommends dust-proof or allergen-impermeable mattress and pillow covers as one part of dust-mite control. The Mayo Clinic gives similar advice for people with dust-mite allergy.
Note: An allergen-proof encasement is not automatically waterproof, and a cushioned mattress pad is not automatically an allergen barrier. Check the product label rather than assuming one layer performs every function.
Inspect the mattress while it is uncovered. Permanent sagging, damaged materials, or a noticeable loss of support can indicate that the mattress is wearing out. There is no need to replace a supportive mattress simply because you are making the bed; judge its condition by comfort, support, visible damage, and the manufacturer’s guidance.
Warning: Avoid forcing or sharply bending a heavy mattress when tucking bedding underneath it. Lift one corner only as much as needed, keep your fingers clear of the bed frame, and get help if the mattress is difficult to raise safely.
Put On the Fitted Sheet
The fitted sheet creates the smooth base for the rest of the bed. Choose the correct mattress size and make sure its pocket depth can accommodate the mattress plus any pad or topper.
- Spread the fitted sheet over the mattress and identify its four corners.
- Hook one corner securely beneath the mattress.
- Move to the opposite corner and stretch the sheet over it.
- Fit the remaining two corners, pulling each elastic edge completely beneath the mattress.
- Walk around the bed and smooth wrinkles toward the edges with your hands.
The sheet should feel snug without looking overstretched. Check that the fabric is evenly distributed from side to side and that none of the corners are riding upward.
If one corner keeps slipping off, first rotate the fitted sheet 90 degrees in case its long and short sides are reversed. If it still comes loose, check the sheet’s stated pocket depth against the combined depth of the mattress and topper.
Add the Flat Sheet and Blanket
A flat sheet, also called a top sheet, is optional. If you use one, spread it over the fitted sheet with equal fabric hanging from both sides. When the sheet has a more finished, patterned, or decorative face, placing that side downward lets it show when you later fold the top edge back over the blanket or duvet.
Align the upper edge near the head of the mattress. Leave enough material at the foot to tuck securely underneath, then smooth the sheet from the center outward.
How to Make Hospital Corners
Hospital corners create a crisp diagonal fold and help keep the foot of a flat sheet or lightweight blanket neatly tucked. The technique has long been used in clinical and institutional bed making; the University of Virginia School of Nursing documents the traditional mitered method.
- Tuck the bottom edge of the flat sheet underneath the mattress across the entire foot of the bed.
- Move to one side and grasp the hanging sheet about 12–18 inches above the foot.
- Lift that section upward and lay it across the mattress, creating a roughly 45-degree diagonal fold at the corner.
- Tuck the fabric that is still hanging below the lifted section underneath the mattress.
- Bring the raised flap back down over the side.
- Smooth the diagonal edge, then tuck the remaining fabric underneath the mattress.
- Repeat on the opposite corner.
Pro Tip: If you like more room around your feet, keep the hospital corners slightly looser instead of pulling every layer drum-tight.
For added warmth, place a lightweight blanket over the flat sheet. Align it evenly on both sides, then fold the top portion of the flat sheet down over the blanket for a clean layered look.
Can You Skip the Top Sheet?
Yes. A top sheet is a preference, not a requirement. Some people like having a washable layer between their body and the duvet or comforter. Others use a duvet with a removable, washable cover and skip the top sheet entirely. Whichever setup you choose, wash the bedding that regularly contacts your body according to its care label and your household’s needs.
Finish With the Duvet or Comforter
Drape the duvet, comforter, quilt, or other top layer over the bed and center it before doing any decorative styling. Check that approximately the same amount hangs from each side.
If you use a duvet, a removable duvet cover can be washed separately from the insert. Straighten the insert inside the cover before placing it on the bed so the corners are filled and the insulation is distributed evenly.
| Step | Result |
|---|---|
| Align the top edge | Cohesive look |
| Balance both sides | Polished appearance |
| Fold at the foot | Layered style |
| Show the top sheet | Inviting presentation |
| Match warmth needs | Better comfort |
You can bring the top edge of the duvet close to the pillows for fuller coverage or fold it down toward the middle or foot of the bed to expose more of the top sheet and blanket. Neither method is more correct; choose the arrangement that is comfortable and easy to maintain.
If a duvet insert repeatedly bunches inside its cover, check that the insert and cover are compatible sizes. Use the internal corner ties or loops if your cover includes them, fasten the closure, and shake the duvet from the top corners to redistribute the filling.
Arrange the Pillows
Pillows are the finishing touch. Start by fluffing your sleeping pillows and placing them evenly at the head of the mattress.
If you use larger pillows with shams, place them behind or in front of the sleeping pillows depending on the look you prefer. Then add decorative pillows in different sizes or textures if you want more depth.
You can stack the pillows flat, stand them upright, or slightly overlap them. Some decorators press a small indentation into the center of a soft throw pillow—the informal karate chop technique—but that is purely a styling preference.
Odd-numbered decorative arrangements such as three pillows are popular because they can create visual variety, but there is no rule requiring a certain number. Stop when the arrangement looks balanced and still leaves the bed practical to use.
Keep the Bed and Bedding Clean
Regular laundering helps remove body oils, sweat, dust, and allergens. Follow the care labels on your particular sheets, pillowcases, blankets, protectors, and duvet covers because fabrics and fillings tolerate different wash temperatures.
For people managing a dust-mite allergy, the U.S. Environmental Protection Agency, NIEHS, and Mayo Clinic recommend measures that include allergen-proof mattress or pillow covers and regular washing of bedding. Mayo and NIEHS specifically cite weekly washing in hot water around 130°F to 140°F (about 54°C to 60°C) for dust-mite control, when the bedding’s care instructions allow it.
When allergy control is not the issue, there is no need to force every fabric through a hot wash. Use the product’s care instructions, wash visibly soiled bedding promptly, and keep the layers that contact your skin on a regular cleaning schedule.
Common Bed-Making Problems
| Problem | What to Try |
|---|---|
| Fitted sheet pops off | Check sheet orientation and use a deeper pocket size if necessary. |
| Flat sheet hangs unevenly | Center it before tucking the foot or sides. |
| Hospital corner loosens | Retuck the fabric beneath the mattress and sharpen the diagonal fold. |
| Duvet bunches inside cover | Match insert and cover sizes and secure any internal corner ties. |
| Finished bed looks uneven | Center the duvet first, then align the pillows with the mattress rather than the wall. |
Frequently Asked Questions
What Is the Correct Order for Bed Making?
If you use a bed skirt, position it beneath the mattress first. Next come any topper or pad, the mattress protector or encasement, fitted sheet, optional flat sheet, optional blanket, duvet or comforter, sleeping pillows, and decorative pillows. Smooth and center each layer before adding the next one.
Why Does Gen Z Not Use Top Sheets?
It is too broad to say that Gen Z does not use top sheets. Bedding preferences vary widely. Some younger sleepers skip the extra sheet because they prefer a simpler setup and use a removable duvet cover instead. Others still prefer a top sheet because it creates another washable layer and can be comfortable in warmer weather. Either method can work if the bedding is cleaned regularly.
How Do You Spread a Bed Nicely?
Start by pulling the fitted sheet smooth and tight. Center each additional layer before tucking anything, use hospital corners if you want crisp edges, and make sure the duvet hangs evenly on both sides. Finish by fluffing the sleeping pillows and adding only as many decorative pillows as you want to remove each night.
What Is the German Bed Method and How Does It Work?
The term is sometimes used for the European practice of two people sharing one bed while sleeping under separate duvets. Online, a similar setup is more commonly called the Scandinavian sleep method. Each sleeper gets an individual duvet and can choose a different warmth level. Separate duvets may also reduce blanket pulling, although they do not guarantee better overall sleep.
Conclusion
A neatly made bed comes down to order and alignment rather than complicated styling. Protect the mattress if needed, pull the fitted sheet smooth, center each additional layer, tuck the foot neatly, and finish with an evenly placed duvet and fluffed pillows. Once you have a routine, the whole process can take only a few minutes while still giving the room a clean, finished look.
Sources
- National Institute of Environmental Health Sciences — Dust Mites and Cockroaches — allergen-proof covers, bedding washing, and dust-mite control.
- U.S. Environmental Protection Agency — The Inside Story: A Guide to Indoor Air Quality — household allergen and bedding-control guidance.
- Mayo Clinic — Dust Mite Allergy: Diagnosis and Treatment — mattress encasements and bedding-care guidance for dust-mite allergy.
- University of Virginia School of Nursing — The Art of Bed Making — historical use of mitered or hospital corners.
- Sleep Foundation — How to Make a Bed — bedding order, top-sheet placement, and hospital-corner technique.
- Sleep Foundation — Scandinavian Sleep Method — two-duvet setup, benefits, and limitations.