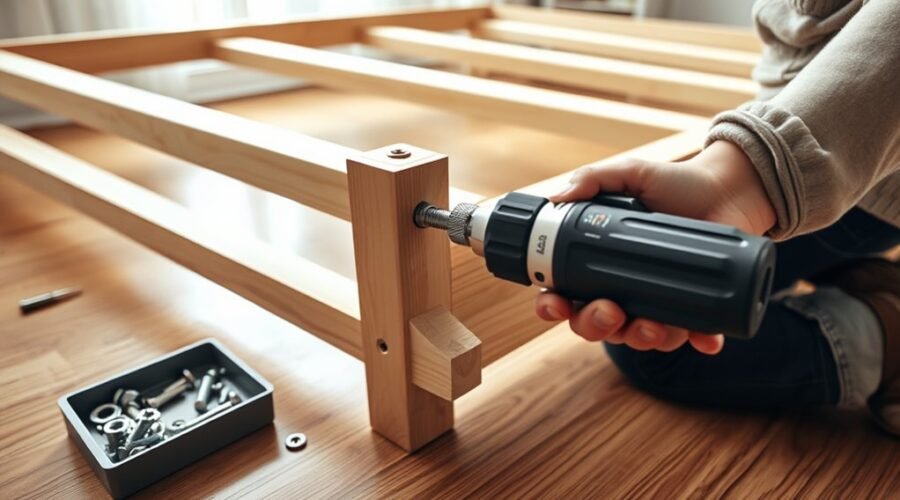
Assembling a bed frame without stripping bolts is mainly about alignment, correct hardware, and controlled tightening—not brute force. Follow the instructions for your exact frame, identify every part before starting, and keep major joints slightly loose until the structure is aligned. If a threaded bolt binds instead of turning smoothly, stop and correct the problem rather than forcing it.
Quick Answer
To assemble a bed frame without stripping bolts, lay out and identify every part, follow the exact manual, start threaded bolts by hand, and keep major joints only lightly snug until the frame is aligned. Then install the supports and slats, tighten in the maker’s sequence, and never force a bolt that starts binding.
Key Takeaways
- Read the instructions for your exact frame and confirm every part and fastener before assembly.
- Start machine bolts by hand so you can feel whether the threads are engaging correctly.
- Keep major joints lightly snug until the frame is aligned; do not fully tighten one corner too early unless the manual specifically tells you to.
- Use diagonal measurements or a carpenter’s square to check a rectangular frame for square; a level checks level, not squareness.
- Follow both the bed-frame and mattress manufacturer’s requirements for slats, center supports, and support legs.
- Replace damaged hardware with an exact compatible part instead of forcing a mismatched bolt, screw, or insert.
At a Glance
| Time Required | Often 30–90 minutes for a basic flat-pack frame; storage, upholstered, and complex frames can take longer. |
| Difficulty | Easy to moderate for many standard frames; use a second person whenever the manual calls for one or the pieces are difficult to control safely. |
| Tools Needed | The tools specified by the manual; commonly a hex key, screwdriver, wrench or socket, tape measure, and sometimes a level. Use a torque wrench only when a real torque specification is provided. |
| Cost | Usually no extra cost when the frame includes complete hardware and required tools; replacement parts or missing tools add to the cost. |
Warning: Never force a bolt that becomes difficult to turn after the first few threads. Back it out and check alignment, thread condition, washers, captive nuts, and part orientation. If the assembly manual shows two people or prohibits a power tool for a step, follow that instruction.
Before You Start: Read the Exact Manual
Find the instructions for the exact bed-frame model before connecting any parts. Hardware that looks similar can have different lengths, thread pitches, shoulders, or intended locations. A wrong fastener may appear to fit for the first few turns and then damage the threaded insert or surrounding material.
If possible, assemble a large frame in the room where you plan to use it. Protect the floor with cardboard, a blanket, or another suitable covering and leave enough space to reach both sides of the frame.
If the original manual is missing, search the manufacturer’s website using the model name, item number, or SKU before guessing how the parts fit together. Complex storage, gas-lift, or adjustable frames should not be assembled from generic instructions alone.
Gather the Right Bed Frame Tools
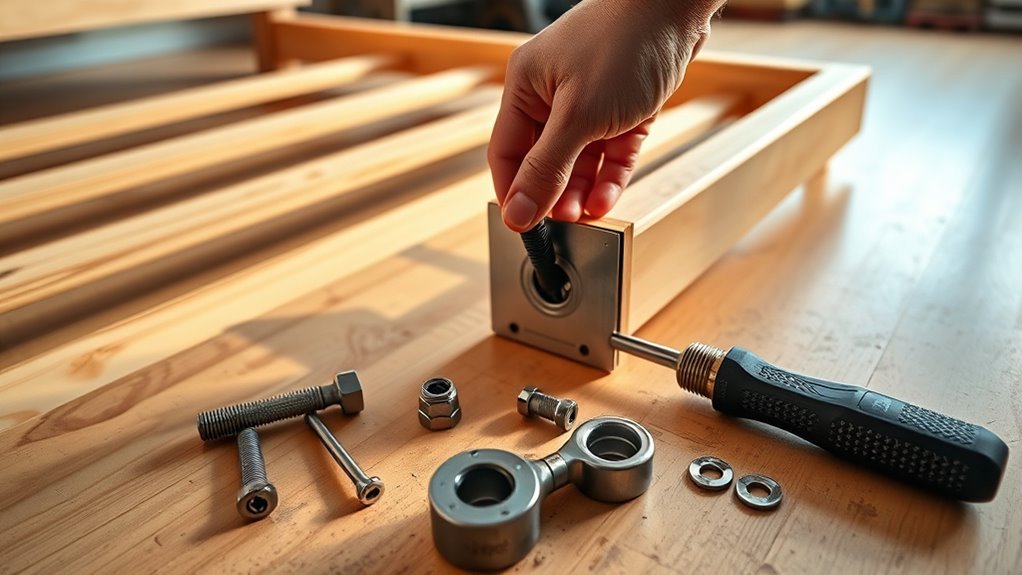
Before assembling the bed frame, check the manual and gather only the tools the manufacturer calls for. Depending on the design, that may include a supplied Allen key, a screwdriver, a wrench, a socket, or another specialty tool.
Keep the tools within reach so you can follow the assembly sequence without repeatedly moving the frame or searching for equipment.
Sort screws, bolts, washers, barrel nuts, brackets, and other fasteners into small trays or groups. Similar-looking bolts can have different lengths or threads, so compare them with the parts diagram before installation.
Do not assume a power drill or impact driver is appropriate. Some assembly instructions explicitly prohibit power tools for particular fasteners; for example, an IKEA SLÄKT assembly instruction shows a drill crossed out during one fastening step.
Use a torque wrench only when the manufacturer provides an actual tightening torque. When no torque value is given, use the supplied or specified hand tool and stop when the fastener is seated securely without crushing the material or damaging the threads.
For machine bolts that enter threaded inserts, nuts, or metal threads, start each bolt by hand for several turns whenever access allows. Smooth engagement is a useful sign that the threads are aligned.
A tape measure or carpenter’s square is useful for checking the frame’s shape. A level has a different job: it helps check whether the finished frame and its support legs sit level on the floor.
Pro Tip: Keep each hardware group beside the matching assembly step instead of placing every fastener in one pile. That makes it much harder to install the right-looking bolt in the wrong location.
Check All Bed Frame Parts
Lay out the headboard, footboard, side rails, support rails, slats, legs, brackets, and all included hardware so you can confirm nothing is missing before assembly begins.
Compare every bed-frame part with the parts list and inspect each component for cracks, bent brackets, damaged inserts, badly deformed holes, stripped threads, or warped surfaces. Even a small defect can interfere with alignment and make a fastener bind.
Inspect every part for damage before assembly. A bent bracket, damaged insert, or wrong fastener can turn a simple alignment problem into a stripped connection.
Verify that each screw and bolt matches the diagram or manufacturer part number. Do not substitute a fastener merely because its diameter looks close.
Sort the hardware by type and size so each item is easy to identify during assembly.
Gently test-fit connections where the instructions allow. If a bracket, rail, or insert does not line up naturally, stop and check its orientation instead of forcing the parts together.
A careful inspection protects both the hardware and the frame and prevents unnecessary disassembly later.
Lay Out the Bed Frame Pieces
Place the headboard, footboard, side rails, slats, supports, and hardware on a soft, flat work surface to protect the finish and keep each part accessible.
Organize the pieces in roughly the order in which the instructions use them. Put matching rails beside each other and keep hardware packets close to the components they attach.
Count screws, bolts, washers, brackets, inserts, and support legs before you start. Confirm that none are missing, bent, or visibly damaged.
A flat work area reduces unnecessary twisting while you connect the main structure. Before fastening anything, read far enough ahead in the instructions to understand each part’s direction and connection points.
Align Bed Frame Holes Before Tightening
Once the major frame pieces are positioned, align every hole and joint before final tightening. Brackets, rails, and threaded inserts should meet without needing excessive leverage.
For a rectangular frame, squareness and level are separate checks. To check whether the frame is square, measure from one corner to the opposite corner, then measure the other diagonal. When a rectangular assembly has the correct side dimensions and matching diagonals, its corners are square. This same diagonal-checking principle is used in carpentry guidance for rectangular frames.
Use a level afterward to check whether the rails and support points sit level on the floor. A level by itself does not prove that the frame is square.
Correct alignment before final tightening. A small twist that is locked into the frame can make later holes difficult to line up and may contribute to wobble.
- Start threaded machine bolts by hand whenever possible.
- Watch for gaps between rails, legs, brackets, and joints.
- Reposition a support or bracket instead of pulling it into place with the bolt.
- Check that washers and captive nuts face the direction shown in the manual.
- Confirm the frame remains square before the final tightening pass.
If the instructions tell you to leave joints loose during an early stage, follow that sequence. IKEA’s general assembly guidance similarly warns that fully tightening every screw too early can distort some furniture assemblies.
Tighten Bed Frame Bolts Without Stripping Them
For a machine bolt entering a threaded nut or insert, turn it by hand for the first few threads whenever possible. If it engages smoothly, continue until it is lightly seated before using the appropriate hand tool.
Follow the manufacturer’s tightening sequence when one is provided. If the instructions simply call for final tightening after the frame is assembled, tighten the major joints gradually rather than fully clamping one corner while the others remain loose.
If a numerical torque specification is provided, a correctly sized torque wrench can help you meet it. Do not invent a torque value for furniture hardware that has no published specification.
Do not automatically apply lubricant or anti-seize to bed-frame threads. Lubrication changes fastener friction and can change the clamp load produced by a given torque. Nord-Lock notes that the manufacturer’s lubrication instructions take priority and that torque may need adjustment when lubrication is used.
What to Do When a Bolt Binds
If a bolt suddenly becomes difficult to turn, stop. Back it out and inspect the threads, hole alignment, bracket position, washers, and mating nut or insert.
A bolt that enters at an angle may be cross-threading. A bolt that is too long may bottom out before the joint is tight. A damaged captive nut may spin or tilt instead of accepting the bolt correctly.
Never use additional leverage or a power tool simply to overcome unexpected resistance. Correct the cause first and replace damaged hardware when necessary.
Repeat the process for each connection, checking alignment and fastener feel as you go.
Add Slats and Center Support
Install the slats, platform panels, center beam, and support legs exactly as the frame instructions specify. There is no universal requirement for a particular number, thickness, or spacing of bed slats.
The mattress manufacturer may also set support requirements. For example, Tempur-Pedic says applicable slatted bases should use structurally sound slats at least 3 inches wide and no more than 4 inches apart. Purple specifies no more than 3.5 inches between slats for relevant slatted setups. These are examples, not universal bed-frame specifications.
The correct slat setup is the one that satisfies both your bed-frame instructions and your mattress manufacturer’s support requirements.
If the frame includes a center support beam, install it in the specified position and orientation. Make sure every supplied support leg reaches the floor as intended once the frame is in its final position.
- Seat each slat or panel fully in its holder, ledge, or clip.
- Use only the supplied or specified fasteners.
- Keep adjustable center feet positioned as the manufacturer directs.
- Do not remove center supports merely because the frame initially feels rigid without them.
- Confirm the finished support system also meets the mattress warranty requirements.
Common Bed Frame Assembly Mistakes to Avoid
- Fully tightening the first corner too early: this can leave too little movement to align the remaining joints.
- Forcing a binding bolt: resistance can signal cross-threading, misalignment, the wrong fastener, or a damaged insert.
- Using a power driver automatically: some manufacturers prohibit power tools for certain fastening steps.
- Mixing similar hardware: bolts that look almost identical may have different lengths or threads.
- Using a level to check square: check rectangular squareness with diagonals or a carpenter’s square.
- Skipping supplied center supports: install every structural support required by the frame.
- Assuming all mattresses use the same slat spacing: check the mattress manufacturer’s requirements.
- Improvising replacement hardware: use the correct diameter, pitch, length, head style, strength, and washer arrangement.
Fix Loose Joints and Wobble
If the finished frame moves, first check whether the main joints are seated correctly and whether the supplied support legs make proper contact with the floor.
Recheck the fasteners using the tool specified by the manufacturer. Do not solve a loose joint simply by applying more force; first confirm that the joint is square, fully seated, and using the correct hardware.
Thread-locking adhesive, glue, dowels, brackets, and other modifications should be treated as repair methods for specific situations—not automatic fixes for every loose bed frame.
Tighten Joint Hardware
Check each joint for looseness and movement. For threaded machine hardware, verify that the bolt is entering the nut or insert correctly before completing the final tightening pass.
Use a wrench, socket, screwdriver, or Allen key that fits the fastener correctly. A loose-fitting tool can round the bolt head before the joint is secure.
- Inspect each joint after the initial tightening pass.
- Recheck hardware after moving or repositioning the frame.
- Follow a published torque specification if the manufacturer provides one.
- Replace damaged bolts, nuts, inserts, or washers instead of forcing them.
Some manufacturers recommend checking connectors again when necessary. For example, IKEA advises re-tightening screws and connectors on several current bed-frame models to maintain stability.
Stabilize Wobbly Frame
If the frame still wobbles after its fasteners are correctly seated, gently test each corner and support point to locate the movement.
On a wooden frame, glue or dowel repairs may be appropriate only when the joint and material are suitable for that repair. Do not use glue to compensate for a loose metal fastener, damaged insert, or incorrectly assembled bracket.
Do not automatically add corner brackets or extra support legs. Added hardware can interfere with the original load path or moving components. Use an approved replacement or reinforcement when the manufacturer provides one.
Also inspect the floor contact. A center leg that stops above the floor or one corner resting on an uneven surface can allow the frame to rock even when every bolt is tight.
Replace Stripped Bed Frame Hardware
When bed-frame hardware strips, first identify the original replacement screw, bolt, nut, insert, or bracket. Match the manufacturer part number whenever possible. If you must source an equivalent fastener, match the diameter, thread pitch, length, head style, material or strength class, and washer arrangement.
- Do not substitute an imperial fastener for a metric thread or vice versa because it seems close.
- Replace a damaged bolt or nut instead of trying to force it through damaged threads.
- A thread-repair insert may work in suitable metal with enough surrounding material, but it is not appropriate for every thin bracket or captive insert.
- A hardwood dowel-and-redrill repair can work for some solid-wood screw holes, but structural damage in MDF or particleboard may require a replacement component or a manufacturer-approved repair.
- Do not install a longer bolt unless the manufacturer confirms that the extra length will not bottom out, contact moving parts, or damage another surface.
If the female threads in a metal insert are destroyed, replacing the insert or the component that contains it is often cleaner than forcing a different bolt into the opening.
For a load-bearing joint with badly damaged engineered wood, cracked metal, or a loose structural insert, stop using the frame until the connection has been properly repaired or the component replaced.
Note: Permanent threadlocker can make future disassembly or repair difficult. Use a thread-locking product only when the bed-frame or fastener manufacturer permits it and choose the specified type.
Special Cases: Storage, Gas-Lift, and Adjustable Frames
Storage beds, gas-lift beds, adjustable bases, and frames with electrical components can require additional steps that a basic platform-bed guide cannot safely replace.
Gas struts and spring-assisted mechanisms can place force on hinges and brackets. Install and handle them only in the sequence shown in the manufacturer’s instructions, and use the required number of people.
For an adjustable or powered base, disconnect electrical power before working around wiring, motors, or moving mechanisms unless the product instructions require power for a specific setup step.
Do not drill new structural holes, relocate brackets, remove support members, or substitute hardware on these frames unless the manufacturer specifically permits the modification.
Final Bed Frame Stability Check
After the hardware is installed and tightened correctly, finish with a complete bed-frame stability check.
Gently push and shake the frame from several points. The joints should remain seated and the frame should not rack noticeably from side to side. If you find movement, check alignment and support contact before tightening anything further.
Place a level across appropriate rails or support points to check whether the bed sits level. Remember that level and square are different: if the rectangular frame itself appears twisted, recheck its diagonal measurements or follow the squaring procedure in the manual.
Inspect all support legs for the intended floor contact. A gap beneath a center support can allow the structure to flex or rock.
Confirm that every slat, panel, center beam, bracket, and retaining clip is in the correct position before placing the mattress on the bed.
After the bed has been used or moved, inspect high-use joints when the manufacturer recommends it and re-tighten connectors as necessary. Replace worn or damaged hardware rather than repeatedly tightening a failing connection.
Frequently Asked Questions
How to Assemble a Bed Frame With No Instructions?
Start by identifying the brand and model number and search the manufacturer’s website for the original manual. Lay out the headboard, footboard, side rails, slats, supports, and hardware, but do not guess which similar-looking fasteners belong in each hole. If you cannot locate instructions, simple dry-fitting may help identify obvious parts, but complex storage, gas-lift, or powered frames should not be assembled by trial and error.
How to Attach a Headboard to a Bed Without Bolts?
Use a headboard mounting system that is designed for your frame and headboard. Depending on the product, that may be a manufacturer-approved wall mount, hook-on connection, compatible bracket system, or a freestanding headboard designed not to rely on the bed frame. Do not rely on adhesive pads or hook-and-loop tape as the structural support for a heavy headboard.
Is It Hard to Assemble a Bed Frame by Yourself?
Many basic bed frames can be assembled by one person, but the exact manual controls. Large headboards, long side rails, storage mechanisms, and heavy panels can be difficult to align safely alone. If the instructions show two people, use two people. Keeping the fasteners lightly snug until the structure is aligned also makes many assemblies easier.
What Kind of Bolts Do You Need for a Bed Frame?
There is no universal bed-frame bolt size. Use the exact hardware specified for your frame. When replacing a bolt, match the original diameter, metric or imperial thread, thread pitch, length, head style, strength or material specification, and any washers, nuts, spacers, or barrel nuts used with it. A bolt that is merely close in size can damage the mating threads.
Conclusion
A solid bed-frame assembly depends on correct parts, good alignment, and controlled tightening. Read the exact manual, start threaded hardware carefully, leave enough movement to align the structure, install every required support, and stop whenever a bolt binds unexpectedly.
Before using the bed, check that the frame is square, the supports contact the floor correctly, the slats meet both frame and mattress requirements, and every joint is secure. If hardware or a structural connection is damaged, repair it correctly or replace the affected part instead of forcing the assembly together.
Sources
- IKEA — Before Assembling / Assembly Guidance — supports checking instructions and parts, using specified tools, using additional people when required, gradual tightening, and avoiding overtightening.
- IKEA — SLÄKT Assembly Instructions — example of product-specific hardware placement and a fastening step where power-drill use is prohibited.
- Tempur-Pedic — Bed Frame and Slatted Base Requirements — supports checking mattress-specific slat width, spacing, and center-support requirements.
- Purple — Slat Spacing Requirements — demonstrates that mattress manufacturers can specify different maximum gaps between slats.
- Nord-Lock Group — Effects of Lubrication on Fastener Preload — supports following manufacturer lubrication instructions and accounting for changes in torque-to-load behavior.
- Lowe’s — Checking a Rectangular Frame for Square — supports comparing diagonal measurements to check squareness.