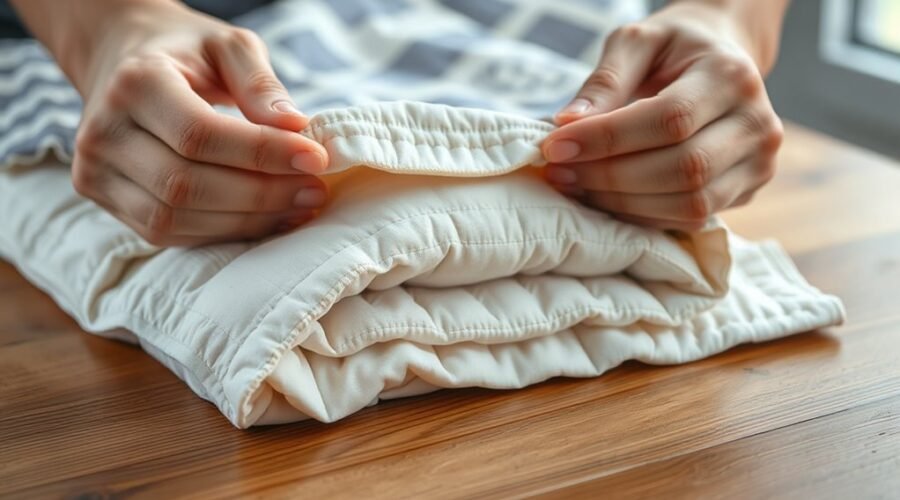
If you have ever traced the faded pattern of an heirloom blanket, you have seen how quilting can combine practical warmth with careful design. Most quilts are built as a layered textile: a decorative top, an insulating middle called batting or wadding, and a backing fabric. Before the final quilting begins, those layers are aligned and temporarily secured so they do not shift.
Quick Answer
The three main layers of a quilt are the quilt top, batting, and backing. The top provides the visible design, the batting adds loft and insulation, and the backing finishes the reverse side. The layers are basted together, quilted or tied, trimmed, and usually finished around the edge with binding.
Key Takeaways
- A typical quilt has three layers: a decorative top, batting in the middle, and backing underneath.
- The top may be pieced, appliquéd, foundation-paper-pieced, English-paper-pieced, or made as a wholecloth design.
- Batting and backing should extend beyond the quilt top before quilting; the exact margin depends on your quilting method and equipment.
- Basting with pins, temporary adhesive, or thread keeps the three layers aligned before quilting.
- Quilting distance should follow the batting manufacturer’s instructions rather than one universal spacing rule.
- Binding covers and protects the trimmed raw edges after quilting is complete.
What Is a Quilt?
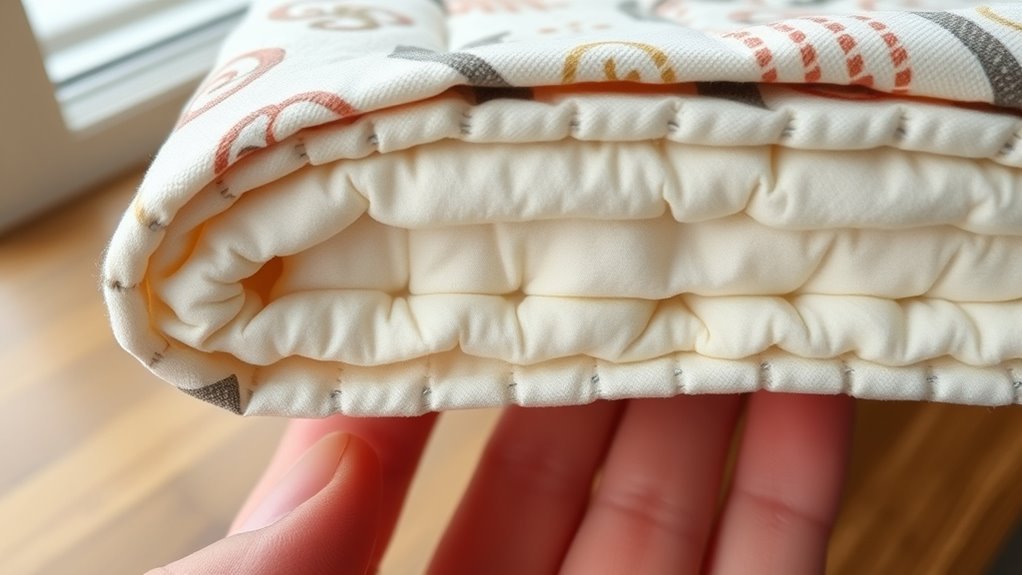
A quilt is a textile made by joining layers together, usually a quilt top, a middle layer of batting, and a backing. The Smithsonian describes traditional quilts in essentially the same three-part structure: a decorated top, padding or batting, and a back.
The top may be assembled from pieced fabric, appliqué, English paper piecing, foundation paper piecing, or a wholecloth design. The batting contributes loft, warmth, drape, and texture, while the backing provides a finished reverse surface and supports the quilt sandwich during quilting.
Quilting stitches, machine quilting, hand quilting, or ties then hold the layers together. Once quilting is complete, the excess batting and backing are trimmed and the raw perimeter is usually enclosed with binding.
A quilt is more than a patterned surface: its top, batting, and backing work together to create structure, warmth, texture, and durability.
That layered construction has supported centuries of practical use and artistic expression. Quilts can preserve family memories, display skilled handwork, reuse meaningful fabric, or simply provide a durable bedcover or decorative textile.
The Three Layers of a Quilt
The three layers of a quilt each serve a different purpose. The quilt top carries most of the visible design, the batting gives the quilt thickness and insulation, and the backing forms the reverse side.
During assembly, the backing is usually placed right side down, the batting is centered over it, and the quilt top is centered right side up. The batting and backing extend beyond the top so there is room for shifting, quilting, frame loading, and final trimming.
Quilt Top Layer
The quilt top is the visible face of the quilt. It may be made from patchwork blocks, appliqué, foundation paper piecing, English paper piecing, strips, scraps, or a single wholecloth surface.
Before building the quilt sandwich, press the top so it lies flat, inspect the seams, trim loose threads, and square the outer edges as accurately as the pattern allows. Remove foundation or English paper-piecing papers when the construction method calls for their removal before quilting.
The important size relationship is that the batting and backing should be larger than the quilt top, not the reverse. The extra material gives you working room during basting and quilting.
Batting Middle Layer
Batting, sometimes called wadding, sits between the quilt top and backing. It controls much of the quilt’s warmth, loft, weight, drape, and stitched texture.
Common fibers include cotton, wool, polyester, bamboo-based blends, and cotton-polyester blends. The best choice depends on how the quilt will be used, washed, quilted, and displayed.
Do not assume every batting can be prepared or quilted the same way. Check its package or manufacturer’s instructions for shrinkage, care, whether pre-washing is recommended, and the maximum distance permitted between quilting lines or ties.
Backing Bottom Layer
The backing is the bottom layer of the quilt sandwich. It may be a single piece of wide backing fabric, several joined lengths of quilting cotton, a deliberately pieced design, or another stable fabric suitable for the quilt’s intended use.
The backing should lie flat and extend beyond the quilt top. Required excess depends on the quilting setup. Some domestic-machine projects need only a few inches per side, while longarm systems or professional longarm quilters may require more.
Press backing seams flat and check directional prints before basting. The backing itself does not cover the quilt’s raw outer edges; that job is normally completed later by the binding.
Quilt Top: The Decorative Layer
A quilt top is where color, pattern, fabric placement, and construction technique become most visible. Pieced tops build patterns from separate units, while appliqué places shapes on a background. Wholecloth quilts rely more heavily on the quilting design itself for visible texture.
Good preparation matters because folds, bulky seams, loose threads, or distorted edges can become harder to manage once the three layers are basted together. Give the finished top a careful press, inspect seam intersections, and trim loose thread tails that could show through pale fabric.
If the top contains foundation paper piecing or English paper piecing, remove papers according to the construction method before final quilting. Avoid stretching bias edges while pressing or moving the top.
Pro Tip: Before adding batting, lay the quilt top on a flat surface and check whether borders, corners, and seams lie naturally flat. Correcting a ripple or open seam is much easier before basting.
Batting: The Warm Middle Layer
Batting determines much of a quilt’s finished feel. Fiber content matters, but so do loft, scrim, quilting distance, shrinkage, washability, and drape.
| Material | Typical Characteristics | What to Check |
|---|---|---|
| Cotton | Breathable, familiar feel, often low to medium loft | Shrinkage and washing instructions |
| Wool | Lofty, warm, resilient | Care requirements and desired quilting effect |
| Polyester | Lightweight, resilient, available in several lofts | Heat and laundering instructions |
| Bamboo or bamboo blends | Soft drape; characteristics vary by blend | Actual fiber blend and care label |
| Cotton-polyester blend | Balances natural-fiber feel with synthetic resilience | Shrinkage and maximum quilting distance |
For example, The Warm Company states that Warm & Natural can be quilted or tied up to 10 inches apart and does not require pre-washing. Other battings can have different limits, so the batting label should control your decision.
If you want a crinkled, traditional-looking surface after washing, some batting shrinkage may be desirable. If dimensional stability matters more, select and prepare materials accordingly. Never assume that unquilted batting can simply be machine washed; use the manufacturer’s preparation method.
Backing: The Foundation Layer
The backing creates the finished reverse side and gives the quilt sandwich a stable base during basting and quilting. Quilting cotton is common, but wide-back fabric can reduce seams, while a pieced backing can turn the reverse into a second design.
Backing should extend beyond the top. The amount is not universal. As one machine-specific example, BERNINA’s Q20 frame instructions call for the backing to be at least 4 inches larger than the quilt top all around and the batting at least 2 inches larger for that setup.
A different machine, quilting frame, or professional longarm service may specify another margin. Always check before cutting an expensive backing.
Backing Fabric Choices
Cotton quilting fabric is a dependable backing because its care requirements can match many quilt tops. Wide backing cloth can eliminate seams on larger quilts, while pieced yardage or coordinated scraps can add interest.
A clean, sturdy sheet can sometimes work as backing, especially for a practical quilt, but consider its weave, condition, laundering history, and compatibility with your quilting method. Very densely woven fabric may be harder to hand quilt.
If the backing includes a directional print, plan the orientation before joining panels. When piecing a back, press seams flat and make sure the finished panel is large enough for the quilting setup you will use.
Preparing the Backing
Prepare the backing on a large, clean surface. Press out wrinkles and inspect the fabric for holes, weak areas, or open seams.
- Measure generously: verify the required excess for your quilting method before cutting.
- Join sections if needed: remove problematic selvages where appropriate and press backing seams flat.
- Check direction: confirm that directional motifs run the way you intend.
- Press without stretching: the backing should be smooth but not distorted.
If you pre-washed the fabrics used for the top and want consistent shrinkage behavior, consider preparing the backing fabric in the same way, provided its care instructions allow it.
How Much Larger Should Batting and Backing Be?
Batting and backing need extra material around the quilt top because quilting can cause slight take-up and shifting, and quilting machines or frames may need fabric outside the final edge.
For many home-quilting situations, leaving roughly 2 to 4 inches beyond each side is a practical starting range. Longarm quilting often requires a specific margin, commonly several inches on every side. Your longarm quilter’s instructions should take priority.
Note: “Four inches larger” can mean two different things: four inches added to the total width and height, or four inches extending from every side. Always confirm which measurement your pattern, machine manual, or longarm quilter means.
Do not trim the backing and batting flush with the quilt top before quilting. Quilt first, then square and trim the completed sandwich before binding unless your specific technique instructs otherwise.
How the Quilt Sandwich Comes Together
A quilt sandwich is the layered unit you create before quilting. On a flat surface, the usual order is:
- Backing: right side facing down.
- Batting: centered over the backing.
- Quilt top: right side facing up and centered over the batting.
Both lower layers should extend beyond the quilt top according to the needs of your quilting setup. Smooth each layer without stretching it. Wrinkles trapped in the backing can become pleats after quilting, so inspect the underside as carefully as the top.
A manufacturer project from Janome illustrates the same basic arrangement: backing right side down, batting above it, and quilt top centered right side up.
Basting Methods That Hold Layers Still
Basting temporarily secures the top, batting, and backing so the layers stay aligned while you quilt. Common choices include safety pins, temporary fabric adhesive, and thread basting.
- Pin basting: curved, rust-resistant safety pins work well for many machine-quilted projects. Start near the center and work outward while smoothing the layers. Pins every few inches are common, with denser placement where shifting is likely.
- Spray basting: a temporary fabric adhesive can hold the sandwich without pins. Apply only according to the product label and avoid heavy overspray.
- Thread basting: long temporary stitches can secure the layers without hard pins, making this method especially useful for hand quilting or projects that will be placed in a hoop.
Warning: Aerosol basting sprays can be flammable. Follow the product’s safety label, protect the surrounding work area, keep the spray away from flames and ignition sources, and use only as directed by the manufacturer.
For example, Odif’s 505 instructions specify spraying the adhesive onto the batting from the recommended distance and warn that the aerosol is extremely flammable.
Quilting Stitches That Secure the Sandwich
Quilting permanently joins the quilt top, batting, and backing. You can quilt by hand, use straight-line machine quilting, free-motion quilt, work on a longarm, or secure some quilts with ties where the batting permits it.
There is no single correct distance between quilting lines. The batting’s stated maximum quilting distance tells you how far apart stitches or ties may safely be placed without risking instability in that particular batting.
Pro Tip: Check the batting package before choosing your quilting design. A pattern with very widely spaced lines may not meet the batting’s requirements, while closer quilting is usually a design choice that creates a firmer, more textured surface.
When machine quilting, test the needle, thread, and tension on a sample made from the same fabric and batting whenever possible. For hand quilting, choose a needle and thread that pass cleanly through all three layers without excessive force.
Binding the Quilt for a Finished Edge
After quilting is complete, square the quilt and trim away the excess batting and backing. Binding then encloses the raw outer edge, protecting it and giving the quilt a clean finish.
Binding strips around 2 to 2.5 inches wide are common, but the correct width depends on the binding method, batting thickness, and desired finished width. Sew the strips together, fold and press them as required by your method, attach them to one side of the quilt, then wrap and secure the binding around the edge.
- For straight-edged quilts: straight-grain or cross-grain binding is commonly used.
- For curved edges: bias binding is especially useful because it stretches around curves.
- For durability: use consistent stitching and make sure the quilt’s raw edge is fully enclosed.
Moda Fabrics notes that quilt binding is typically cut on straight grain, while bias binding provides extra stretch that is particularly useful for curves.
Pre-washing binding strips is not automatically required. Treat the binding consistently with the rest of the quilt when shrinkage or dye behavior is a concern, and follow the fabric manufacturer’s care instructions.
Common Quilt-Sandwich Mistakes to Avoid
- Making the batting smaller than the top: the batting needs working room beyond the finished quilt edge.
- Cutting away excess too early: wait until quilting is complete unless your chosen technique specifically says otherwise.
- Ignoring the batting label: fiber content alone does not tell you the maximum quilting distance or care method.
- Leaving backing wrinkles: wrinkles can become permanent pleats when stitched into the sandwich.
- Stretching a layer while basting: smooth the fabric rather than pulling it under tension.
- Assuming every longarm quilter wants the same margin: ask for the required backing and batting size before preparing the quilt.
- Using spray adhesive without following its safety instructions: application distance, flammability, and cleanup vary by product.
Frequently Asked Questions
How do you put the three layers of a quilt together?
Place the backing right side down, center the batting over it, and place the quilt top right side up on the batting. Smooth the layers without stretching them, then baste them with safety pins, temporary fabric adhesive, or thread before quilting through all three layers.
What does “dirty quilting” mean?
“Dirty quilting” is not a standardized historical quilting term with one accepted technical definition. Some contemporary makers use it informally for a loose, improvisational, or intentionally imperfect approach to quilting. Because usage varies, check the definition used by the pattern designer, teacher, or quilting community where you encounter the phrase.
What is the golden rule of quilting?
There is no single official “golden rule” that applies to every quilting method. For pieced patchwork, accuracy and consistency matter: follow the pattern’s stated seam allowance, which is often a scant 1/4 inch for traditional patchwork. Measure carefully, test your seam before assembling many blocks, and use the same allowance throughout the project.
What are the three layers of a quilt?
The three layers are the quilt top, batting, and backing. The top supplies the visible design, the batting gives the quilt loft and insulation, and the backing forms the reverse side. Quilting stitches or ties secure those layers together.
Does batting need to be larger than the quilt top?
Yes. Batting should extend beyond the quilt top before quilting so there is room for shifting, take-up, and trimming. A few inches on every side is common, but the exact amount depends on whether you are quilting on a domestic machine, longarm, frame, or another setup. Follow your machine manual or longarm quilter’s requirements.
Should you pre-wash quilt batting?
Only when the batting manufacturer recommends or permits it and you want the effect that pre-washing provides. Many battings are designed to be used directly from the package. Some manufacturers specify a gentle hand-soaking method rather than machine washing unquilted batting, so always check the product instructions first.
Sources
- Smithsonian Center for Folklife and Cultural Heritage — quilt structure and historical context.
- BERNINA Q20 User Manual — layer preparation, frame margins, and basting methods.
- The Warm Company: Warm & Natural — quilting distance, shrinkage, and pre-washing guidance.
- Odif 505 Temporary Fabric Adhesive — spray-basting instructions and safety information.
- Moda Fabrics — straight-grain versus bias binding guidance.
- Janome — quilt-sandwich layering and finishing workflow.
Conclusion
A quilt is built from three cooperating layers: the decorative top, the batting, and the backing. Prepare each layer smoothly, leave enough batting and backing beyond the top for your quilting method, and secure the sandwich before stitching.
The most important technical details are not universal numbers: batting preparation, quilting distance, and working margins can change with the product and equipment you use. Check those instructions before cutting or quilting. Once the layers are securely quilted, square the edges and add binding to turn the loose sandwich into a finished textile made for warmth, display, memory, or everyday use.