If your blackout curtains still glow around the edges, the fabric may not be the problem. Most light leaks come from the space above, beside, between, or below the panels. The best results come from measuring for extra wall coverage, choosing hardware that keeps the fabric close to the wall, using enough panel fullness, and sealing any gaps that remain.
Quick Answer
To hang blackout curtains with minimal light leakage, mount the rod or track above the window and extend it beyond both sides, use panels wide enough to stay full when closed, let them reach the floor, and close side and center gaps with return hardware, overlap, magnets, or removable hook-and-loop fastener.
Key Takeaways
- Measure the window and the wall around it before buying the rod or panels; blackout coverage usually works better when the hardware extends several inches beyond both sides.
- Mounting about 4 to 6 inches above the frame is a common starting point, but a higher track can further reduce the top gap when the room and hardware allow it.
- About 2× the coverage width is a useful starting point for blackout curtain fullness; follow the curtain maker’s recommendation for your exact header style.
- Return or wraparound rods help bring the outer edges of the curtain back toward the wall, while panel overlap helps control the center seam.
- For heavy blackout panels, use brackets, anchors, studs, or no-drill hardware rated for the combined weight of the rod and curtains.
At a Glance
| Time Required | About 30–90 minutes for a typical window, depending on hardware and wall type |
| Difficulty | Easy to moderate |
| Tools Needed | Tape measure, pencil, level, drill or screwdriver when required, appropriate anchors or studs, and a step ladder |
| Cost | Varies by curtain size, rod or track, brackets, anchors, and optional edge-sealing hardware |
Why Blackout Curtains Leak Light
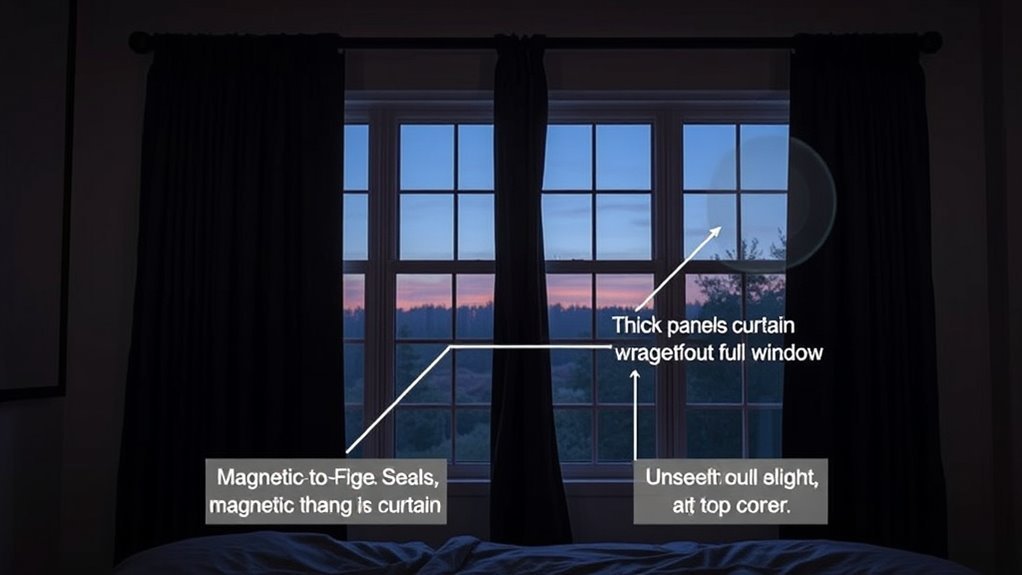
Blackout fabric can block a large amount of light through the material itself while the installed curtain still leaks light around its perimeter. The four places to check are the top, outer sides, center seam, and bottom.
Side leakage usually appears when the rod ends too close to the window or the fabric hangs several inches away from the wall. Top leakage becomes more visible when the rod sits close to the top of the frame instead of overlapping the wall above it. Two-panel curtains can also open slightly at the center, while curtains that end above the floor leave a bright strip underneath.
This is why blackout performance depends on the complete installation rather than the curtain label alone. Wider coverage, enough fabric, correct hardware, and a close fit around the opening usually matter more than adding another decorative layer.
Note: “Blackout” normally describes the light-blocking performance of the curtain material or product. It does not automatically mean the entire window installation will be completely light sealed.
Measure Your Window for Full Coverage
Start by measuring the window opening and the wall area around it. Measure the window width, then decide how much extra coverage is practical on the left and right. Current curtain guides commonly recommend extending outside-mounted hardware several inches beyond the frame. The Shade Store describes roughly 6 to 12 inches beyond the frame for many outside-mount applications, while SelectBlinds recommends adding about 4 to 8 inches per side for its total-blackout curtains.
Those numbers are useful ranges, not a rule that every window must follow. A narrow wall, nearby furniture, trim, switches, or a corner may limit your available extension. The goal is to create enough wall overlap that you cannot see the bright edge of the glass from normal positions in the room.
Measure curtain height from the planned rod, ring, or track position to the finished hem. For strong bottom coverage, floor-length panels should reach the floor or finish very close to it. Account for rings, hooks, grommets, or track carriers because they change the final hanging height.
Keep three measurements separate:
- Window width: the actual opening or outer frame measurement.
- Coverage width: the total span you want the closed curtains to cover, including extra wall area.
- Fabric width: the combined width of all curtain panels before they are gathered into pleats or waves.
Pro Tip: Mark the planned rod ends and height with painter’s tape before drilling. Close the room as much as possible and look at the window in daylight. If the tape still lines up with visible glass at the edges, increase the planned overlap before installing the hardware.
Choose the Right Blackout Curtain Style
Choose curtains specifically designed for blackout or room-darkening use and check the manufacturer’s stated light-blocking performance. Dense fabric, bonded or coated backing, and blackout lining can all be used, so fabric thickness alone does not tell you how well a curtain will block light.
The header style affects how the curtain hangs around the rod or track. Pinch pleats, pencil pleats, back tabs, grommets, and rod pockets can all work, but they create different folds, stack depths, and top gaps. If maximum darkness matters more than decorative style, choose a header and hardware combination that keeps the top of the panel close to the wall or ceiling and lets the panel close without large openings.
Fullness also depends on the header. IKEA’s measuring guidance uses about 1.5 to 2 times the rod length for a single pleat and 2 to 2.5 times for a double pleat. For blackout curtains, approximately 2× the coverage width is a practical starting point when the curtain manufacturer does not specify another fullness ratio.
A weighted hem can help some curtains hang more steadily, but the bigger priorities are adequate width, correct length, and hardware that lets the panel sit close to the wall.
Pick the Best Mount for Light Blocking
For most standard curtain installations, an outside-mounted rod or track gives you more control over light because the fabric can overlap the wall around the window instead of ending inside the opening.
A wall-mounted rod is simple and works well when it can be installed high and wide. A ceiling-mounted track is useful when you want the curtain to start near the ceiling or when there is limited wall space above the frame. A return or wraparound rod is especially useful for reducing side leakage because its ends turn back toward the wall.
Rods And Tracks
Choose the hardware based on the weight of the curtains, the wall construction, and how closely you want the fabric to sit to the wall. Heavy lined blackout curtains may require stronger brackets or additional support compared with lightweight decorative panels.
If the rod manufacturer specifies a maximum unsupported span or bracket spacing, follow that requirement instead of relying on a universal distance. Longer rods can sag if the combined curtain and rod weight exceeds what the hardware was designed to carry.
Warning: Do not assume the screws or adhesive hardware you already have can support heavy blackout curtains. Use the mounting method and anchors specified for the wall material and the total installed weight. When a bracket cannot be secured to a stud, use an anchor rated for the wall type and expected load.
Height And Extension
Mounting the rod about 4 to 6 inches above the window frame is a common starting point. Pottery Barn’s hanging guide gives the same 4-to-6-inch range. If the ceiling, trim, and curtain length allow it, mounting higher can further reduce the visible gap above the curtain.
For side coverage, extend the hardware far enough beyond the frame that the closed curtain overlaps the surrounding wall. Depending on the product and room, manufacturer guidance commonly falls somewhere around 4 to 12 inches per side rather than one universal measurement.
Hang the Rod Higher and Wider
Once you have the measurements and hardware, install the curtains in a deliberate order so small errors do not become permanent light gaps.
- Mark the center and bracket positions. Use a tape measure and pencil so both sides are the same height.
- Check the marks with a level. A sloped rod can make one curtain edge or the center seam hang unevenly.
- Locate studs or choose suitable anchors. Follow the rod or track manufacturer’s instructions for the wall type and load.
- Install the brackets or track. Tighten the hardware securely without overtightening into drywall or other fragile material.
- Hang the panels. Arrange the pleats, rings, hooks, tabs, or grommets evenly.
- Close the curtains and check all four leak zones. Inspect the top, sides, center, and bottom during daylight.
- Adjust before finishing. Move hooks, set the returns, add center overlap, or install edge sealing where necessary.
Mount Above the Frame
Installing the rod above the frame creates wall overlap between the top of the window and the curtain header. About 4 to 6 inches is a useful standard starting point, while tracks positioned closer to the ceiling can provide even more top coverage when the room layout and curtain length permit it.
Keep the hardware level. Even a small height difference can make one panel sit higher at the floor or cause two center panels to meet unevenly.
Extend Past the Sides
Extending the rod past the frame gives the curtain fabric room to cover the bright vertical edges of the window. Instead of forcing a fixed 12-to-14-inch extension on every installation, choose an extension that provides visible wall overlap and still leaves enough space for the open curtain stack.
For many rooms, roughly 4 to 12 inches on each side is a workable planning range. The exact amount should follow the curtain or hardware manufacturer’s instructions and the wall space available around your window.
If side leakage remains even with enough width, the issue may be the rod’s projection from the wall rather than its total length. A return or wraparound rod lets the outer curtain edges curve back toward the wall, reducing that side channel.
Seal Light Gaps With Tracks, Velcro, or Magnets
After the main installation is complete, deal with the remaining leaks by location instead of adding random layers.
For side gaps: use a return rod, wraparound hardware, side channel, or removable hook-and-loop fastener to hold the outer panel edge closer to the wall. Magnets can also work when you have compatible magnetic plates or purpose-built curtain hardware.
For the center gap: arrange two panels so they overlap slightly when closed instead of only touching edge to edge. Curtain pins, overlap carriers on some tracks, or discreet magnetic closures can help keep that meeting point closed.
For the top gap: mount the hardware higher when possible or use a track positioned closer to the ceiling. A suitable valance or pelmet can also cover light that spills over the top if moving the rod is not practical.
For the bottom gap: use curtains that reach the floor or finish very close to it. A ceiling track by itself cannot correct a panel that is too short.
Treat the window as four separate leak zones—top, sides, center, and bottom—and fix the zone where the light is actually entering.
Add Fullness and Length for Better Coverage
Enough fabric prevents the curtains from becoming stretched flat across the window when closed. A practical target for many blackout installations is a combined panel width of about 2 times the area being covered, but header style matters.
For example, IKEA recommends about 1.5 to 2 times rod length for single pleats and 2 to 2.5 times for double pleats. SelectBlinds lists approximately 200% fullness for its total-blackout curtain set. Follow the product’s own instructions when available because custom pleats, ripple folds, and lightweight fabrics can need different amounts of material.
For length, measure from the actual hanging point—not merely from the top of the rod—to the floor. Rings, hooks, carriers, and grommets can change where the fabric begins. Panels that lightly reach the floor generally control bottom leakage better than curtains ending several inches above it.
For long rods or heavy lined curtains, use every bracket or support required by the hardware manufacturer. There is no universal rule that every rod over a particular length needs the same number of supports.
Troubleshoot Leftover Light Leaks
Check the curtains during the brightest part of the day with the room lights switched off. Stand in the positions that matter most, such as the bed, sofa, or viewing seat, because a gap that is invisible straight on may be obvious from an angle.
| Where You See Light | Likely Cause | Best Fix |
| Across the top | Rod is low or curtain header sits far from the wall | Raise the hardware if possible, move to a higher track, or add a suitable top treatment |
| Along the sides | Insufficient wall overlap or too much rod projection | Extend coverage, use return hardware, or hold the outer edge closer to the wall |
| Between two panels | Panels only touch instead of overlapping | Create slight center overlap or use suitable magnetic/track closure hardware |
| Under the curtains | Panels are too short | Lower the hanging point if practical or use longer floor-length panels |
| One side only | Rod, track, or brackets are not level | Recheck bracket height and level before changing the curtain itself |
Recheck the installation after the curtains have hung for a day or two. Fabric can settle, rings can shift, and adjustable rods can move slightly. Small adjustments at the center and returns often make a noticeable difference.
Frequently Asked Questions
How to Hang Blackout Curtains so No Light Comes Through?
Use blackout panels that are wide enough to remain full when closed, mount the rod or track above and beyond the window frame, let the curtains reach the floor, overlap two panels at the center, and bring the outer edges back toward the wall with return hardware or another suitable edge-sealing method. A normal curtain installation may still allow tiny gaps, so inspect it in daylight and adjust each leak point.
Do Blackout Curtains Block Light Completely?
Blackout fabric can block very high levels of light through the material, but the finished room may still have light around the top, sides, center, or bottom of the curtains. Near-total darkness requires both effective blackout fabric and an installation that controls those perimeter gaps.
What Is the Proper Way to Hang Blackout Curtains?
Measure the window and surrounding wall first, choose a rod or track rated for the curtain weight, install it level above the frame and wider than the opening, use enough fabric for fullness, and make the panels long enough to reach the floor. Then close the curtains during daylight and correct any top, side, center, or bottom gaps.
Is There a Way to Hang Blackout Curtains Without Drilling Holes?
Yes, but the hardware must be rated for the complete rod-and-curtain weight. Purpose-built adhesive curtain-rod hooks are one option on compatible smooth surfaces. For example, 3M’s Command curtain-rod instructions specify compatible surfaces, installation steps, rod dimensions, and other restrictions; selected current curtain-rod hook products are rated up to 10 lb. A tension rod can also avoid drilling, but because it sits inside the opening it usually gives less side coverage than a wide outside mount.
Window coverings can also affect heat gain and heat retention. The U.S. Department of Energy recommends curtains, blinds, or shades as one way to block direct sunlight in warm conditions and help retain warmth in colder conditions. Actual energy savings vary by window, climate, product, fit, and how the covering is used.
Conclusion
For a darker room, focus less on one “perfect” curtain measurement and more on complete coverage. Measure the wall as well as the window, mount the hardware high enough and wide enough to create overlap, use sufficient panel fullness, and keep the fabric close to the wall at the sides. Finally, check the top, sides, center, and bottom in daylight and fix only the gaps that remain.
Sources
- The Shade Store — How to Measure for Curtains — outside-mount rod extension and curtain fullness guidance.
- SelectBlinds — Total Blackout Curtain Set — blackout measuring, side overlap, track height, and 200% fullness guidance.
- Pottery Barn — How to Hang a Drape — common rod-height and window-overlap guidance.
- IKEA — Measure the Window for Curtain Rails, Rods or Blinds — fullness recommendations for different pleat styles.
- 3M Command — Curtain Rod Hook Instructions — no-drill mounting restrictions, positioning, and installation requirements.
- U.S. Department of Energy — Energy-Saving Tips for Renters — use of curtains and other window coverings to manage direct sunlight and warmth.