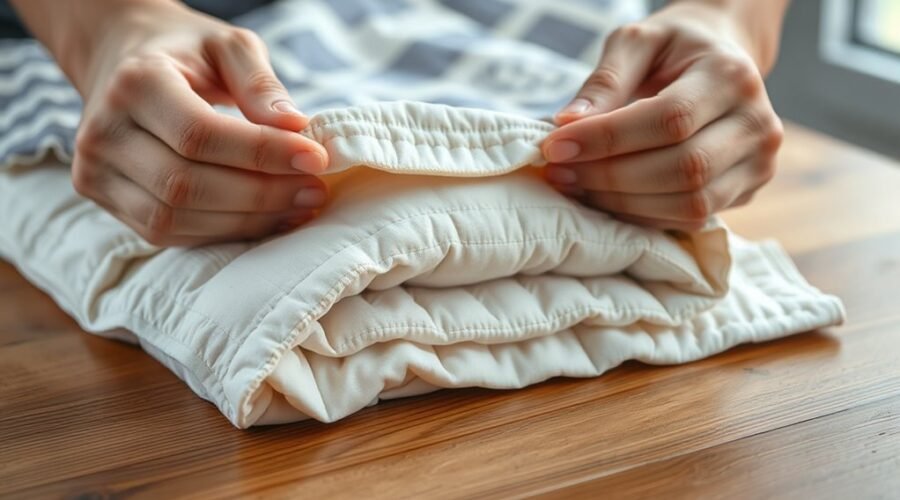
If you’ve ever traced the faded patterns of an heirloom blanket, you’ve met the quilt’s long history. You can think of a quilt as three joined layers: the decorative top, the insulating batting, and the backing beneath. Before stitching begins, you hold them in place with basting—pins, spray, or thread—so the stack won’t shift, and then the quilting stitches bind all three into one careful whole.
Key Takeaways
- A quilt is a layered textile made for warmth, beauty, and practical use.
- It has three layers: a decorative top, a batting middle, and a backing fabric.
- The top may be pieced, appliquéd, or made from a single whole cloth.
- The layers are joined by basting first, then quilting stitches through all three layers.
- Binding finishes the edges, covering raw seams and securing the quilt’s layers.
What Is a Quilt?
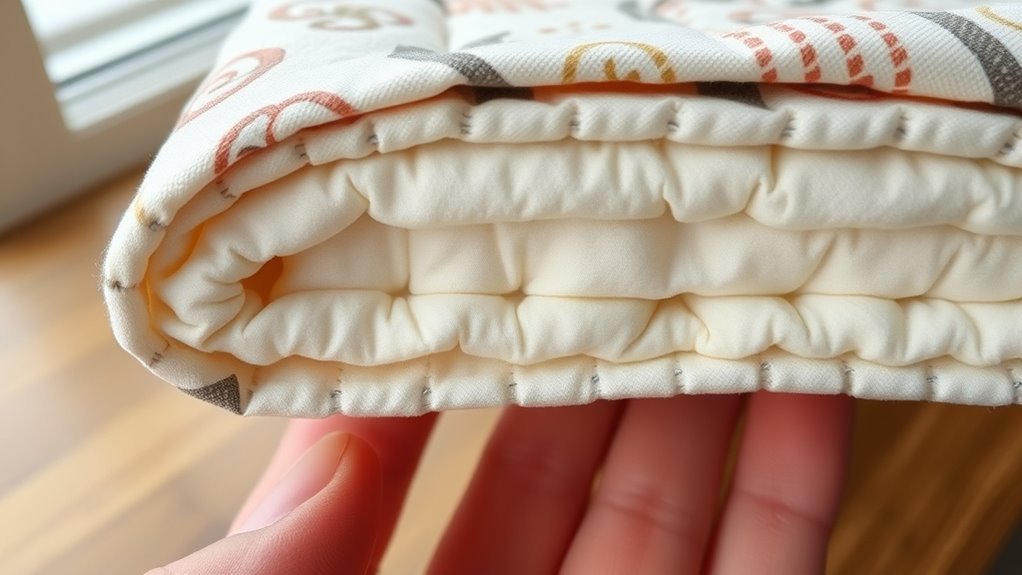
A quilt is a carefully made textile built from three essential layers: a decorative top, a batting layer for warmth, and a backing fabric for support.
When you study a Quilt, you see craft shaped by memory, labor, and skill. Its top may come from pieced patches, appliqué, or whole cloth, each method letting you express pattern and purpose with precision.
The middle batting gives body and insulation, while the backing fabric steadies the work and completes the form. You’ll notice that these Layers aren’t random; they answer to one another in balance.
The batting gives body and warmth, while the backing steadies the work, each layer answering the others in balance.
Makers have long used quilting to bind the three parts, stitching through them for strength and beauty. In that act, you witness practical art serving human comfort, resistance, and dignity.
A Quilt stands as evidence that hands can transform fabric into shelter, history, and freedom.
The Three Layers of a Quilt
You can see a quilt’s structure in three layers: the decorative quilt top, the insulating batting in the middle, and the backing beneath it.
You shape the top with piecing, appliqué, or foundation paper piecing, and each method leaves its mark on the design.
You then place a backing that’s larger than the top, so quilting can bind the layers together without strain.
Quilt Top Layer
The quilt top is the visible face of the whole piece, where the quiltmaker’s skill and creativity first come through in piecing, foundation paper piecing, English paper piecing, or appliqué.
You shape the quilt top as the expressive heart of the layers of a quilt, distinct from the quilt backing, yet bound to it in purpose.
Press every seam flat, square the edges, and clear stray threads so the surface reads clean and deliberate. If you used FPP or EPP, remove the paper and ease out creases.
Keep the quilt top at least 4 inches larger than the batting so you’ve room for quilting and the cloth won’t shift.
Properly prepared, it gives your work strength, dignity, and a finely finished presence.
Batting Middle Layer
Batting, sometimes called wadding, sits between the quilt top and backing as the quilt’s quiet engine, lending warmth, loft, and a subtle texture that shapes the finished work.
You choose batting or wadding from cotton, wool, bamboo, polyester, or blends, each with its own hand, breathability, and insulation.
In the quilt sandwich, this middle layer lets the three layers together hold form and purpose. Cut it at least 4 inches larger than the top so you can quilt without drift or gaps.
You may pre-wash cotton batting if you want less shrinkage, though it’s optional.
As you stitch, keep needle penetration steady; it preserves durability and a clean surface, honoring the long craft tradition while letting your quilt serve comfort, memory, and freedom.
Backing Bottom Layer
Beneath the batting lies the backing, the bottom layer that completes the quilt sandwich and gives the work its foundation. You usually choose one wide piece of fabric, cut at least 4 inches larger than the quilt top on every side, so you can baste and stitch without strain.
Your backing may be a specialized quilt cloth, or, if thrift serves you, an old sheet. Its quality shapes durability, so select it with care. Press it flat; don’t let folds or creases survive. Pre-washing remains optional, depending on the top.
Before assembly, check directionality so prints align. When you join the layers, the backing shields raw edges and steadies the quilt for generations, honoring craft and freedom.
Quilt Top: The Decorative Layer
A quilt’s top is its most visible layer, the surface where piecing, appliqué, or English paper piecing shows your skill and design choices. You arrange each piece of fabric to create a quilt top that speaks through color, pattern, and deliberate order.
In older traditions, this layer carried memory, labor, and identity, and you still carry that legacy when you shape it with care. Press every seam flat so the surface lies smooth and true, without creases that might mar the finish.
Square up the edges and trim stray threads before you layer it, for careful preparation improves the finished quilt and honors your time. When you choose motifs and set them with precision, you make a decorative field that’s both durable and expressive.
A well-made quilt top doesn’t merely decorate; it declares craft, autonomy, and the dignity of making.
Batting: The Warm Middle Layer
Wool, cotton, bamboo, or polyester may fill the quilt’s middle, but batting does more than occupy space: it insulates, adds weight, and gives the finished work its soft body and texture. In your quilting journey, you choose batting for warmth, breathability, and drape. A whole cloth quilt can reveal every nuance of this layer.
| Material | Trait |
|---|---|
| Cotton | breathable, familiar |
| Wool | lofty, insulating |
| Bamboo | supple, cool-feeling |
You’ll cut the batting at least 4 inches larger than the top so your stitches meet the edge without strain. Pre-washing isn’t required, yet you may do it to temper shrinkage and shape the surface. When you select and prepare batting with care, you strengthen the quilt’s hand, endurance, and historical character. That middle layer has long served makers who stitched for comfort, memory, and freedom.
Backing: The Foundation Layer
You’ll place the backing as the quilt’s firm bottom layer, and it should extend at least 4 inches beyond the top on every side.
You can choose cotton for its durable, practical service, or use wide yardage and pieced scraps to give the reverse a distinct character.
Before basting, press the fabric smooth so folds don’t distort the quilt as you work.
Backing Fabric Choices
Backing fabric forms the foundation layer of a quilt, giving the finished piece stability and a clean reverse side. When you create a quilt, choose backing fabric with care, for it bears the work’s hidden authority.
Cotton remains a trusted choice; it breathes well and endures long use. Wide backing cloth can spare you seams, though you may also piece lesser yardage or even sturdy old sheets to serve honestly.
Make the backing at least 4 inches larger than the quilt top on every side, so it can hold shifting during stitching. If you join sections, flatten seams and mind directionality, or the wrong side will show disorder.
Fine backing strengthens longevity and honors your labor.
Preparing the Backing
Once you’ve chosen the cloth that will rest beneath the quilt top, prepare it with care, for this layer gives the whole piece its steadiness.
You shape the backing layer to stand as the foundation, at least 4 inches larger on every side, so basting can hold fast and the cloth won’t shift. If you wish, use pre-washing to quiet sizing and shrinkage; then press it smooth.
When you piece a backing from more than one fabric, keep pressing seams flat and matched, lest drag lines rise like old wounds.
Check the cloth’s direction before you baste, so the final face keeps the look you intended.
- Measure generously.
- Align and press.
- Inspect grain and pattern.
How the Quilt Sandwich Comes Together
A quilt sandwich is the layered foundation of the whole piece: the quilt top lies face up, the batting rests beneath it, and the backing faces down. You assemble this quilt sandwich with care, centering the quilt top over the batting and backing so each edge speaks cleanly.
Let your batting extend at least 4 inches beyond the quilt top on every side; that generous margin guards the borders and keeps raw edges hidden. You then secure the backing flat to your workspace, so the layers don’t wander as you work.
In this orderly arrangement, you inherit an old textile discipline: measured, exact, and made for durable beauty. When you align the layers well, you claim a smooth field for later stitching and protect the fabric from puckers, shifts, and waste.
Basting Methods That Hold Layers Still
Baste the quilt layers to keep the sandwich from drifting as you stitch, binding the top, batting, and backing into a steady field. In older workrooms, you’d secure them before the needle ever moved, because basting gives you control and freedom from shifting cloth.
Start at the center and work outward, so you don’t trap fabric or form puckers.
- Pin basting: place curved safety pins about 4 inches apart. This suits machine quilting and keeps each layer aligned.
- Spray basting: mist temporary adhesive for a swift, even hold when you need speed.
- Thread basting: hand-stitch long, loose lines, no more than 3 inches apart, for delicate, intricate designs.
Keep your spacing exact, and you’ll hold the layers still without surrendering the surface to drift.
With basting, you prepare a disciplined field where your quilt can be joined cleanly, and every stitch can follow your will.
Quilting Stitches That Secure the Sandwich
Quilting stitches lock the quilt top, batting, and backing into a single working surface, so the sandwich stays aligned through wear and washing. You shape these quilting stitches in straight lines, free-motion curves, or humble hand ties, and each method leaves its own historic mark.
When you stitch 2 to 4 inches apart, you give the batting firmer support; closer spacing steadies the layers more for machine work. If you quilt by hand, you guide a needle and thread through all three layers, making small, deliberate marks that read like craft and witness.
If you use a machine, you gain speed and evenness, without surrendering control. Cotton thread yields a softer look, while polyester can sharpen the surface. In every choice, you claim order, durability, and beauty for the quilt top and batting alike, joining labor to freedom.
Binding the Quilt for a Finished Edge
Once the quilting stitches have locked the layers together, you finish the edge with binding, the strip that hides the raw edges and gives the quilt a clean, durable border. You cut fabric strips, often 2.5 inches wide, and pre-wash them so they won’t shrink or bleed later.
Histories of quiltmaking show this last step as both practical and ceremonial: it closes the work and protects your labor. You sew the binding to the quilt top, fold it over the edge, and secure it on the back for a neat finish that endures handling.
- Cut binding on the bias for flexibility at corners and curves.
- Stitch it down evenly, keeping the raw edges covered.
- Press it flat, so the border feels firm and ready.
With this final seam, you claim a liberated, finished quilt that carries strength, order, and care into daily use.
Frequently Asked Questions
How to Put the Three Layers of a Quilt Together?
You assemble the three layers by using careful layering techniques: place the backing right side down, then the batting, then the quilt top right side up.
Choose fabric choices that give you at least 4 inches extra on every edge.
Baste from the center outward, pinning, spraying, or threading to steady each layer.
Then quilt through all three, letting your stitches bind the work with precision, strength, and freedom.
What Does “Dirty Quilting” Mean?
Dirty quilting means you use scraps, rejects, and varied fabric types to build a quilt with purpose and freedom.
In quilt history, this practice has long honored thrift and invention; one estimate says quilters reused nearly 80% of household textiles in hard times.
With simple quilting tools, you can stitch rough edges into bold patterns, and you’ll turn waste into a liberated, precise, beautifully imperfect textile.
What Is the Golden Rule of Quilting?
You follow the golden rule of quilting: keep your seam allowances accurate, usually 1/4 to 1/2 inch, so your pieces fit cleanly.
In quilt history, this precision shaped durable work. Your quilting techniques should keep stitches even, with steady tension.
Choose fabric selection wisely, and pre-wash to prevent shrinkage and bleeding.
You can honor the rule while still making liberated, expressive quilts that reflect your own vision.
What Are the Three Layers of a Quilt?
You work with three layers: a quilt top, batting, and backing.
Historic quilts often used 100% cotton, and you’ll still see fabric types chosen for strength and beauty.
The top carries quilt patterns, the batting adds warmth and loft, and the backing steadies everything beneath.
When you use careful stitching techniques, you bind them into a durable cloth of memory, craft, and liberation.
Conclusion
You now see a quilt as three joined layers: the pieced top, the lofty batting, and the sturdy backing. Once you baste them with pins, spray, or thread, you stitch the “sandwich” into one firm fabric. Imagine an old workshop table, cloth spread smooth, each layer held fast before the needle passes through. In that careful order, you turn loose textiles into a lasting heirloom, warm, decorative, and made to endure.