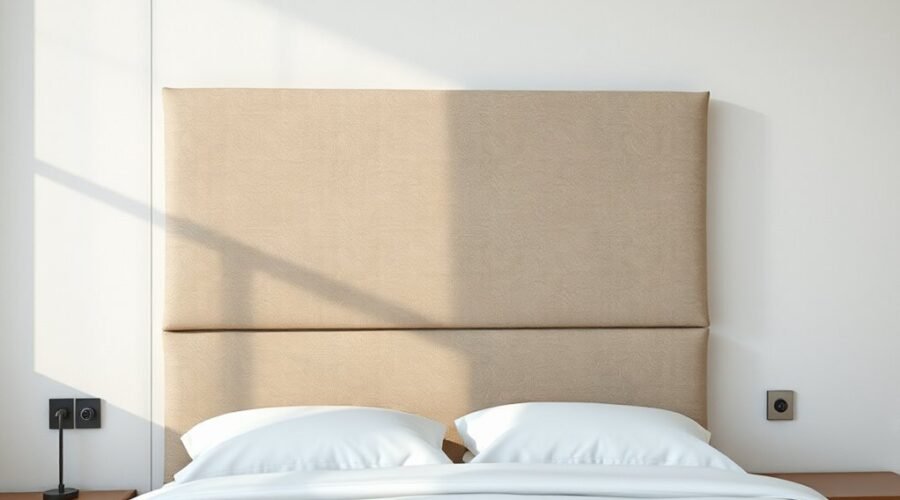
A wall-mounted headboard attaches to the wall instead of relying on the bed frame for support. That gives you more freedom to position the headboard independently of the frame and can create a clean, floating appearance. A secure installation depends on the headboard’s mounting system, the wall construction, accurate measurements, and fasteners that are approved for the actual load.
Quick Answer
To hang a wall-mounted headboard, position the bed, choose the finished headboard height, measure the location of its cleat or brackets, locate suitable wall framing, check for hidden utilities, level and secure the wall hardware, then lift the headboard into place and test it for movement. Always follow the headboard manufacturer’s mounting instructions first.
Key Takeaways
- A wall-mounted headboard attaches directly to the wall rather than depending on bed-frame mounting points.
- French cleats, Z-clips, brackets, and other mounting systems can work, but the hardware must match the headboard design and wall construction.
- Locate actual framing instead of assuming every stud is exactly 16 or 24 inches apart.
- Choose the finished headboard height first, then calculate the wall-hardware position from the cleat or bracket location on the back of the headboard.
- Before drilling, check for concealed wiring, plumbing, and other hazards.
- Use a level, manufacturer-approved fasteners, and a helper for large or heavy headboards, then check the installation for movement before using the bed.
At a Glance
| Time Required | About 30–60 minutes for a straightforward installation; masonry, fragile plaster, or custom hardware may take longer. |
| Difficulty | Moderate DIY project when suitable framing and manufacturer-specified hardware are available. |
| Tools Needed | Tape measure, pencil, level, suitable stud/utility detector, drill or driver, correct drill bits, and the specified mounting hardware. |
| Cost | Varies by the supplied hardware, wall type, and whether additional approved fasteners or professional installation are required. |
What Is a Wall Mounted Headboard?

A wall-mounted headboard is secured directly to the wall instead of being bolted to the bed frame. Depending on the product, it may hang from French cleats, interlocking brackets, Z-clips, rails, or another manufacturer-designed mounting system.
The arrangement can create a clean, floating look because the mounting hardware is usually hidden behind the headboard. It also lets you position the headboard independently of the bed frame, which is useful when the frame has no compatible headboard holes or when you want a wider or taller design.
For a secure installation, the wall hardware and the attachment points on the headboard must work as one system. A decorative panel that has no structural backing for brackets should not simply be converted into a wall-mounted headboard without confirming that its construction can support the mounting hardware.
Manufacturer instructions should always take priority over generic mounting advice. For example, West Elm’s wall-mount instructions specify measuring the actual French-cleat locations, leveling the cleats, securing them to the wall, and preferably fastening the connecting hardware into wall studs.
Why Choose a Wall Mounted Headboard?
A wall-mounted design can give you more freedom over the headboard’s height and horizontal position because it does not have to line up with holes in the bed frame. It can also keep visible legs, struts, and mounting bolts out of sight.
The main benefits are independent positioning, a clean appearance, and the potential for a stable installation when the mounting system is correctly secured.
Space-Saving Style
A wall-mounted headboard can make a small room look less cluttered because the mounting system is hidden and the headboard may not need floor-standing legs. It does not automatically create a large amount of extra usable floor area, however, so the benefit is better described as a cleaner visual footprint.
You can also choose a headboard that is wider or taller than the bed frame without depending on the frame’s attachment points. This makes wall mounting useful for upholstered panels, statement headboards, and designs intended to extend beyond the mattress width.
Stable, Custom Fit
A correctly installed wall-mounted headboard can feel very stable because its support does not depend on a bed frame that may move when the bed shifts.
You can choose the finished position according to the mattress height, pillows, bedside furniture, outlets, switches, artwork, and the headboard’s proportions. The important measurement is not a universal distance from the mattress; it is the relationship between the desired finished headboard position and the location of its mounting hardware.
Pro Tip: Before drilling, temporarily hold or prop the headboard at the intended height. Make sure enough of it remains visible above your pillows and that its lower edge covers any wall gap you do not want to see.
Tools and Hardware You Need
Gather the tools before moving the bed away from the wall. A typical installation may require a tape measure, pencil, level, stud/utility detector, drill or driver, suitable drill bits, screws, washers, and the mounting hardware supplied with the headboard.
The safest hardware choice is the one specified for the headboard and the actual wall construction—not simply the largest screw or anchor available.
- Inspect the headboard: Identify the cleat, brackets, mounting rail, or reinforced attachment points on its back.
- Identify the wall: Determine whether you are working with wood framing, metal framing, hollow drywall, plaster/lath, brick, concrete, or another construction.
- Check the instructions: Use the manufacturer-specified fastener type, quantity, spacing, and wall requirements whenever they are provided.
- Prepare for accurate layout: Have a level and tape measure ready before drilling any mounting holes.
French cleats are common on wall-mounted headboards because one part attaches to the wall and the matching part interlocks with it from the headboard. Other products use metal hangers, Z-clips, or proprietary brackets. Do not substitute one mounting system for another unless the headboard manufacturer permits it.
Find the Right Height and Position
There is no single installation height that works for every wall-mounted headboard. Mattress thickness, pillow arrangement, headboard height, bracket location, and manufacturer instructions all affect the finished position.
If you want to hide the wall between the mattress and headboard, positioning the bottom edge slightly below the mattress top is a useful visual guideline. Treat that as a styling choice rather than a structural specification.
Use this method for a more accurate layout:
- Place the bed where it will normally sit.
- Hold or mock up the headboard at the desired finished height.
- Mark the intended top or bottom edge lightly on the wall.
- Measure from that reference edge to the cleat or bracket on the back of the headboard.
- Transfer that exact offset to the wall.
- Use a level to draw or verify the hardware line.
This is the same basic approach used in manufacturer instructions such as West Elm’s French-cleat installation procedure: choose the desired finished position, measure the cleat location on the headboard, and transfer that measurement to the wall.
Locate Studs for a Secure Mount
Use a stud finder or appropriate wall scanner to locate framing across the area where the mounting hardware will sit. Wood framing is often arranged at common on-center spacings such as 16 or 24 inches, but construction varies, so do not determine screw locations by spacing alone.
The 2024 International Residential Code includes different permitted stud spacings depending on the wall design and construction. That is one reason it is better to locate actual framing than to assume where a stud must be.
Find Wall Studs
Move the detector slowly across the wall and mark the edges or center of each confirmed framing member according to the detector’s instructions. Check more than one point vertically if needed so you do not mistake another object in the wall for framing.
If the headboard’s mounting rail crosses multiple studs, use the stud locations permitted by the mounting system. Some commercial cleats are specifically designed with hole patterns that help align with framing. For example, Rowley’s headboard cleat instructions describe a cleat designed around stud attachment.
Mark Secure Mounting Points
Once the finished height and framing locations are known, hold the wall cleat or bracket at the calculated mounting line. Use a level and mark the mounting holes directly through the hardware where practical.
Recheck the distance from the floor, mattress, or reference line before drilling. A few minutes spent checking the layout is easier to correct than a row of misplaced holes.
Warning: Do not drill until you have considered concealed electrical wiring, plumbing, and other services. The UK Health and Safety Executive advises checking for hidden electrical wiring and other hazards before drilling or cutting into a surface. Be especially cautious near switches, receptacles, lights, plumbing fixtures, and walls where utilities may run.
Choose the Best Mounting Method
The best mounting method is determined by the headboard’s construction, supplied hardware, wall material, and required fasteners. Weight matters, but it should not be the only factor.
- Manufacturer-supplied French cleat or rail: Use the supplied system as instructed. Cleats are common because they provide continuous horizontal support and make it easier to lower the headboard into position.
- Direct bracket mounting: Use brackets only where the headboard has suitable structural attachment points and the bracket manufacturer permits the installed load.
- Hollow-wall anchors: Use them only when the headboard instructions and anchor specifications explicitly permit installation in that wall material. A generic drywall anchor is not an automatic substitute for a required stud connection.
- Masonry mounting: Brick and concrete require compatible masonry fasteners and drilling methods. Follow the headboard and anchor manufacturer’s instructions or use a qualified installer.
- Metal studs or fragile plaster: These conditions can require specialized fasteners, blocking, or professional assessment rather than ordinary wood screws.
Note: Some individual headboards are designed for approved drywall anchors. Others specifically recommend or require attachment to wall framing. Product-specific instructions always override a general rule about anchors.
How to Mount Wall Headboard Brackets
Once you have confirmed the headboard position, wall construction, and required hardware, the installation becomes a straightforward measuring and fastening job.
- Position the bed and choose the finished headboard height. Check the result with your normal pillows in place.
- Move the bed away from the wall. Give yourself enough room to measure and drill safely.
- Measure the mounting-hardware offset. Measure from a known headboard edge to the cleat, rail, or brackets on its back.
- Locate framing and hidden services. Mark usable framing and check the drilling area for concealed hazards.
- Transfer the mounting line to the wall. Use the offset measured from the headboard rather than relying on a generic height.
- Level the wall hardware. Hold the cleat or brackets against the wall and mark the approved fixing holes.
- Drill the specified pilot or anchor holes. Use the correct bit diameter and depth for the supplied fastener or anchor.
- Secure the hardware. Tighten the fasteners evenly without damaging the wall, hardware, or cleat.
- Hang the headboard with a helper when needed. Lift it above the cleat or brackets and lower it into its fully engaged position.
- Check the installation. Confirm that the headboard is level, fully seated, and does not lift, rock, or shift unexpectedly before moving the bed back.
Bracket Types and Uses
Common wall-headboard mounting systems include French cleats, metal Z-clips, interlocking brackets, mounting rails, and other proprietary hangers. Each system has its own screw pattern, engagement depth, and installation requirements.
French cleats consist of mating pieces that lock together as the headboard is lowered into position. West Elm’s wall-mounted headboard instructions, for example, use wall cleats that are leveled, fastened, and then engaged by lowering the headboard onto them.
D-rings and similar hangers may be appropriate for certain lightweight decorative panels, but they should not be treated as a universal headboard mounting method. Use them only when the hanger and headboard construction are designed for that installation.
Marking Stud Positions
Mark confirmed framing locations before positioning the hardware. Then align the cleat or brackets with those marks while maintaining the required finished headboard position.
If the manufacturer’s mounting holes do not line up with suitable framing, do not simply move screws to unapproved parts of the bracket or improvise new holes. Follow the manufacturer’s alternate fastening instructions or obtain appropriate professional advice.
Secure Drilling and Fixing
Drill pilot holes only after confirming the mounting marks, wall construction, and hidden-utility check. Keep the drill perpendicular to the wall unless the hardware instructions specify otherwise.
Use all required fasteners and washers. Tighten them enough to seat the mounting hardware firmly, but avoid overtightening that can crush drywall, strip a hole, deform a bracket, or split a wooden cleat.
For large headboards, use a second person during lifting. West Elm’s assembly instructions specifically call for two people for its wall-mounted model.
Wall Mounted Headboards vs. Headboard Struts
Wall-mounted headboards and bed-frame-mounted headboards can both work well, but they solve the attachment problem differently.
A wall-mounted headboard is positioned independently of the bed frame. This can give you more control over height and width, and a properly installed wall system does not move every time the bed frame shifts.
Headboard struts or frame brackets attach the headboard to compatible mounting points on the bed. They can be convenient because the headboard moves with the bed and fewer holes may be needed in the wall. Their stability depends on the frame, brackets, bolts, and how firmly the bed itself sits.
Choose between the two based on the headboard’s intended mounting method, your wall construction, whether you can drill into the wall, and whether you expect to reposition the bed frequently.
Common Wall Mounting Mistakes to Avoid
- Assuming stud locations: Common spacing is useful as a clue, not proof. Confirm framing with an appropriate detector.
- Using a generic height measurement: Calculate the mounting line from the actual cleat or bracket position on your headboard.
- Ignoring manufacturer instructions: The supplied hardware may have specific fastener, wall, and spacing requirements.
- Using unsuitable hollow-wall anchors: An anchor must be approved for the wall material and the installed load.
- Skipping the utility check: Concealed wiring or plumbing can turn a simple drilling job into a serious hazard.
- Failing to level the mounting hardware: A small error at the cleat can leave a wide headboard visibly crooked.
- Hanging a large headboard alone: An awkward lift can damage the wall, hardware, headboard, or installer.
- Moving the bed back immediately: Test the headboard for full bracket engagement and unexpected movement first.
Troubleshooting a Wall Mounted Headboard
The Headboard Is Crooked
Check the wall cleat or brackets with a level. If the hardware itself is not level, remove the headboard and correct the wall mounting rather than trying to disguise the problem by shifting the bed.
The Headboard Rattles or Moves
Confirm that the mating hardware is fully engaged and that all required fasteners are tight. Check whether the bottom of the headboard requires a spacer, bumper, stabilizing bracket, or other component supplied by the manufacturer.
The Headboard Will Not Seat on the Cleat
Remove it and compare the wall cleat with the mating cleat on the headboard. Look for reversed orientation, protruding screw heads, misaligned sections, or interference from trim and baseboards. Do not force the headboard into place.
There Is a Large Gap Behind the Headboard
Some mounting systems intentionally create a small wall clearance. If the gap is excessive, verify that all brackets, spacers, and cleats are installed in the correct orientation and that no screw head or wall obstruction is preventing full engagement.
When to Hire a Professional
Professional installation is sensible when the headboard is oversized, unusually heavy, difficult to lift, or being mounted to brick, concrete, fragile plaster, or an unfamiliar wall system.
You should also get qualified help if you cannot determine where electrical wiring or plumbing runs, if the required attachment points do not align with suitable structure, or if the manufacturer specifies installation methods you are not equipped to perform.
Antique plaster, tile, masonry, metal studs, and walls containing uncertain services can require specialized drilling and fastening methods. In those situations, avoiding damage is usually more important than forcing a generic DIY approach.
After installation, inspect the headboard periodically. Hardware can loosen with time and movement; West Elm’s wall-mounted headboard care instructions specifically recommend checking that connections remain tight.
Frequently Asked Questions
What are the pros and cons of having a wall-mounted headboard?
Advantages include independent height adjustment, hidden hardware, less movement caused by the bed frame, and flexibility with wide or tall designs. Disadvantages include drilling into the wall, more demanding installation, possible wall repair after removal, and the need to match the fasteners to the wall construction.
How does a wall-mounted headboard work?
The wall carries the headboard through a cleat, bracket, rail, or similar mounting system. One part is secured to the wall and, for interlocking systems, a matching part on the headboard engages with it. The fasteners and wall structure must be suitable for the complete installed load.
How do you hang a wall-mounted headboard?
Choose the finished headboard position, measure the offset to its mounting hardware, locate suitable wall structure, check for concealed utilities, mark and level the mounting hardware, drill the specified holes, secure the hardware, hang the headboard, and test it for movement before putting the bed back.
Can any headboard be wall mounted?
No. The headboard needs structural material or manufacturer-provided attachment points capable of receiving the mounting hardware. A thin decorative backing, loose upholstery panel, or unsupported trim should not be used as a structural mounting point.
How high should a wall-mounted headboard be?
There is no universal height. Position it so the proportions work with the mattress and pillows, then determine the exact wall-hardware height by measuring the cleat or bracket offset on the back of the headboard. Slightly overlapping the mattress line can hide a visible wall gap, but it is a styling choice rather than a structural rule.
Can you mount a headboard on drywall without hitting a stud?
Only when the headboard manufacturer permits hollow-wall mounting and the specified anchor is approved for the wall material and required load. Some headboards are designed for drywall anchors, while others call for framing attachment. Do not substitute generic anchors for required stud fasteners.
Conclusion
A wall-mounted headboard can create a clean appearance and a stable backdrop for the bed, but a secure result depends on accurate layout and the right connection to the wall. Choose the finished position first, measure the actual cleat or bracket offset, locate suitable structure, check for hidden utilities, and use the hardware specified for the headboard and wall type.
Use a helper when the headboard is large or awkward, check that the mounting system is fully engaged before moving the bed back, and inspect the fasteners periodically. If the wall construction, utilities, or required anchors are uncertain, professional installation is the safer option.
Sources
- West Elm — Wall Mount Headboard Assembly Instructions — supports measuring French-cleat position, leveling the cleats, preferred stud attachment, two-person assembly, and periodic hardware checks.
- International Code Council — 2024 International Residential Code, Chapter 6 — provides current framing context, including permitted stud-spacing configurations.
- UK Health and Safety Executive — Work Near Electricity — supports checking for concealed electrical wiring and other hazards before drilling.
- Rowley Company — Headboard Cleat Instructions — demonstrates a stud-oriented headboard cleat installation and placement method.